
Site hosting news, tutorials, tips, How Tos and more
![]()
Have you ever setup your smart phone to connect to a POP3 and/or SMTP server only to get errors? You looked through your email providers’ documentation and spoke with their tech support only to have them tell you that the problem is not on their end.
Frustrating as it is, they are often right. The true culprit is typically your carrier. Often times they either restrict or obstruct certain ports. How to find if your Smart Phone is able to use these ports; you ask?
Luckily for Android users, there are some nifty free apps you can download and install to perform some port checks for you. The specific one I would like to point out is the Android Net Swiss Tool (this was tested using a Galaxy S3).
![]() It’s very easy to use and comes in really handy when you’re wondering if the hot spot you are connected to or your phone carrier is obstructing specific ports.
It’s very easy to use and comes in really handy when you’re wondering if the hot spot you are connected to or your phone carrier is obstructing specific ports.
Once you have Net Swiss Tool installed, tap the icon. You will see on the top a drop down list where you can choose Portscan TCP. You have two options on how you can define the ports. The first and easiest method is to tap on the Port List button. The second is to manually input the port numbers in the blank text box. When you manually type the ports you want to test, separate the port numbers by spaces not commas. Also pay close attention to the Timeout setting. Some servers may take longer then usual to respond back to a port check. If you’re Timeout setting is set too low, the app will assume the port is closed if it has not received a reply back within a short period of time.
Tap the Test bar and you will see whether the port is open or not.
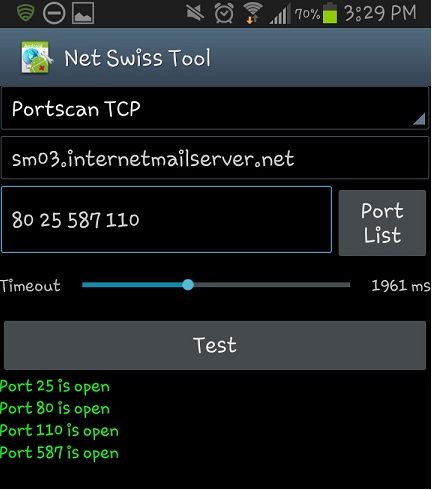 You will need to keep in mind that it will test the current backbone your phone is using at the time. Meaning if you are connected to WiFi, it is testing the ports through that WiFi. If you are away from any hot spots, then your phone is testing through your phone carrier’s backbone.
![]()
Here’s a short tutorial on how to link your Microsoft Access database to your Microsoft SQL Server database. (Note: Screenshots from Microsoft Access 2010)
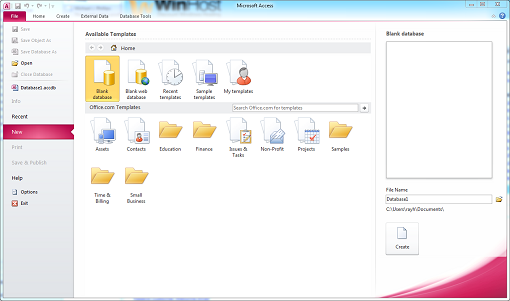
1. First, you will need to create an Access database or open up an existing one.
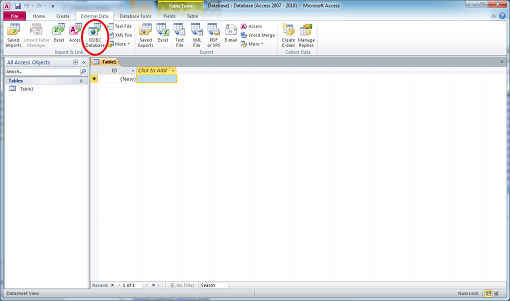
2. Next, you’ll want to click on the External Data tab and then ODBC Database icon which will start a wizard.
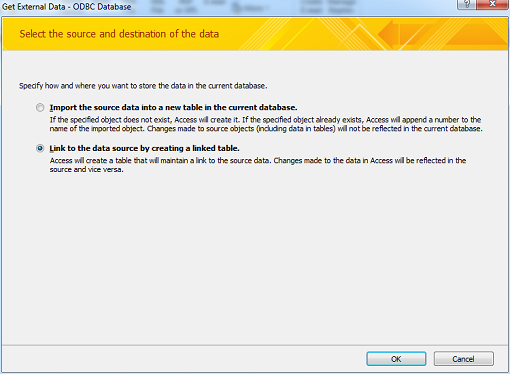
3. Select Link to the data source by creating a linked table and click on OK.
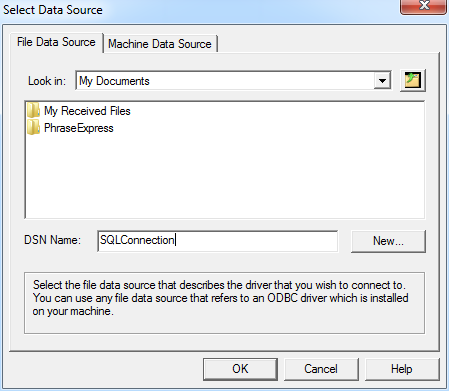
4. In the Select Data Source window, type in the DSN Name and click on the New button.
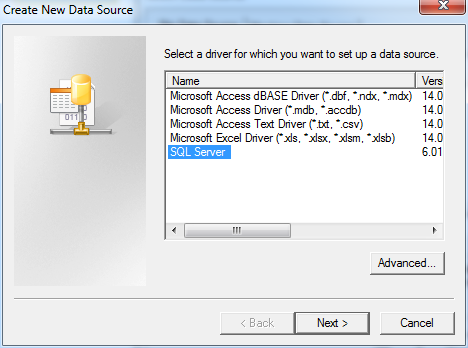
5. In the Create New Data Source window, select SQL Server and click on the Next button.
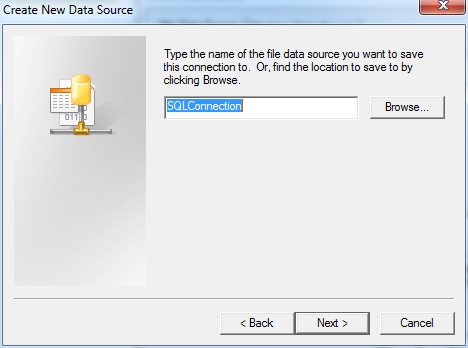
6. In the Create New Data Source window, type in the file name and click on the Next button.
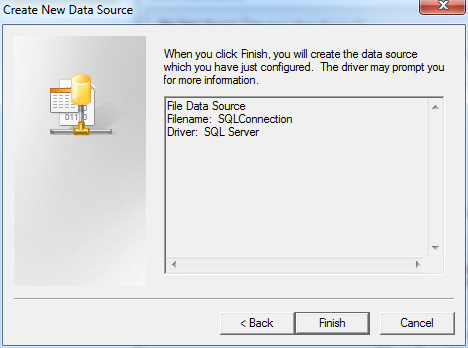
7. In the Create New Data Source window, click on the Finish button.
8. In the Create a New Data Source to SQL Server window, type in the name of the database for the Description and enter the fully qualified domain name for the Server.
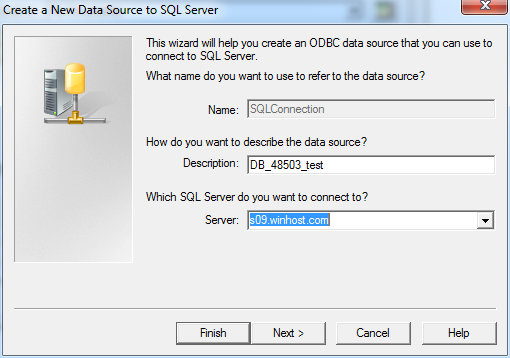
9. In the Create a New Data Source to SQL Server window, check With SQL authentication, type in your Login ID and Password and click on the Next button.
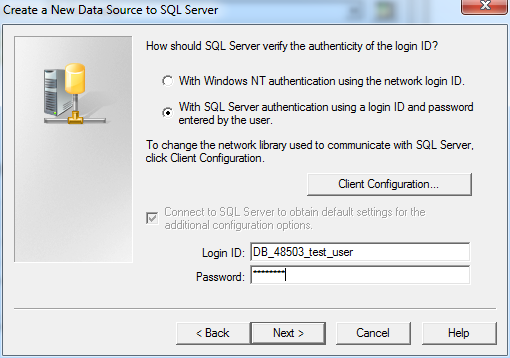
10. In the Create a New Data Source to SQL Server window, you can leave the options as is or change them. Click on the Next button.
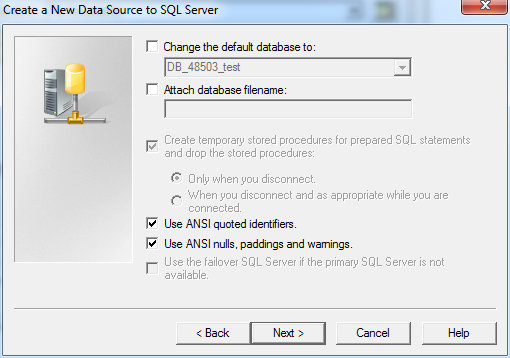
11. In the Create a New Data Source to SQL Server window, you can leave the options as is or change them. Click on the Finish button.
12. In the ODBC Microsoft SQL Server Setup window, click on the OK button.

13. In the Select Data Source window, click on the OK button.
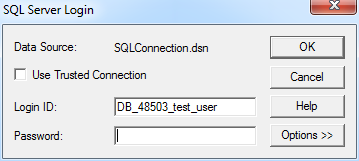
14. In the SQL Server Login window, enter the Login ID and Password.
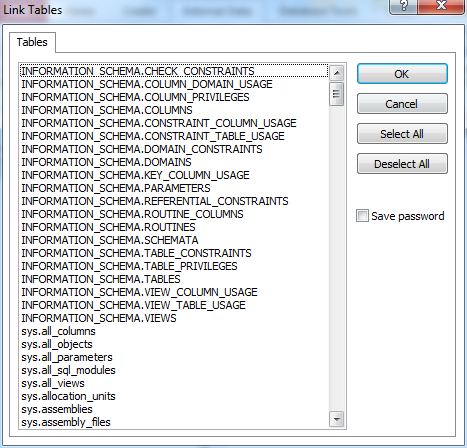
15. In the Link Tables window, select the table(s) you want to link and click on the OK button.
16. In the Select Unique Record Identifier window, choose the fields that will uniquely identify the record and click on the OK button.

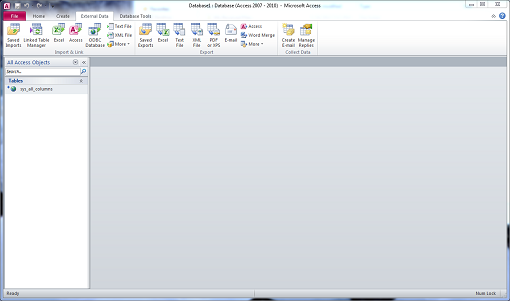
17. You have now created a linked table in Microsoft Access!
![]()
In my previous blogs, I showed you how you can tighten up the settings in SmarterMail to help prevent too much spam from ending up in your Inbox:
Content Filtering, the other Spam Crime Fighter
But what happens if legitimate email messages are being marked accidently as spam, and you know it’s from a legitimate email address? Fortunately, there is a way to rectify this problem by using the Trusted Senders feature in SmarterMail. This feature allows you to whitelist email addresses or domains, thus bypassing the spam/content filtering rules you have setup. And here are instructions on how to set it up:
1. Log into SmarterMail with the email account you want to apply this setting to.
2. Click the Settings icon (2 cogs) on the menu to your left.
3. Expand the My Settings folder and click on Trusted Senders.
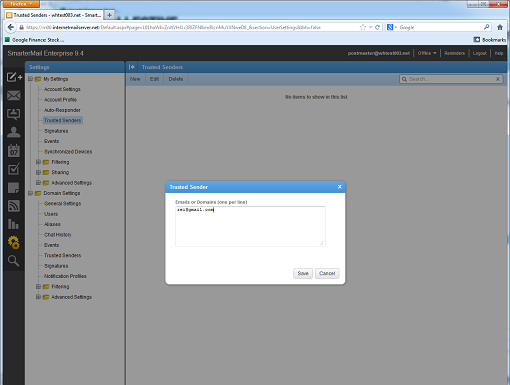
4. Click on the New button.

1. Enter the email addresses/domains you want to whitelist, line by line.
2. Click on the Save button, and you’re done!
If you want this setting to be applied to all the email accounts in your domain, log in with the postmaster account instead, and use the Trusted Senders under Domain Settings.