
Site hosting news, tutorials, tips, How Tos and more
Nopcommerce 4.3 was released and with it, the ability to use a MySQL database. In this post I’ll be showing you how to configure your nopCommerce 4.3 with a MySQL database.
Like many applications, nopCommerce is installed in two steps. First, you install the nopCommerce application into your site and then you complete the software configuration by providing information through an Installation Wizard that you access through your web browser.
You can use our Application Installer to install nopCommerce 4.3 in your site. Follow the instructions in the first part of this Knowledge Base article to get the initial nopCommerce install done but you won’t need to create a new MS SQL database. The rest of the information in this blog post will give instructions on how to create a MySQL database and how to complete the nopCommerce Installation screen.
Now that you have installed nopCommerce in you site, we want to pull up the nopCommerce Installation screen to finish configuring nopCommerce. Assuming that your domain is not yet resolving to Winhost, you can complete the nopcommerce configuration using the Secondary URL we provide you. Here is how to find the Secondary URL.
Enter the Secondary URL into your web browser. You will be presented with the nopCommerce Installation screen. In this screen, you will provide specific information about your store and hosting account to finish configuring the application.
Enter the following information into the nopCommerce Installation screen.
Next, you need to create a MySQL database through the Winhost control panel. Here are step-by-step instructions.
Now, you need to specify that you will use MySQL as your database and tell the nopCommerce application where the database is and how to access it. So, go back to the nopCommerce Installation screen and have the Winhost Control Panel MySQL section open in another browser tab so you can go back and forth to get and enter your information.
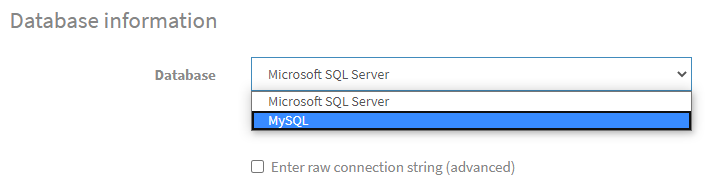
In the Database Information Section of the nopCommerce Installation screen, click on the Dropdown menu and select MySQL as shown below:
Click on the Install button and wait for the installation to complete. This will take a few minutes.
Enjoy
Visit Winhost to learn more about our nopCommerce hosting solution
No responses yet