![]()

Note: The manual methods in this tutorial are great, but if you’re looking for a “set-it-and-forget-it” automated backup solution, we offer a site backup service that can also back up your MS SQL and MySQL databases. Read about it on our site, or activate it in Control Panel. It’s easy, it’s inexpensive and it’s cool. What more could you ask for?
Making a backup in MySQL workbench is a pretty easy task once you know what to do, but it can be a little confusing the first time around. Allow us to save you some time with these simple instructions.
Version 6.3.7 is shown here, and of course future versions may differ. Download MySQL Workbench here (you’ll need a free Oracle account if you don’t already have one – just click the “Register” link in the upper right corner of that download page).
First thing you’ll need to do in Workbench is connect to your database.
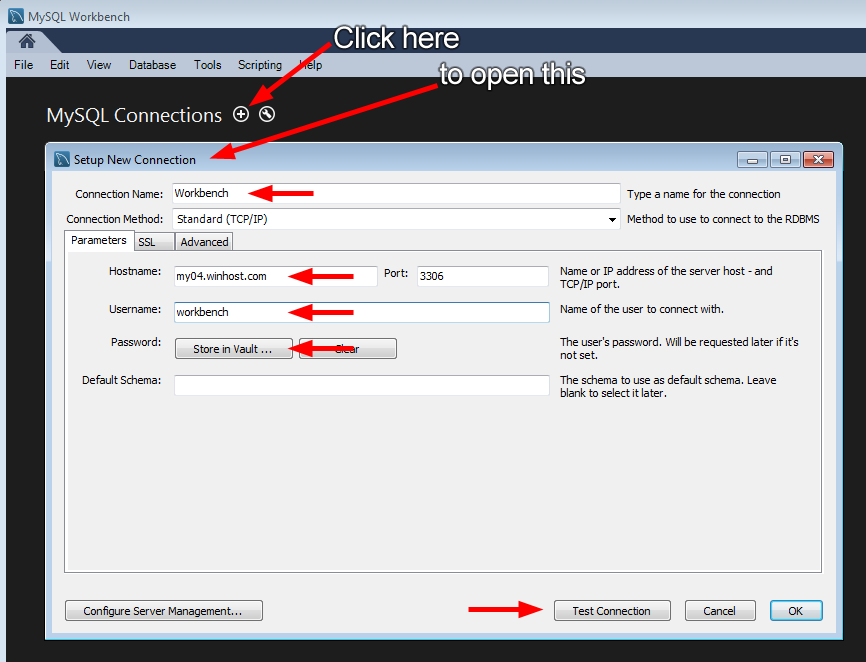
- Click the + icon to open the new connection window.
- Give the connection a name.
- Enter the MySQL server hostname (you can find that in the MySQL Manager in Control Panel).
- Enter your database username.
- Click “Store in Vault” to enter your database password.
- Click “Test Connection.”

If everything is correct you’ll see the successful connection box.
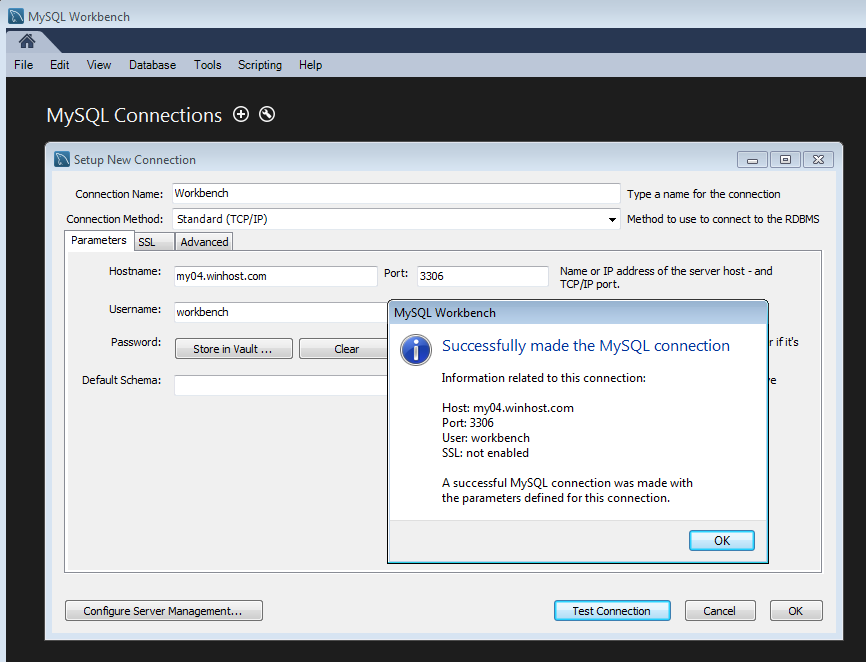
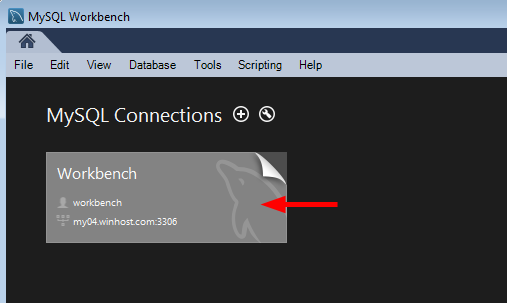
Go ahead and close that, and click the connection that you just set up.

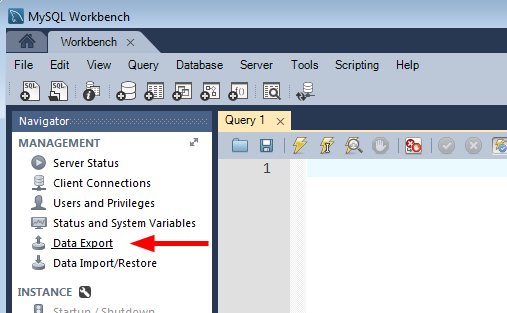
Click “Data Export.”

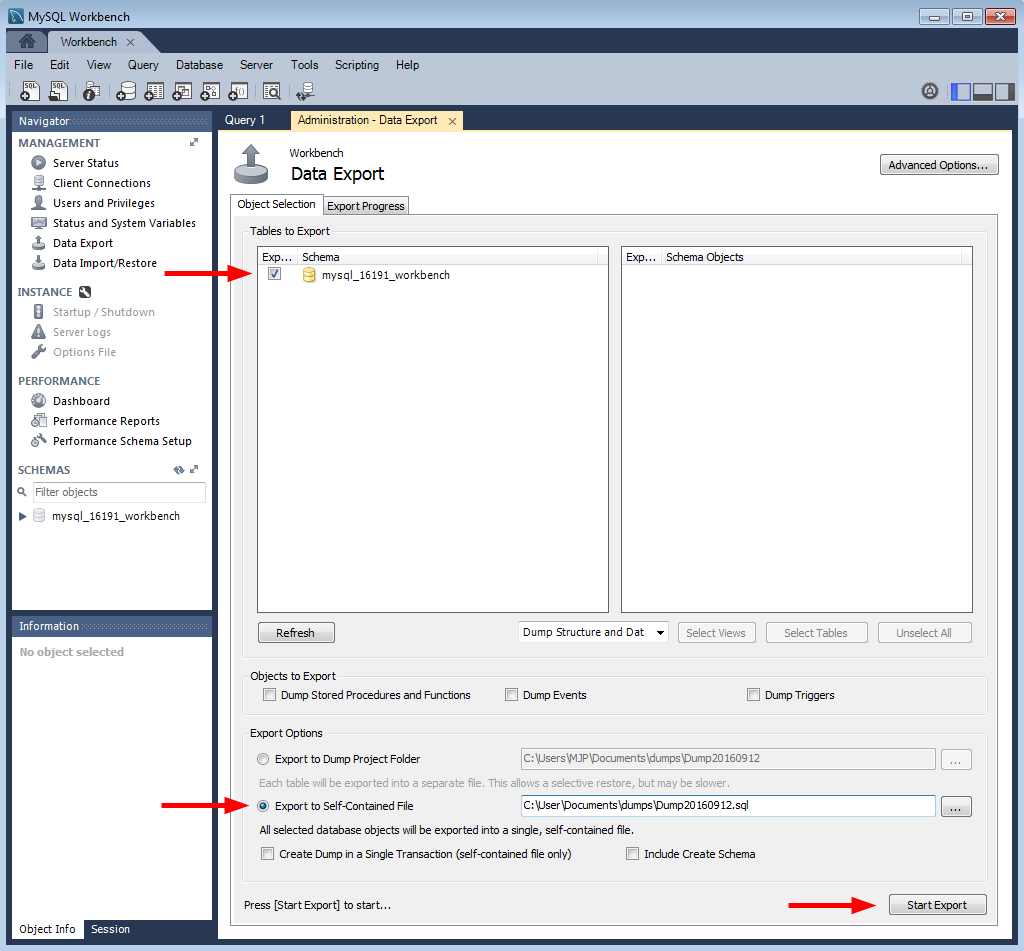
There are a lot of options on the next screen. For the purposes of this how-to we’re just making a simple backup of the entire existing database, so we’re not going to use most of those options. But as you can see, you can do a lot more than just a simple database dump here.
- Select your database in the “Tables to Export” window.
- Choose “Export to Self-Contained File” and make note of the path. That’s where your backup(s) will be located.
- Hit the “Start Export” button.

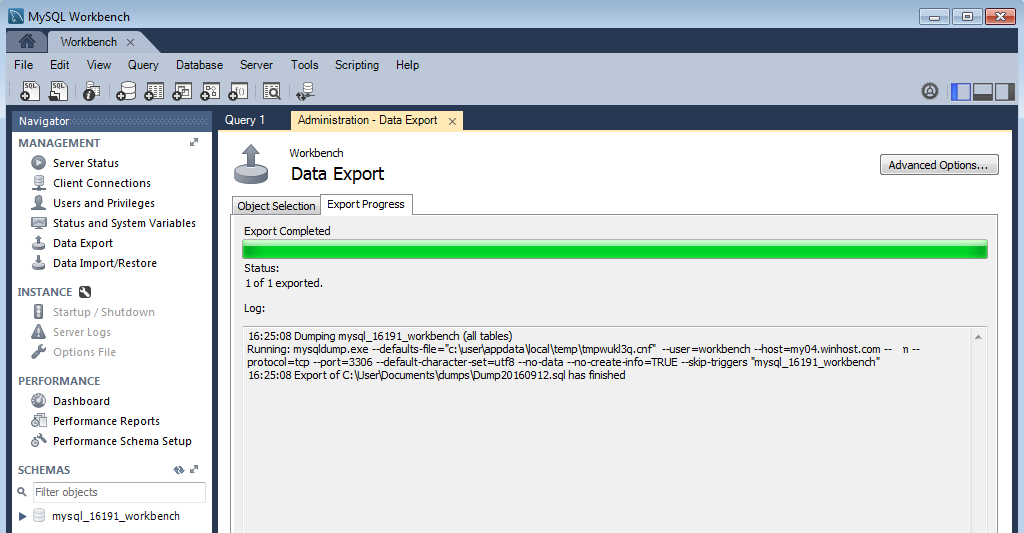
If everything goes according to plan you’ll see the “Export competed” dialog, and you’ll be all set. Your database is backed up for development use or simply for safe keeping.

That’s all there is to making a backup.
But check out the “Data Import/Restore” link right under the “Data Export” link. As you might have guessed, you use that link to restore a locally stored backup up to the MySQL server here at Winhost. We’ll talk about that in a future article.