
Site hosting news, tutorials, tips, How Tos and more
Nopcommerce 4.3 was released and with it, the ability to use a MySQL database. In this post I’ll be showing you how to configure your nopCommerce 4.3 with a MySQL database.
Like many applications, nopCommerce is installed in two steps. First, you install the nopCommerce application into your site and then you complete the software configuration by providing information through an Installation Wizard that you access through your web browser.
You can use our Application Installer to install nopCommerce 4.3 in your site. Follow the instructions in the first part of this Knowledge Base article to get the initial nopCommerce install done but you won’t need to create a new MS SQL database. The rest of the information in this blog post will give instructions on how to create a MySQL database and how to complete the nopCommerce Installation screen.
Now that you have installed nopCommerce in you site, we want to pull up the nopCommerce Installation screen to finish configuring nopCommerce. Assuming that your domain is not yet resolving to Winhost, you can complete the nopcommerce configuration using the Secondary URL we provide you. Here is how to find the Secondary URL.
Enter the Secondary URL into your web browser. You will be presented with the nopCommerce Installation screen. In this screen, you will provide specific information about your store and hosting account to finish configuring the application.
Enter the following information into the nopCommerce Installation screen.
Next, you need to create a MySQL database through the Winhost control panel. Here are step-by-step instructions.
Now, you need to specify that you will use MySQL as your database and tell the nopCommerce application where the database is and how to access it. So, go back to the nopCommerce Installation screen and have the Winhost Control Panel MySQL section open in another browser tab so you can go back and forth to get and enter your information.
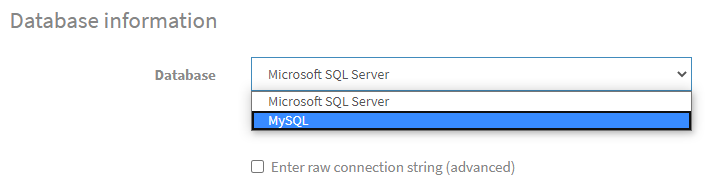
In the Database Information Section of the nopCommerce Installation screen, click on the Dropdown menu and select MySQL as shown below:
Click on the Install button and wait for the installation to complete. This will take a few minutes.
Enjoy
Visit Winhost to learn more about our nopCommerce hosting solution

The base installation of WordPress can be more than enough for somebody to start their blog or site. With plenty of features already at a user’s disposal you may never even realize that more are available. Where are these additional features you might ask… Plugins!
Plugins are scripts written by the WordPress community that can add a variety of features or functionality to your site and the best part is most of them are free. In today’s tutorial we are going to install a plugin to help beef up the security of our WordPress site.
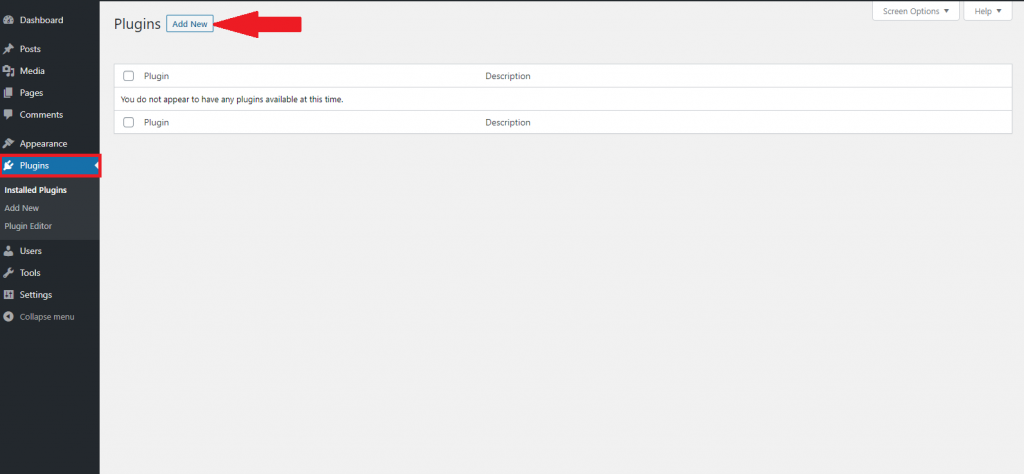
In the admin section of your WordPress site on the left hand side you’ll want to click the “Plugins” tab. Once in the plugins manager page, click on “Add New” toward the top. You will be presented with all the different plugin options you can install. For now, we are looking for a specific plugin. In the search bar in the top right, search for “Wordfence” and the first result should be the one we are looking for.
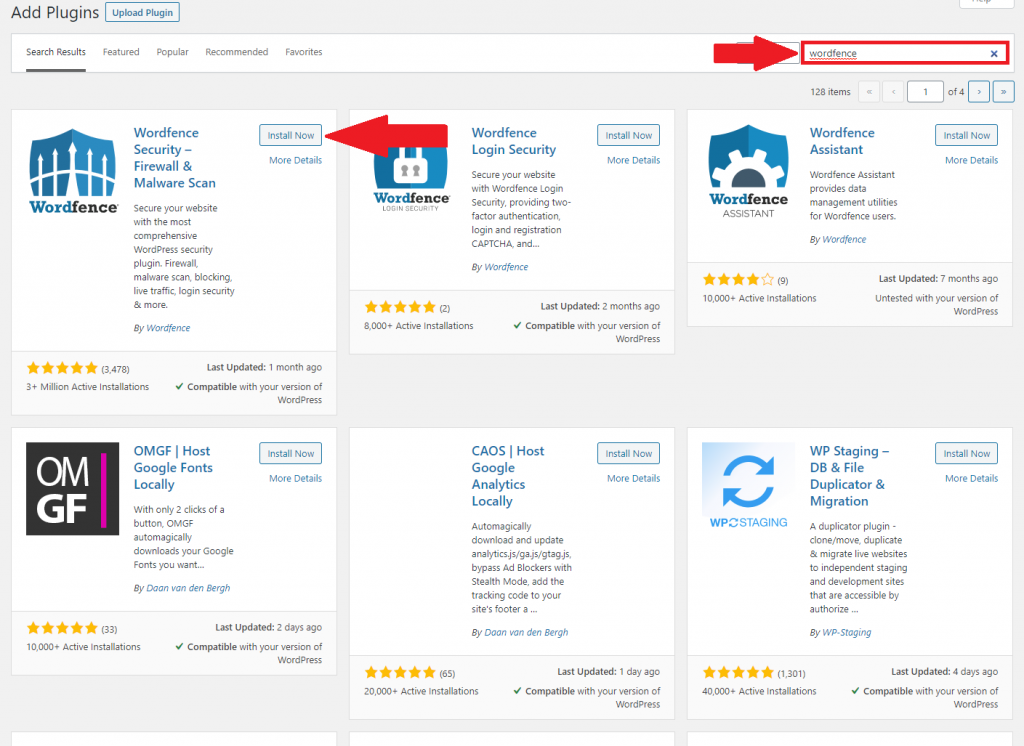
Click the “Install Now” button and then also click “Activate” once the installation is complete.
To give some quick background on what we are installing, Wordfence is a security plugin that we recommend to pretty much any WordPress site. With Wordfence you can secure your site against a variety of malicious attacks that I will cover in a future post.
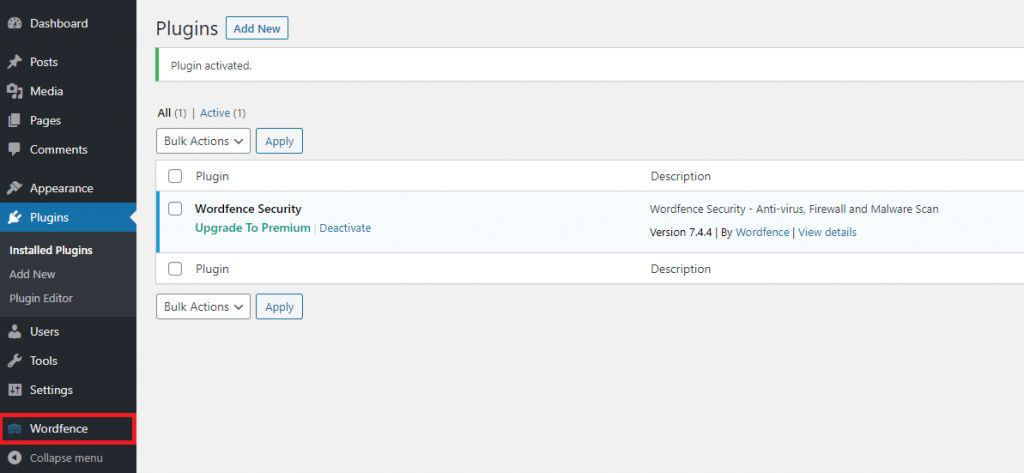
After installation you will see the plugin show up under the plugins tab. Another thing to note is that for some plugins a new tab may appear where you can adjust its settings.
If you have any questions or run into any issues feel free to leave a comment down below or open a support ticket.
Visit Winhost to learn more about our WordPress Hosting solution

Welcome back folks to the next installment in our WordPress tutorial series. Last time we covered the installation of WordPress as well as getting your first post up and running. In this article we will be covering the steps on how upload and insert images to your posts like this one.

As with most cases we are going to start by logging in to the admin section of your site. (The URL should be something like HostingAccountDomain.com/wp-login)
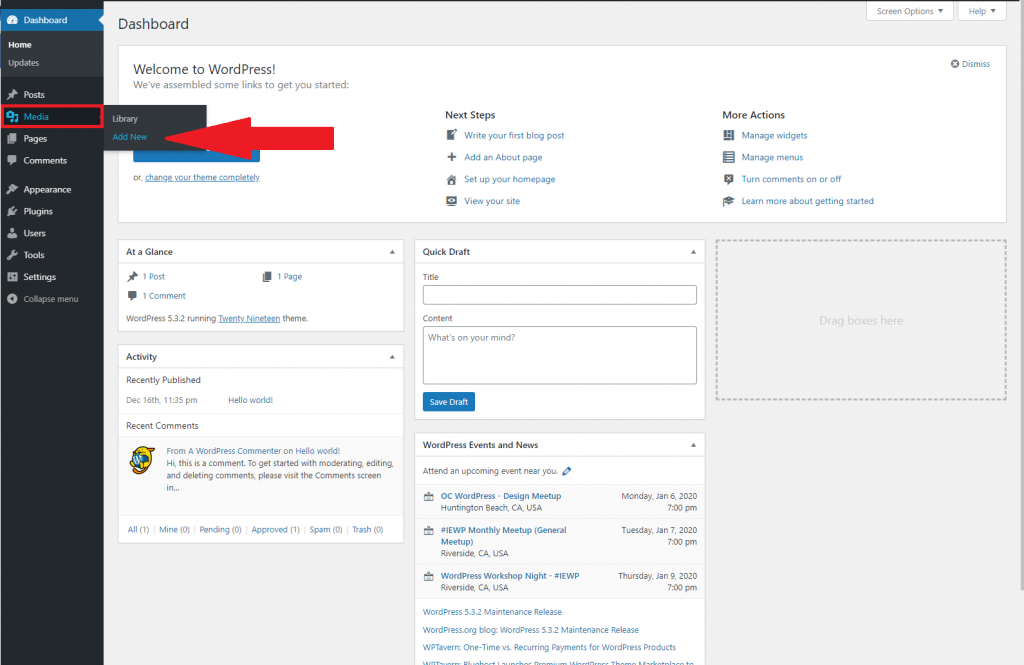
Once you are logged in you will be taken to the WordPress admin dashboard displayed below. On the left hand side you will want to hover over the icon of a camera/music note. On the options that appear you will want to click “Add New”
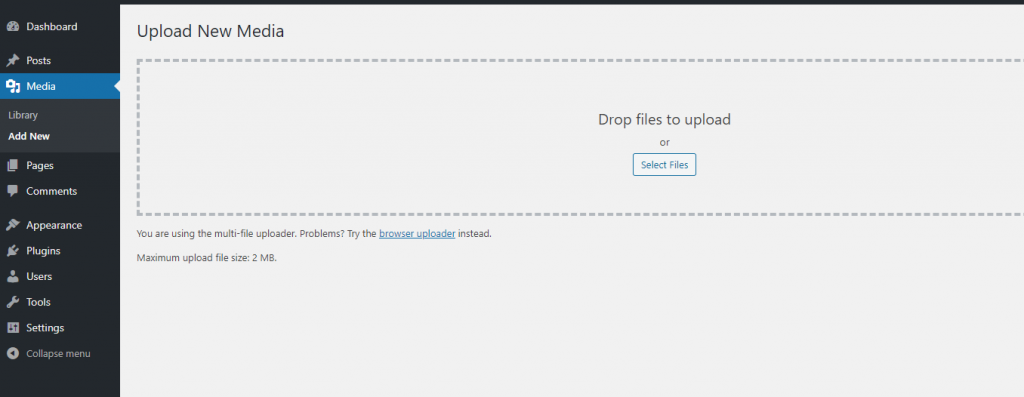
To upload your images you can either drag the file straight from your computer to the page or click the “Select Files” button.
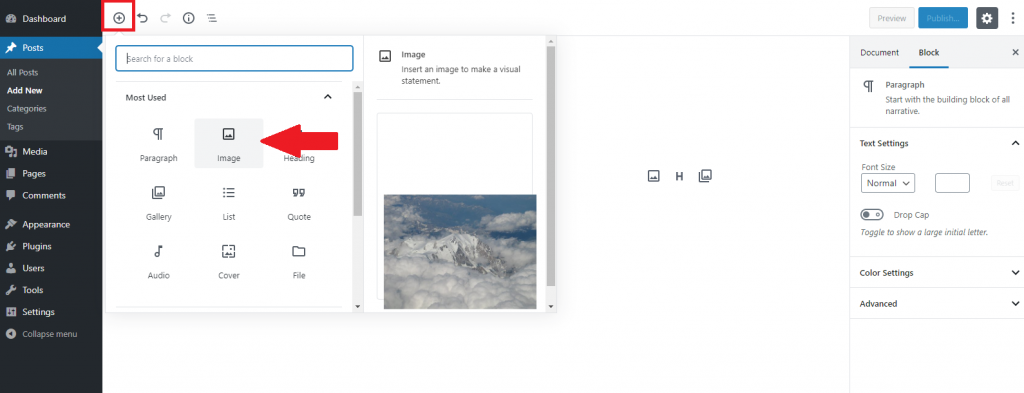
Now that the image is in your library it can be used across your site such as in a post or page. Below is an example of using the image in a post. First you would create a new post, then you click the “Add Block” button, finally you would click the block for “Image”.
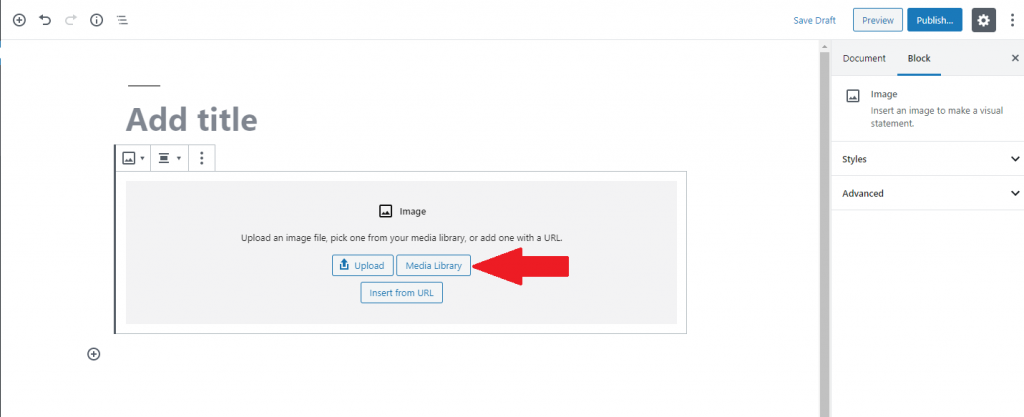
Once the block is added, click on “Media Library” and select your desired image.
That’s about all there is to it and with that we will wrap up this WordPress tutorial, in our next one we will cover installing and configuring plugins and themes. As I mentioned in the last post please feel free to comment if there is anything specific you would like to be covered in a tutorial.
Visit Winhost to learn more about our WordPress Hosting solution
WordPress is an incredibly popular content management system (CMS). I have seen estimates say the it accounts for around 20%+ of self-hosted sites. This can be attributed to a variety of reasons such as a painless installation, low initial cost (free), and general ease of use. Due to this immense popularity I wanted to take some time a work on a tutorial series on some of the basics for users that may need some help getting started.
The first step of course would be to sign up for a Winhost hosting account so your site can be seen by the world.
Once you gain access to the control panel you can then easily install WordPress using our app installer. The steps are to so can be found here https://support.winhost.com/kb/a1214/app-installer-how-to-set-up-wordpress.aspx. Be sure to remember the username and password you choose as you will need them in just a few moments.
Congratulations! You are now a proud owner of your very first WordPress site, now lets get your first post up.
To accomplish this you will need to log into the admin section of your site. Maybe the fastest way would be to navigate to the /login page on your site, for example www.HostingAccountDomain.com/login. You’ll be met with a login screen where you will use the credentials that you selected during the installation process.
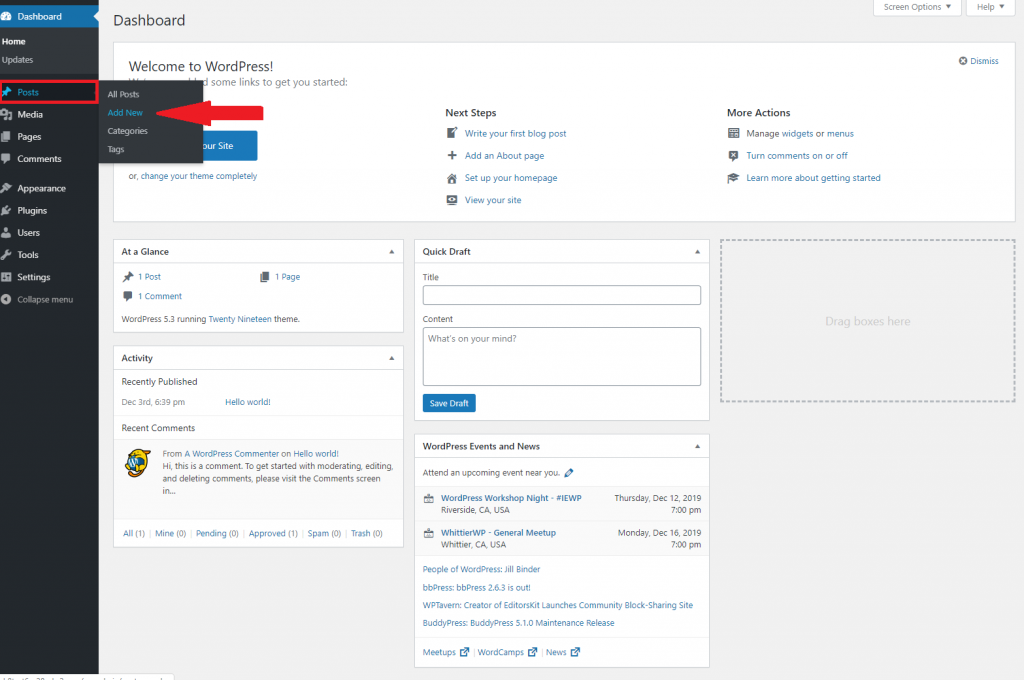
After you log in you will be taken to the admin section dashboard which may, at first glance, look intimidating, but after some use it will become very familiar. I will hopefully be covering all of the options in future tutorials, but here I will only focus on adding a new post.
You will click on Posts on the left menu (the icon looks like a thumbtack) and from there click “Add New”.
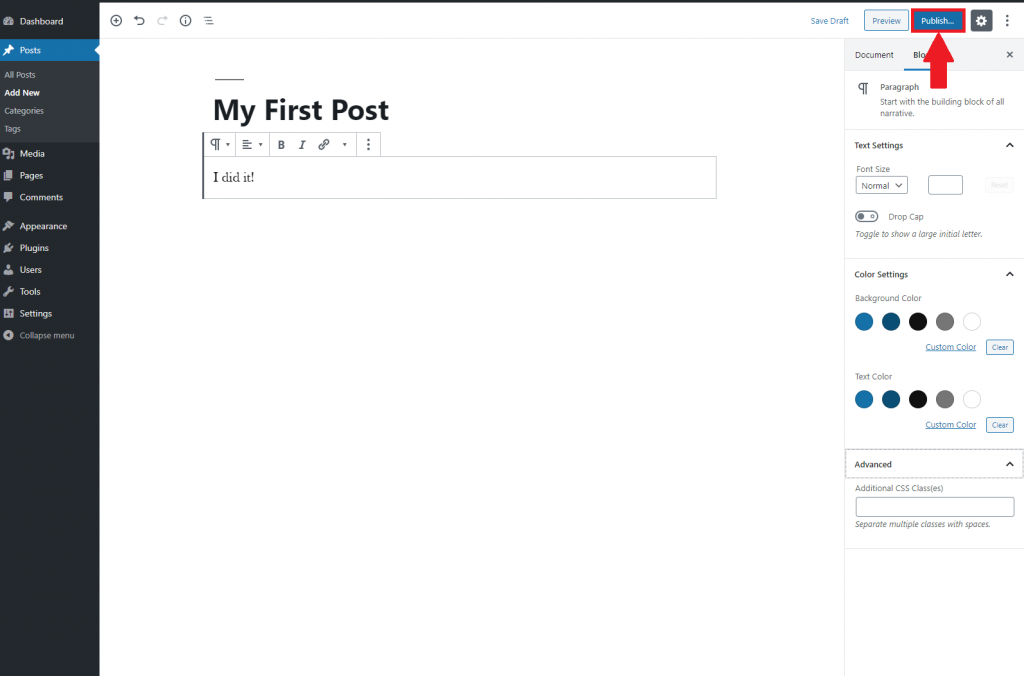
You can add your content title and main text. There are some editing options on the right hand side that you can experiment with, and when the your test post is ready go ahead hit the big blue “Publish” button in the top right.
There you have it, your first WordPress post! Hopefully the steps were easy enough to follow, if you happen to get lost please feel free to open up a support ticket and we can assist you.
Also please let me know if there is anything specific you would like to see covered in a future tutorial in the comments below.
Visit Winhost to learn more about our WordPress Hosting solution
Lately, we have been seeing a higher number of DotNetNuke (DNN) sites getting hacked via a known Telerik.Web.UI.dll vulnerability that’s been around for years. DNN released a patch a few years back. However, we have been seeing in influx of compromised DNN sites caused by this easy-to-fix vulnerability.
If you’re using DNN Versions 5.6.3 through 9.0.1 you must apply this patch to avoid disruptions to your site. More importantly, prevent it from getting hacked.
If you are running a DNN site and need help or want us to patch DNN for you, stop reading and contact our support department. We can help you apply this patch to your site at no cost. Please note that if your DotNetNuke site requires upgrading, then we can help you with that but we do charge for upgrading services.
First thing you need to do is download the patch directly from the DNN Site here: Critical Security Update September 2017
Once you have zip file from the DNN Site, you need to install it as you would an Extension within DNN.
Log into your DNN site as the SuperUser default login.
Navigate to: [HostingAccountDomain.com]/Admin/Extensions
Or look for the Extensions link within your DNN Site.

Click on the Install Extension Wizard button

Select Choose File button and select the zip file you just downloaded from DNN in Step 1 and click Next
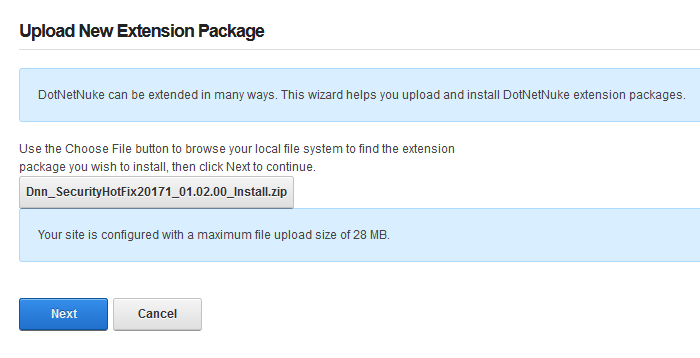
If you receive a random 500 or 404 error within your DNN site after clicking Next from Step 5. Please note the following, otherwise move on to Step 6 below.
You most likely received this error because you need to increase your maxRequestLength setting within your web.config file. You can access this file via FTP.
Look for the setting: maxRequestLength=”12288″
And change it to: maxRequestLength=”28000″
The above increases the limit to 28 MB.
Save your changes and upload the updated web.config file into the same directory overwriting the old web.config file.
Then try Step 5a again.
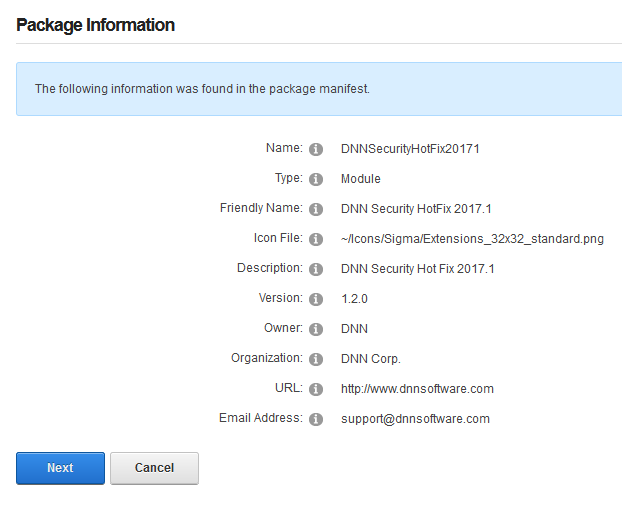
You will see the Package Information about the HotFix. Go ahead and click on Next.
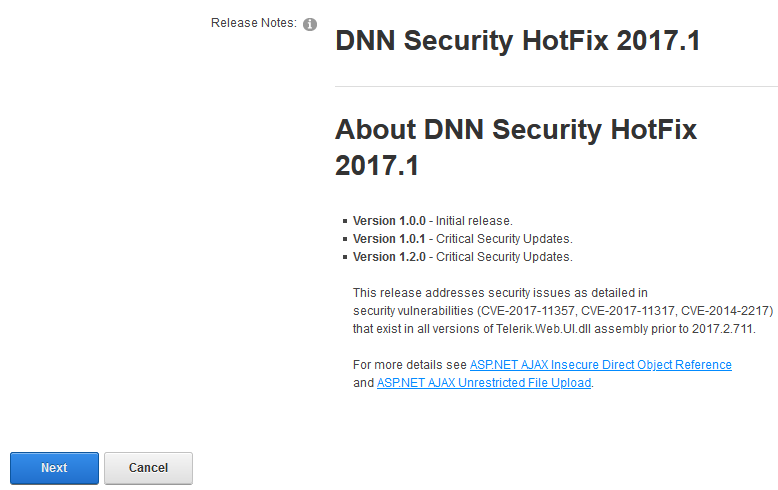
Click Next on the Release Notes window
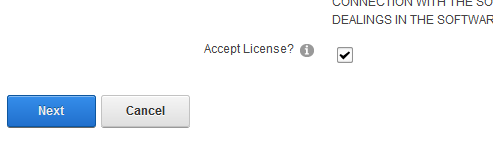
Read and place a check next to Accept License
Click Next.
You will then see the Package Installation Report. Click on the upper right X to exit out of the window.
Once your extension page is reloaded. You will see the newly installed Patch for your site.

If you are using DNN, make sure to look into this. There are hackers out there that are targeting DNN and we don’t want you to be a victim of their malicious activities.
If you have any questions or concerns, just contact us.
Having an email message to take forever to arrive can be very annoying and sometimes it leaves people wondering why is this even happening. In this article I’ll show you how to analyze email headers of an email message.
What is an email header?
An email header is a timeline of where the email message went through to get to you and the different email systems it touched during the delivery process. It’s sort of like looking at the tracking information of your UPS delivery. The only way to find out where the slowness is happening is to review the email header of that sluggish email message.
Where can I find the email header?
First, the email message must arrive at the destination before you can review the headers. We have instructions on how to view email headers in our knowledge base. There are multiple ways of viewing the headers. Here is another list that can help you find your email headers.
How to analyze the email header
Email headers can look ugly and hard to understand. Luckily there is a email header analyzing tool provided by MxToolBox.com that can help with that.

Copy and paste that ugly looking email header into the empty field and click on Analyze Header.
In the results, the email server with the longest bar graph is going to be the email server that is causing the most delay.
Why is this occurring?
There are many different reasons why an email message could be slow. One common reason is that the email server that caused the most delay had a large amount of email messages to process. If you see that the latency is happening in one of our email servers, we will gladly check our system for you and the logs to see what might be happening. Please contact our support department via our support portal for assistance.
For the most part most email servers are temporarily handling large volume of emails and will go back to normal performance on their own. However, if you’re seeing this issue keeps happening at a particular email server, you can contact the email administrator of that email system and provide them with the email header as proof.
Visit Winhost to learn more about our Windows hosting solution
In this tutorial we’ll be using an empty ASP.NET Core application within Visual Studio 2017 and show you how to deploy an ASP.NET Core 2.2 application that is running in InProcess on a Windows IIS Server.
ASP.NET Core 2.2 was recently released and with some new cool features. You are now able to use InProcess with your ASP.NET Core application. By default older versions of ASP.NET Core used OutOfProcess. When using InProcess the ASP.NET Core application only uses the IIS Worker process (w3wp.exe) whereas the OutOfProcess Core application uses the Kestrel server along with the IIS Worker process.
Kestrel is used in ASP.NET Core because it’s supported on different web servers like Apache, IIS, and Nginx. In a Windows server environment, OutOfProcess uses the Kestrel process (dotnet.exe) and IIS Worker process as a reverse proxy to handle the HTTP requests and other various requests normally handled by the IIS Worker Process.
When using InProcess hosting the IIS worker process handles all of the HTTP requests without Kestrel. No more reverse proxies being utilized meaning for a quicker result and a boost in performance.
On Winhost we support both InProcess hosting and OutOfProcess hosting with ASP.NET Core 2.2. If you want to test this on Winhost try to find our hidden promo code within this blog post. (Hint: It’s not a clickable link.)
Open a new Visual Studio Project as shown below:

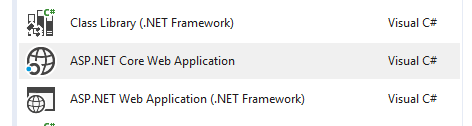
Select ASP.NET Core Web Application.
Click OK and on the next window select Empty making sure ASP.NET Core 2.2 is selected from the drop down menu as well. Click Okay again.
In this project we’re only interested to focus on what process the ASP.NET Core 2.2 is running on. To do this we need to edit the Startup.cs file from the Solution Explorer page.
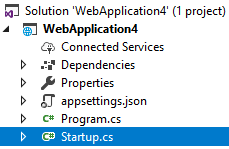
Go to Line 30 and replace the following code:
await context.Response.WriteAsync("Hello World!");
With the following:
await context.Response.WriteAsync(System.Diagnostics.Process.GetCurrentProcess().ProcessName);
The above code replaces the typical “Hello World!” text from the empty application and displays the process name the application is running on. This step isn’t necessary if you want your application to use InProcess hosting model. We are doing this here just to see what process is being used once it’s been deployed onto the web server.
When selecting a new ASP.NET Core 2.2 project in Visual Studio 2017 the defaults to InProcess within the Application’s Project file. However, you have the ability to check what hosting model your core application is going to use by checking the Project file. See below example:
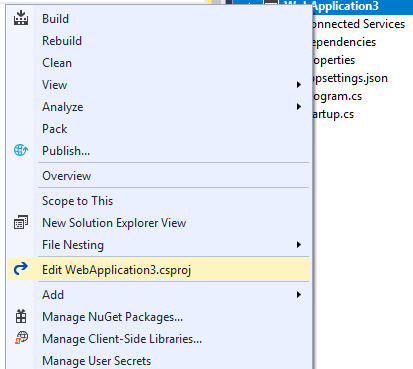
In the project file on line 5 you should see the following:
<AspNetCoreHostingModel>InProcess</AspNetCoreHostingModel>
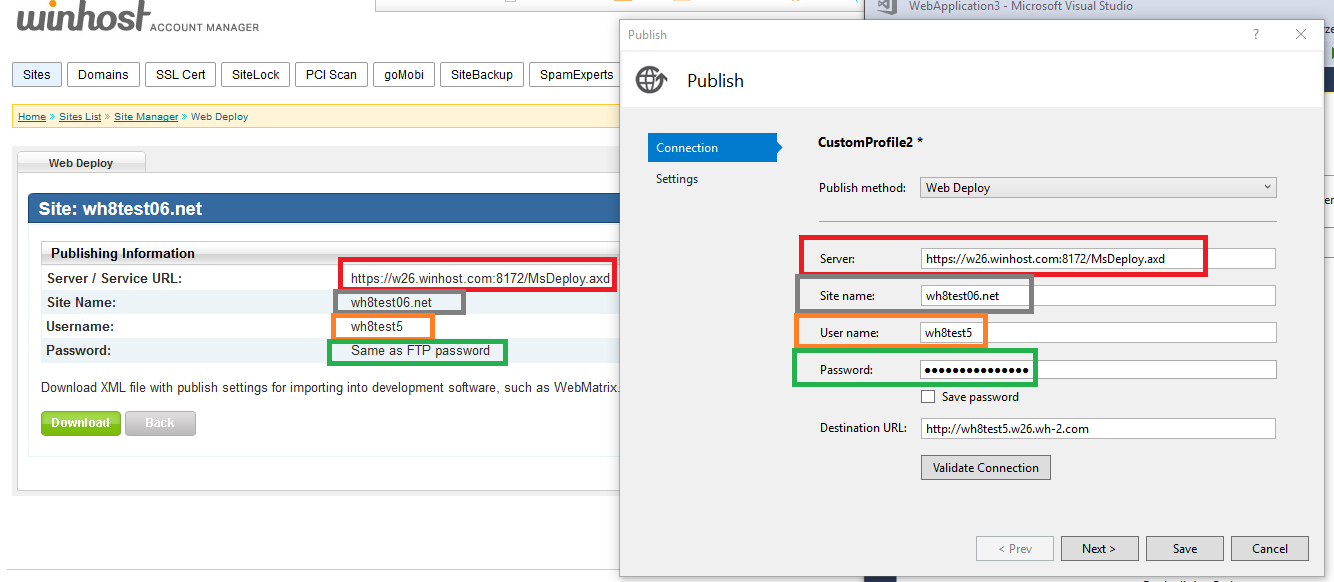
Log into your Winhost control panel if you haven’t done so already.
In the Publishing information section you will need these settings within Visual Studio when doing a Web Deployment. See below:
If your application is on a IIS server and it’s running InProcess the text you will see in the web browser is: w3wp
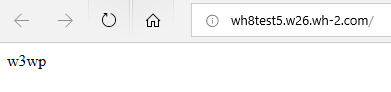
If your Core application is running OutOfProcess then it will return: dotnet

In closing, InProcess according to Microsoft is, quicker compared to OutOfProcess. Nicely done Microsoft… Nicely done, indeed.
Visit Winhost to learn more about our ASP.NET Core hosting solution