
Site hosting news, tutorials, tips, How Tos and more

The latest version of these apps are now available in the control panel app installer:
* Drupal has replaced Acquia Drupal.
Visit Winhost to learn more about our application hosting solutions


WordPress is an incredibly popular content management system (CMS). I have seen estimates say the it accounts for around 20%+ of self-hosted sites. This can be attributed to a variety of reasons such as a painless installation, low initial cost (free), and general ease of use. Due to this immense popularity I wanted to take some time a work on a tutorial series on some of the basics for users that may need some help getting started.
The first step of course would be to sign up for a Winhost hosting account so your site can be seen by the world.
Once you gain access to the control panel you can then easily install WordPress using our app installer. The steps are to so can be found here https://support.winhost.com/kb/a1214/app-installer-how-to-set-up-wordpress.aspx. Be sure to remember the username and password you choose as you will need them in just a few moments.
Congratulations! You are now a proud owner of your very first WordPress site, now lets get your first post up.
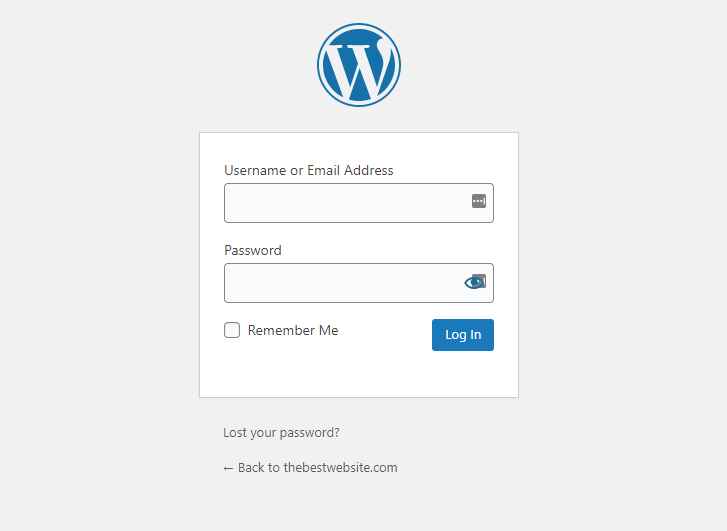
To accomplish this you will need to log into the admin section of your site. Maybe the fastest way would be to navigate to the /login page on your site, for example www.HostingAccountDomain.com/login. You’ll be met with a login screen where you will use the credentials that you selected during the installation process.
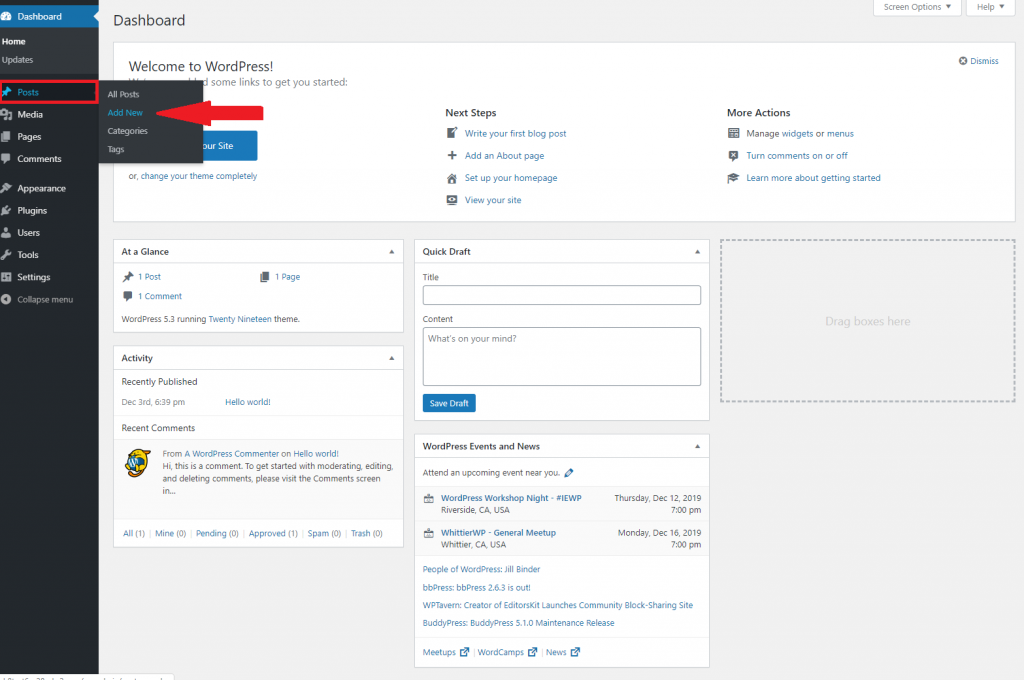
After you log in you will be taken to the admin section dashboard which may, at first glance, look intimidating, but after some use it will become very familiar. I will hopefully be covering all of the options in future tutorials, but here I will only focus on adding a new post.
You will click on Posts on the left menu (the icon looks like a thumbtack) and from there click “Add New”.
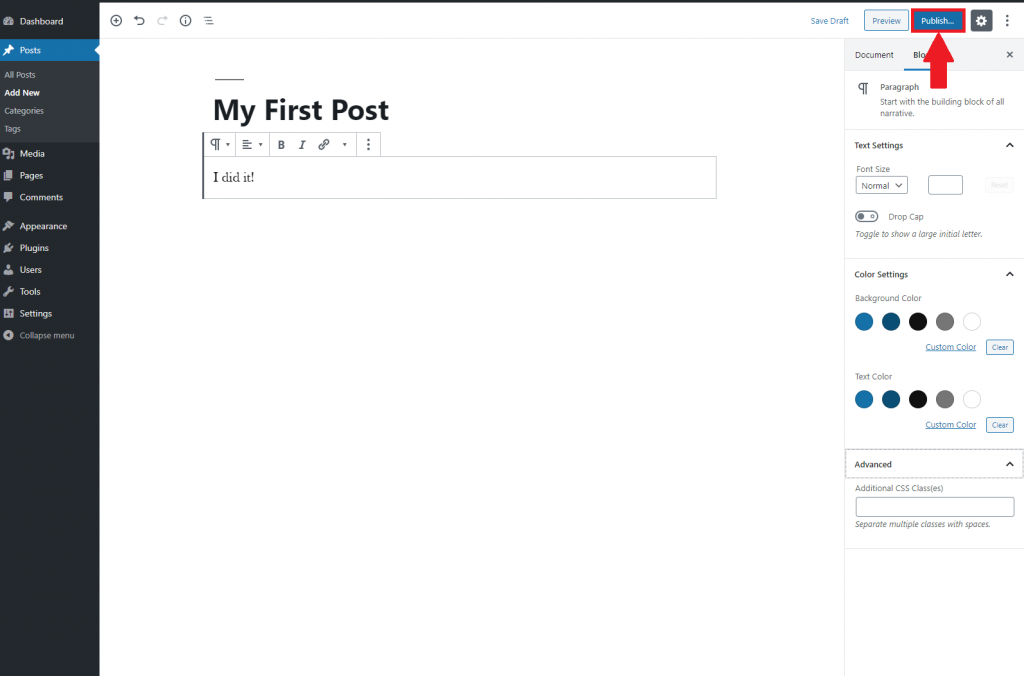
You can add your content title and main text. There are some editing options on the right hand side that you can experiment with, and when the your test post is ready go ahead hit the big blue “Publish” button in the top right.
There you have it, your first WordPress post! Hopefully the steps were easy enough to follow, if you happen to get lost please feel free to open up a support ticket and we can assist you.
Also please let me know if there is anything specific you would like to see covered in a future tutorial in the comments below.
Visit Winhost to learn more about our WordPress Hosting solution
Lately, we have been seeing a higher number of DotNetNuke (DNN) sites getting hacked via a known Telerik.Web.UI.dll vulnerability that’s been around for years. DNN released a patch a few years back. However, we have been seeing in influx of compromised DNN sites caused by this easy-to-fix vulnerability.
If you’re using DNN Versions 5.6.3 through 9.0.1 you must apply this patch to avoid disruptions to your site. More importantly, prevent it from getting hacked.
If you are running a DNN site and need help or want us to patch DNN for you, stop reading and contact our support department. We can help you apply this patch to your site at no cost. Please note that if your DotNetNuke site requires upgrading, then we can help you with that but we do charge for upgrading services.
First thing you need to do is download the patch directly from the DNN Site here: Critical Security Update September 2017
Once you have zip file from the DNN Site, you need to install it as you would an Extension within DNN.
Log into your DNN site as the SuperUser default login.
Navigate to: [HostingAccountDomain.com]/Admin/Extensions
Or look for the Extensions link within your DNN Site.

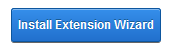
Click on the Install Extension Wizard button
Select Choose File button and select the zip file you just downloaded from DNN in Step 1 and click Next
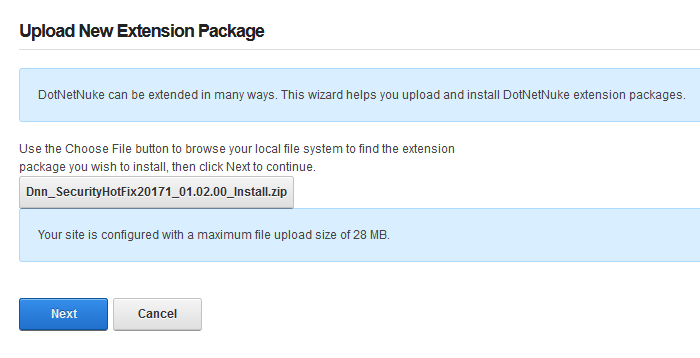
If you receive a random 500 or 404 error within your DNN site after clicking Next from Step 5. Please note the following, otherwise move on to Step 6 below.
You most likely received this error because you need to increase your maxRequestLength setting within your web.config file. You can access this file via FTP.
Look for the setting: maxRequestLength=”12288″
And change it to: maxRequestLength=”28000″
The above increases the limit to 28 MB.
Save your changes and upload the updated web.config file into the same directory overwriting the old web.config file.
Then try Step 5a again.
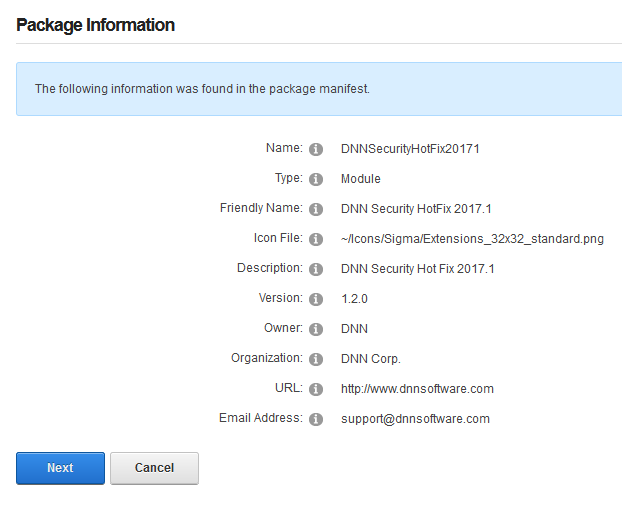
You will see the Package Information about the HotFix. Go ahead and click on Next.
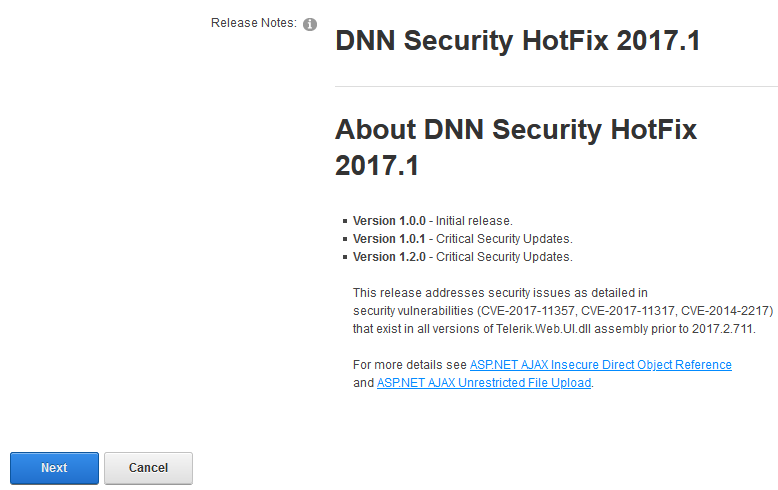
Click Next on the Release Notes window
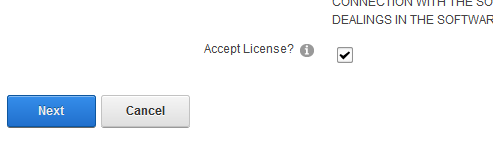
Read and place a check next to Accept License
Click Next.
You will then see the Package Installation Report. Click on the upper right X to exit out of the window.
Once your extension page is reloaded. You will see the newly installed Patch for your site.

If you are using DNN, make sure to look into this. There are hackers out there that are targeting DNN and we don’t want you to be a victim of their malicious activities.
If you have any questions or concerns, just contact us.