
Site hosting news, tutorials, tips, How Tos and more
Today we announce the launch of a new Premium Private SQL Server solution! Private SQL is your own dedicated Microsoft SQL Virtual Server that is not shared with any other customer. Since your SQL databases reside on their own server, they will have access to all of the server resources, like CPU, RAM and disk space.
But don’t your hosting plans already come with SQL databases?
Yes, all of our hosting plans include Shared SQL server databases. With Shared SQL, many customer databases use the resources of a shared SQL server. Therefore, there are constraints imposed so that all SQL databases on the server performs well for all our customers. And on occasion, there can be a case of a “bad neighbor”, where another customer’s database can use up a lot of server resources, slowing down the SQL performance for your database as well as other customer’s databases. Our staff monitors the Shared SQL Servers and we will work to resolve such performance issues as quickly as possible.
With the Private SQL service, these constraints go away and you don’t deal with any “bad neighbor” situation. For example, you can have a very large SQL database.
SQL Server Customization
Because the Private SQL Server is for just your SQL databases, we can offer server customizations that we can’t do for the Shared SQL servers. For example, we can enable SQL Jobs, SQL CLR, install special monitoring software, or setup custom backup services.
Private SQL Server Plans
There are two base Private SQL plans – one plan with 4 CPU Cores and one plan with 8 CPU Cores. The server disk space storage starts at 200 GB and can be expanded if needed. You can select how much RAM you want for your Private SQL Server starting from 2 GB. And finally, you can select the SQL Server version that you want to use.
Visit Winhost.com to learn more about features and pricing of Private SQL Server solutions

.NET Core
On our Windows 2012 and Windows 2016 web servers, both .NET Core 3.1.9 and .NET Core 2.1.23 are now available for framework dependent deployment (FDD).
Note: If you cannot use framework-dependent deployment for any .NET Core version, you can always publish using self-contained deployment (SCD). (For example, in our Knowledge Base, we show how to use self-contained deployment with Visual Studio 2017.) If any customers have questions about deployment, contact our tech support.
PHP
On our Windows 2012 and Windows 2016 hosting platform, we have made the following updates to PHP versions:
Visit Winhost to learn more about our ASP.NET Core hosting and PHP hosting solutions
Nopcommerce 4.3 was released and with it, the ability to use a MySQL database. In this post I’ll be showing you how to configure your nopCommerce 4.3 with a MySQL database.
Like many applications, nopCommerce is installed in two steps. First, you install the nopCommerce application into your site and then you complete the software configuration by providing information through an Installation Wizard that you access through your web browser.
You can use our Application Installer to install nopCommerce 4.3 in your site. Follow the instructions in the first part of this Knowledge Base article to get the initial nopCommerce install done but you won’t need to create a new MS SQL database. The rest of the information in this blog post will give instructions on how to create a MySQL database and how to complete the nopCommerce Installation screen.
Now that you have installed nopCommerce in you site, we want to pull up the nopCommerce Installation screen to finish configuring nopCommerce. Assuming that your domain is not yet resolving to Winhost, you can complete the nopcommerce configuration using the Secondary URL we provide you. Here is how to find the Secondary URL.
Enter the Secondary URL into your web browser. You will be presented with the nopCommerce Installation screen. In this screen, you will provide specific information about your store and hosting account to finish configuring the application.
Enter the following information into the nopCommerce Installation screen.
Next, you need to create a MySQL database through the Winhost control panel. Here are step-by-step instructions.
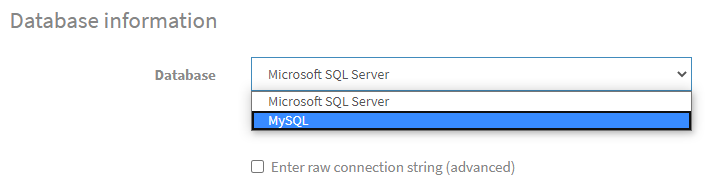
Now, you need to specify that you will use MySQL as your database and tell the nopCommerce application where the database is and how to access it. So, go back to the nopCommerce Installation screen and have the Winhost Control Panel MySQL section open in another browser tab so you can go back and forth to get and enter your information.
In the Database Information Section of the nopCommerce Installation screen, click on the Dropdown menu and select MySQL as shown below:
Click on the Install button and wait for the installation to complete. This will take a few minutes.
Enjoy
Visit Winhost to learn more about our nopCommerce hosting solution
If you haven’t noticed we updated PHP version 7.3 with the latest minor update 7.3.17 and we also installed PHP 7.4.
Back in October I wrote about speed improvements that came with PHP 7.3. Now with the PHP 7.4 the internet world is claiming that this new version also has speed improvements compared to previous PHP versions.
Okay, but how much faster?!
Curious, I installed WordPress using the Winhost Max plan. This was a base WordPress installation using the default template and I evaluated the speed with Google Chrome’s Developer Tools and Google’s Page Insights.
The following are the results I got. Please note that your results will vary depending on plugins, themes, and PHP versions that you are using.


Just based on these test results, it appears that PHP 7.4 has improved its speed over the latest version PHP 7.3.
So how do you get started with PHP 7.4 and should you really use it?
Both PHP versions 7.3 and 7.4 require your site to be on our Windows Server 2012 / IIS 8 or 2016 / IIS 10 servers.
If your WordPress site is on an Windows 2012 /IIS 8 or Window 2016 / IIS 10 server, then you can go ahead and change the PHP version within the Winhost control panel.
Here is how to change the PHP version within the Winhost control panel.
If your WordPress site is on a Windows 2008 server and your site is using an older PHP 5.3 – 5.6 version and you want to use the higher PHP versions., then you will need to first update your WordPress site to the latest version. Then your site will need to be migrated to our Windows 2012 or Windows 2016 servers. Note that using newer versions of WordPress will result in an error/warning if you’re using an older version of PHP. And remember, before doing any updating on your WordPress site, please be sure to back up the web site files and MySQL Database. That way if something goes wrong, you can always revert back to the old version of your site.
If your WordPress site needs to be migrated to our IIS 8 or IIS 10 servers, then just contact our support team and ask them to migrate your site to an IIS 8 or IIS 10 server. We’ll do the migration at no cost to you. Migration typically takes about one hour but really depends on how large your site is. We won’t have to migrate your database or email server as these are already on separate servers.
I also wanted to mention that even though we have PHP 7.4 installed on our servers, since it is new, there are still a limited amount of components/modules available. And although we tested PHP 7.4 with WordPress and everything appears to be working fine, at this time we are still not recommending using it in your production site – until the components/modules catch up. For now we have the latest 7.3 minor update installed and PHP 7.3 will work with the latest version of WordPress and provide you with adequate speed for your site.
It should also be mentioned that it is always important to backup your site before doing any work on your production WordPress site and that we do offer a great SiteBackup service that can automatically backup your site files and MySQL database on a nightly basis. Earlier this year, I wrote about why having backups are important. Please check out that blog post. If you need help setting up the SiteBackup service, please feel free to contact our support department for assistance. We will help you set it up free of charge.
That’s it for now. Have fun with PHP!
Visit Winhost to learn more about our WordPress Hosting solution

Lately, we have been seeing a higher number of DotNetNuke (DNN) sites getting hacked via a known Telerik.Web.UI.dll vulnerability that’s been around for years. DNN released a patch a few years back. However, we have been seeing in influx of compromised DNN sites caused by this easy-to-fix vulnerability.
If you’re using DNN Versions 5.6.3 through 9.0.1 you must apply this patch to avoid disruptions to your site. More importantly, prevent it from getting hacked.
If you are running a DNN site and need help or want us to patch DNN for you, stop reading and contact our support department. We can help you apply this patch to your site at no cost. Please note that if your DotNetNuke site requires upgrading, then we can help you with that but we do charge for upgrading services.
First thing you need to do is download the patch directly from the DNN Site here: Critical Security Update September 2017
Once you have zip file from the DNN Site, you need to install it as you would an Extension within DNN.
Log into your DNN site as the SuperUser default login.
Navigate to: [HostingAccountDomain.com]/Admin/Extensions
Or look for the Extensions link within your DNN Site.

Click on the Install Extension Wizard button

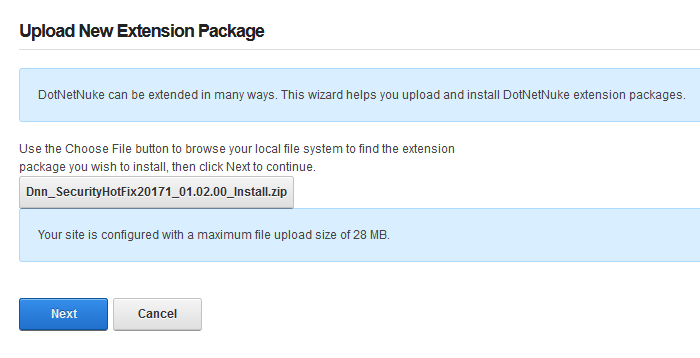
Select Choose File button and select the zip file you just downloaded from DNN in Step 1 and click Next
If you receive a random 500 or 404 error within your DNN site after clicking Next from Step 5. Please note the following, otherwise move on to Step 6 below.
You most likely received this error because you need to increase your maxRequestLength setting within your web.config file. You can access this file via FTP.
Look for the setting: maxRequestLength=”12288″
And change it to: maxRequestLength=”28000″
The above increases the limit to 28 MB.
Save your changes and upload the updated web.config file into the same directory overwriting the old web.config file.
Then try Step 5a again.
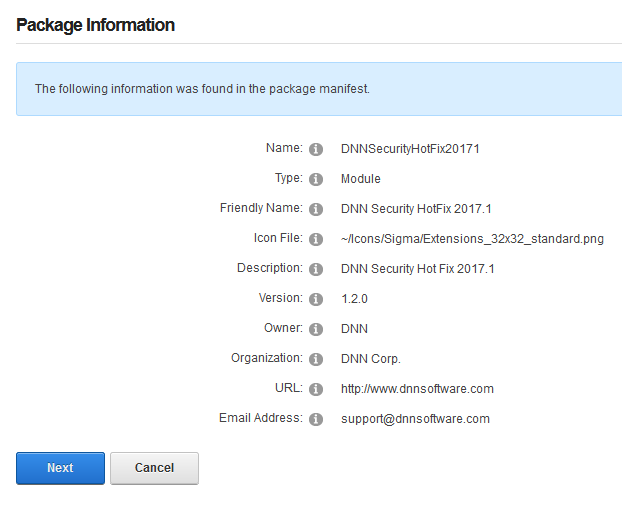
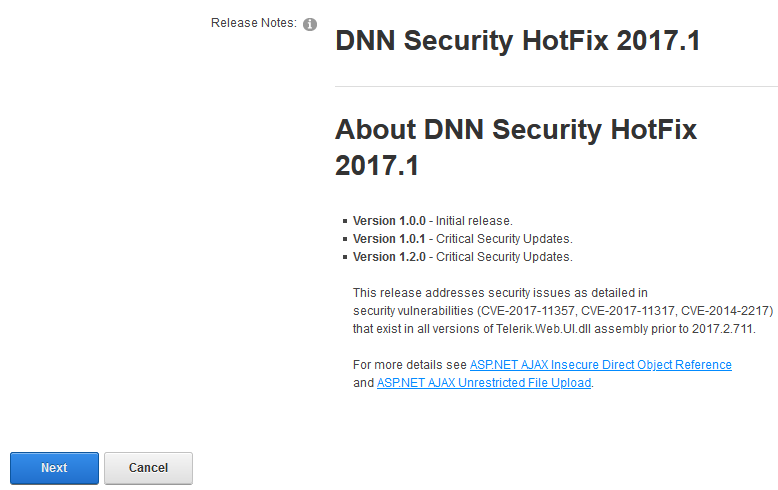
You will see the Package Information about the HotFix. Go ahead and click on Next.
Click Next on the Release Notes window
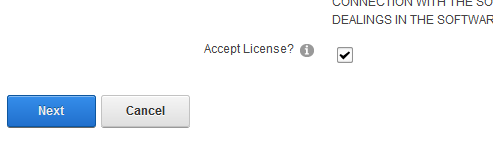
Read and place a check next to Accept License
Click Next.
You will then see the Package Installation Report. Click on the upper right X to exit out of the window.
Once your extension page is reloaded. You will see the newly installed Patch for your site.

If you are using DNN, make sure to look into this. There are hackers out there that are targeting DNN and we don’t want you to be a victim of their malicious activities.
If you have any questions or concerns, just contact us.

When you are in a bind to find missing website files, the last thing you want to hear from your hosting provider is “Sorry, we don’t have backups of XYZ.”
At Winhost, we do have a backup system in place to backup our customer’s website files and databases nightly. However, this backup system is intended for disaster recovery. We can pull files out of the backup system but this should not be your only backup source.
There have been times when I’ve had customers ask for certain files from our backups, and for one reason or another we didn’t have them because…
In short, there are many different reasons a hosting provider may not have specific backups.
First off, if you haven’t already, download your website to your own computer. If you have any questions about downloading your website files or databases, let us know and we can help. You may want to get on a schedule to download your site every so often. For extra safety, you can copy the files to an external harddrive.
When you are making changes to your site, it’s always best to make the changes on your own computer and then upload the modified files to the webserver. This way you should have the latest copy. Keep in mind that making changes directly on the server may be convenient, but your local copy will be out of sync.
For those that prefer an automated solution for backups over manual methods, we launched our SiteBackup Service.
If you want to make sure your website files and databases are being backed up – nightly, weekly or what ever your heart desires – then our SiteBackup service is a great way of automatically backing up your website and databases. And to protect you further, the backups are not located in the Winhost data center – they are on the Amazon cloud.
In addition, you get a separate control panel for your backups and the backup control panel is located outside of Winhost data center as well.
We have instructions in our knowledge base on how to configure SiteBackup. But if you want our support department to help you set up the SiteBackup service, just let us know after you order. We’ll help you set it up for you.
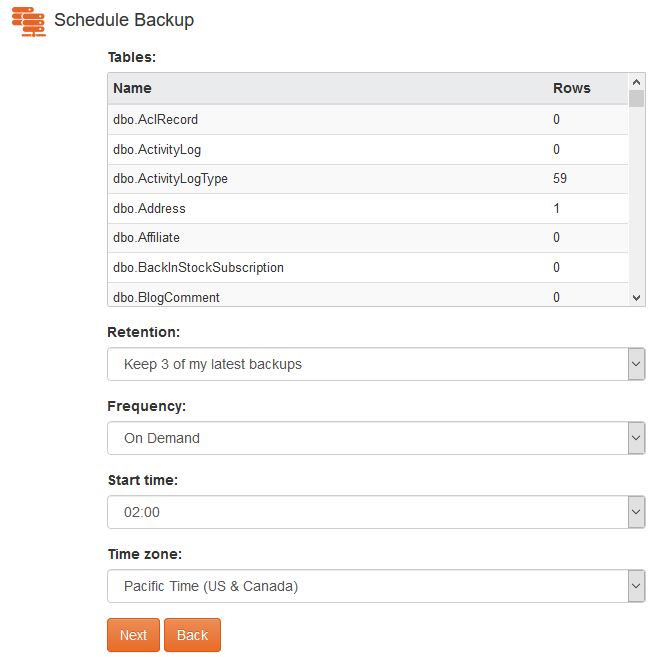
Below is a screenshot of the SiteBackup configuration options.
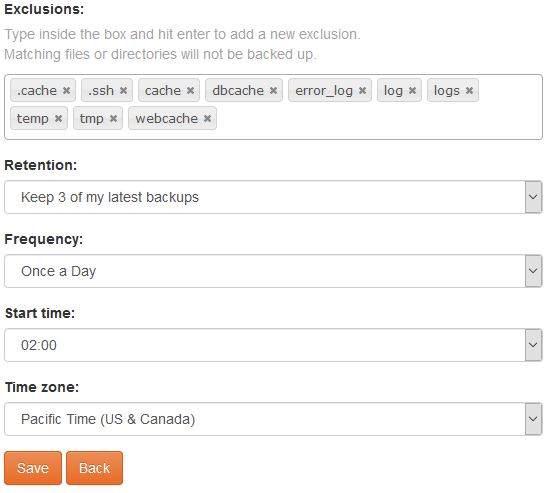
Some of the things you can configure are:
You can backup your MS SQL databases and MySQL database too.
For your site files there is an option to simply restore within the SiteBackup service.

As well as an option to download the site files in zip format.

So the SiteBackup solution is a convenient way to take charge of your site backups. You can sign up for the SiteBackup service through your control panel. If you need help setting it up, just contact our support department. We can help set it up for you.
First of all, I want you to understand this email message you received is nothing but a scam and you weren’t really hacked. I’ll explain in more details as you read on.
This is by far one of the best spam email messages I’ve seen since I started working here at Winhost. Not only is it creative but some people are really paying bitcoins to not get “exposed.” That’s why this scam is popular.

Why are people falling for this scam?
This scam is often effective because the email message may contain your real password that you are using. Or, it may contain part of a password that you used in the past.
Or
The email states that the email message was sent from your email account to make you believe that your email was hacked. They may use the following text in their email message to you:
“I’m a programmer who cracked your email account and device about half year ago.
You entered a password on one of the insecure site you visited, and I catched it.”
“I have very bad news for you.
17/07/2019 – on this day I hacked your OS and got full access to your account [email protected].
You can check it – I sent this message from your account.”

The hacker goes on to claim that they installed a Rat program on your computer and no matter what you do, you won’t be able to stop them unless you pay up. Don’t pay them anything. I’ll tell you why…

You might be asking… “well… How did they get my password?“
Well you probably heard of all of those nasty data breaches that have been reported on the news and all over the internet? If you were not aware or if you have no idea how anyone might have gotten your account information, there is a website that you can use to check your email address – or any known passwords you like to use and see if it’s part of a data breach. The website is called, “have i been pawned?“. This website’s main purpose is for ordinary people to visit and check if their information was part of any data breach. More about the creator can be found here.
Should I really use this website?
Well, the email message you received already contains your single plain text password. Your password has obviously been compromised before and checking how the hacker may have gotten it can’t hurt you at this point. The hackers also have the same tool to check your password. Hopefully, you are not using that password no more. If you are, change your password.
In the website, you enter the password that you received in the spam email. Their search will bring up what company or list contained that same password.
If your password was compromised, you will get the following message.

“But, they sent me an email from my own email address. So how did they do that?”
Glad you asked. We need to check the email headers and check to see exactly where the email message come from. To get your email header we have the following knowledge base article that shows you how to retrieve this information. An email header may look ugly to a lot of people, but the coolest part is that it tells the story of how you received that email message. Email headers tell a story of the path the email took to get to your inbox.
The email header can be a little tricky to read but you can use some tools to decipher the email header.
The What’s my IP website has the ability to tell you the origin of the email message. Simply copy and paste the email header into the empty field.
Once you paste in the email header, click on the blue Analyze button. You will get the results of the originating IP number. This is the IP number of the mail server that sent out an email message.
You can check if the IP of the mail server is the same IP number or company that you’re using for your email service. If the IPs don’t match, then the email message has been spoofed – meaning someone just used an email system and changed the “From address” to use your email address. Email addresses are easily spoofed. Just YouTube “how to spoof an email address” if you are interested to learn more.
How do I prevent this from happening again? I hate seeing these damn emails!?
If the email messages you’re receiving are in fact being spoofed, then you have to set up an SPF record and DKIM for your domain name. If you’re using our email services we have the following knowledge base article that provides you with the correct SPF record you should use with our email service.
Is there anything else I can do to stop this email scam?

Yes, we also offer a spam filtering service that stops the bad email messages from ever touching our email systems. The spam filtering service starts to work at the MX level of the email service. This occurs when you change the MX record for your domain name to use the spam filtering service’s MX Records instead. The email messages that are sent to your domain users get routed to the spam filtering service first. Within their system the email messages get scrubbed and filtered and only the legitmate emails get sent to your inbox. Also, a nice feature that comes with our Spam Filtering service – if for some reason our mail server has an issue and can’t receive email messages for any reason – the Spam Filtering service holds on to the incoming email messages and sends it to the main mail server once the issue has resolved. Out of all of the services we offer, the Spam Filtering service is by far one of my favorite ones we provide to our customers.
If you have any questions or concerns about any email spam/scams, feel free to reach out to our technical support team.
Visit Winhost to learn more about our Windows hosting solution