
Site hosting news, tutorials, tips, How Tos and more
First of all, I want you to understand this email message you received is nothing but a scam and you weren’t really hacked. I’ll explain in more details as you read on.
This is by far one of the best spam email messages I’ve seen since I started working here at Winhost. Not only is it creative but some people are really paying bitcoins to not get “exposed.” That’s why this scam is popular.
Why are people falling for this scam?
This scam is often effective because the email message may contain your real password that you are using. Or, it may contain part of a password that you used in the past.
Or
The email states that the email message was sent from your email account to make you believe that your email was hacked. They may use the following text in their email message to you:
“I’m a programmer who cracked your email account and device about half year ago.
You entered a password on one of the insecure site you visited, and I catched it.”
“I have very bad news for you.
17/07/2019 – on this day I hacked your OS and got full access to your account [email protected].
You can check it – I sent this message from your account.”

The hacker goes on to claim that they installed a Rat program on your computer and no matter what you do, you won’t be able to stop them unless you pay up. Don’t pay them anything. I’ll tell you why…

You might be asking… “well… How did they get my password?“
Well you probably heard of all of those nasty data breaches that have been reported on the news and all over the internet? If you were not aware or if you have no idea how anyone might have gotten your account information, there is a website that you can use to check your email address – or any known passwords you like to use and see if it’s part of a data breach. The website is called, “have i been pawned?“. This website’s main purpose is for ordinary people to visit and check if their information was part of any data breach. More about the creator can be found here.
Should I really use this website?
Well, the email message you received already contains your single plain text password. Your password has obviously been compromised before and checking how the hacker may have gotten it can’t hurt you at this point. The hackers also have the same tool to check your password. Hopefully, you are not using that password no more. If you are, change your password.
In the website, you enter the password that you received in the spam email. Their search will bring up what company or list contained that same password.
If your password was compromised, you will get the following message.

“But, they sent me an email from my own email address. So how did they do that?”
Glad you asked. We need to check the email headers and check to see exactly where the email message come from. To get your email header we have the following knowledge base article that shows you how to retrieve this information. An email header may look ugly to a lot of people, but the coolest part is that it tells the story of how you received that email message. Email headers tell a story of the path the email took to get to your inbox.
The email header can be a little tricky to read but you can use some tools to decipher the email header.
The What’s my IP website has the ability to tell you the origin of the email message. Simply copy and paste the email header into the empty field.
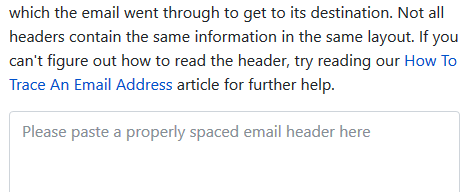
Once you paste in the email header, click on the blue Analyze button. You will get the results of the originating IP number. This is the IP number of the mail server that sent out an email message.
You can check if the IP of the mail server is the same IP number or company that you’re using for your email service. If the IPs don’t match, then the email message has been spoofed – meaning someone just used an email system and changed the “From address” to use your email address. Email addresses are easily spoofed. Just YouTube “how to spoof an email address” if you are interested to learn more.
How do I prevent this from happening again? I hate seeing these damn emails!?
If the email messages you’re receiving are in fact being spoofed, then you have to set up an SPF record and DKIM for your domain name. If you’re using our email services we have the following knowledge base article that provides you with the correct SPF record you should use with our email service.
Is there anything else I can do to stop this email scam?
Yes, we also offer a spam filtering service that stops the bad email messages from ever touching our email systems. The spam filtering service starts to work at the MX level of the email service. This occurs when you change the MX record for your domain name to use the spam filtering service’s MX Records instead. The email messages that are sent to your domain users get routed to the spam filtering service first. Within their system the email messages get scrubbed and filtered and only the legitmate emails get sent to your inbox. Also, a nice feature that comes with our Spam Filtering service – if for some reason our mail server has an issue and can’t receive email messages for any reason – the Spam Filtering service holds on to the incoming email messages and sends it to the main mail server once the issue has resolved. Out of all of the services we offer, the Spam Filtering service is by far one of my favorite ones we provide to our customers.
If you have any questions or concerns about any email spam/scams, feel free to reach out to our technical support team.
Visit Winhost to learn more about our Windows hosting solution