
Site hosting news, tutorials, tips, How Tos and more
If you haven’t noticed we updated PHP version 7.3 with the latest minor update 7.3.17 and we also installed PHP 7.4.
Back in October I wrote about speed improvements that came with PHP 7.3. Now with the PHP 7.4 the internet world is claiming that this new version also has speed improvements compared to previous PHP versions.
Okay, but how much faster?!
Curious, I installed WordPress using the Winhost Max plan. This was a base WordPress installation using the default template and I evaluated the speed with Google Chrome’s Developer Tools and Google’s Page Insights.
The following are the results I got. Please note that your results will vary depending on plugins, themes, and PHP versions that you are using.


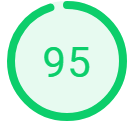
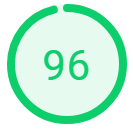
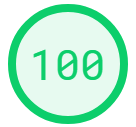
Just based on these test results, it appears that PHP 7.4 has improved its speed over the latest version PHP 7.3.
So how do you get started with PHP 7.4 and should you really use it?
Both PHP versions 7.3 and 7.4 require your site to be on our Windows Server 2012 / IIS 8 or 2016 / IIS 10 servers.
If your WordPress site is on an Windows 2012 /IIS 8 or Window 2016 / IIS 10 server, then you can go ahead and change the PHP version within the Winhost control panel.
Here is how to change the PHP version within the Winhost control panel.
If your WordPress site is on a Windows 2008 server and your site is using an older PHP 5.3 – 5.6 version and you want to use the higher PHP versions., then you will need to first update your WordPress site to the latest version. Then your site will need to be migrated to our Windows 2012 or Windows 2016 servers. Note that using newer versions of WordPress will result in an error/warning if you’re using an older version of PHP. And remember, before doing any updating on your WordPress site, please be sure to back up the web site files and MySQL Database. That way if something goes wrong, you can always revert back to the old version of your site.
If your WordPress site needs to be migrated to our IIS 8 or IIS 10 servers, then just contact our support team and ask them to migrate your site to an IIS 8 or IIS 10 server. We’ll do the migration at no cost to you. Migration typically takes about one hour but really depends on how large your site is. We won’t have to migrate your database or email server as these are already on separate servers.
I also wanted to mention that even though we have PHP 7.4 installed on our servers, since it is new, there are still a limited amount of components/modules available. And although we tested PHP 7.4 with WordPress and everything appears to be working fine, at this time we are still not recommending using it in your production site – until the components/modules catch up. For now we have the latest 7.3 minor update installed and PHP 7.3 will work with the latest version of WordPress and provide you with adequate speed for your site.
It should also be mentioned that it is always important to backup your site before doing any work on your production WordPress site and that we do offer a great SiteBackup service that can automatically backup your site files and MySQL database on a nightly basis. Earlier this year, I wrote about why having backups are important. Please check out that blog post. If you need help setting up the SiteBackup service, please feel free to contact our support department for assistance. We will help you set it up free of charge.
That’s it for now. Have fun with PHP!
Visit Winhost to learn more about our WordPress Hosting solution

The base installation of WordPress can be more than enough for somebody to start their blog or site. With plenty of features already at a user’s disposal you may never even realize that more are available. Where are these additional features you might ask… Plugins!
Plugins are scripts written by the WordPress community that can add a variety of features or functionality to your site and the best part is most of them are free. In today’s tutorial we are going to install a plugin to help beef up the security of our WordPress site.
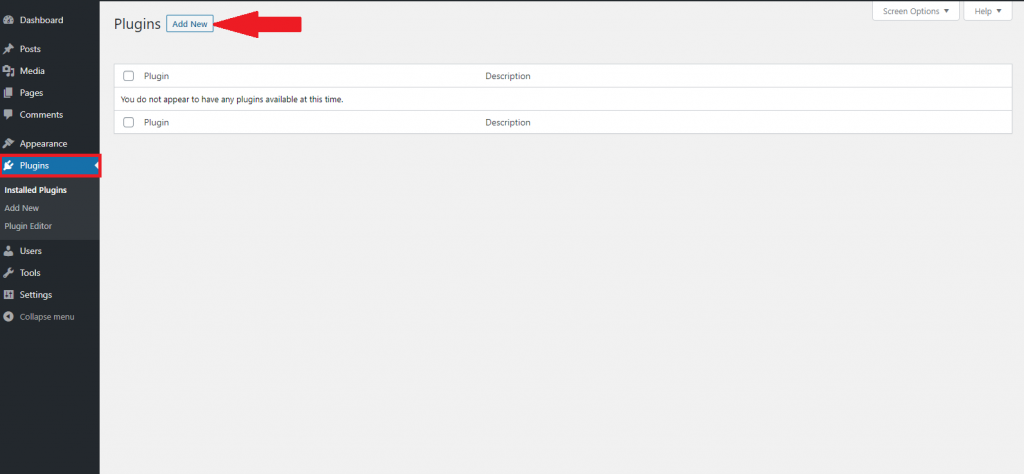
In the admin section of your WordPress site on the left hand side you’ll want to click the “Plugins” tab. Once in the plugins manager page, click on “Add New” toward the top. You will be presented with all the different plugin options you can install. For now, we are looking for a specific plugin. In the search bar in the top right, search for “Wordfence” and the first result should be the one we are looking for.
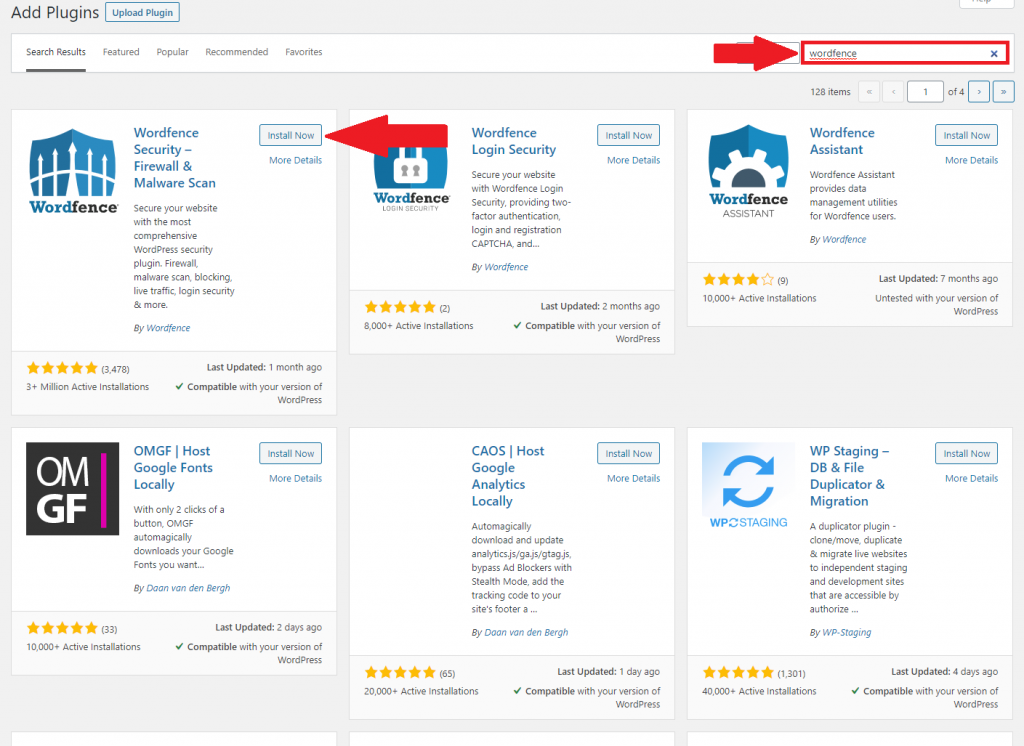
Click the “Install Now” button and then also click “Activate” once the installation is complete.
To give some quick background on what we are installing, Wordfence is a security plugin that we recommend to pretty much any WordPress site. With Wordfence you can secure your site against a variety of malicious attacks that I will cover in a future post.
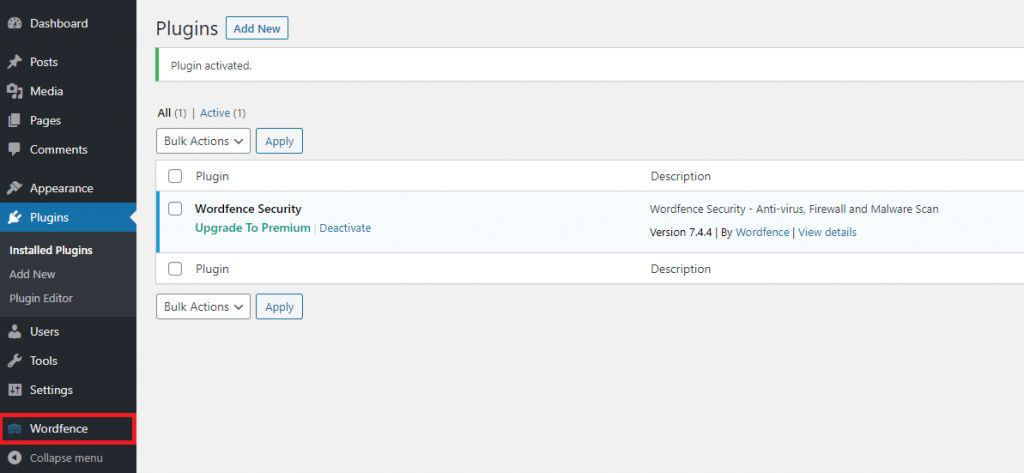
After installation you will see the plugin show up under the plugins tab. Another thing to note is that for some plugins a new tab may appear where you can adjust its settings.
If you have any questions or run into any issues feel free to leave a comment down below or open a support ticket.
Visit Winhost to learn more about our WordPress Hosting solution
Welcome back folks to the next installment in our WordPress tutorial series. Last time we covered the installation of WordPress as well as getting your first post up and running. In this article we will be covering the steps on how upload and insert images to your posts like this one.

As with most cases we are going to start by logging in to the admin section of your site. (The URL should be something like HostingAccountDomain.com/wp-login)
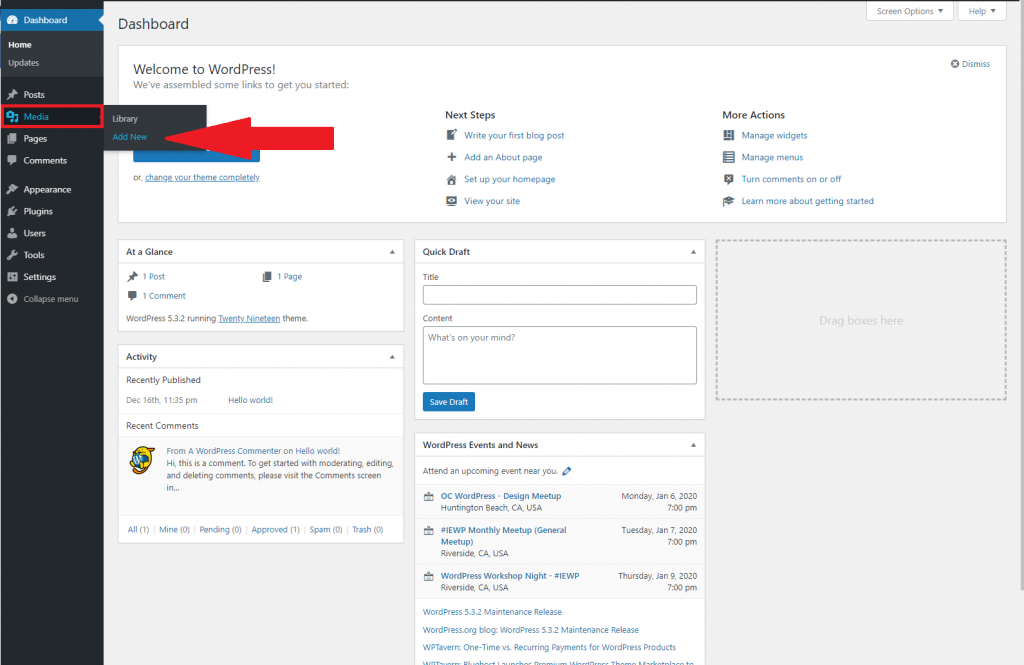
Once you are logged in you will be taken to the WordPress admin dashboard displayed below. On the left hand side you will want to hover over the icon of a camera/music note. On the options that appear you will want to click “Add New”
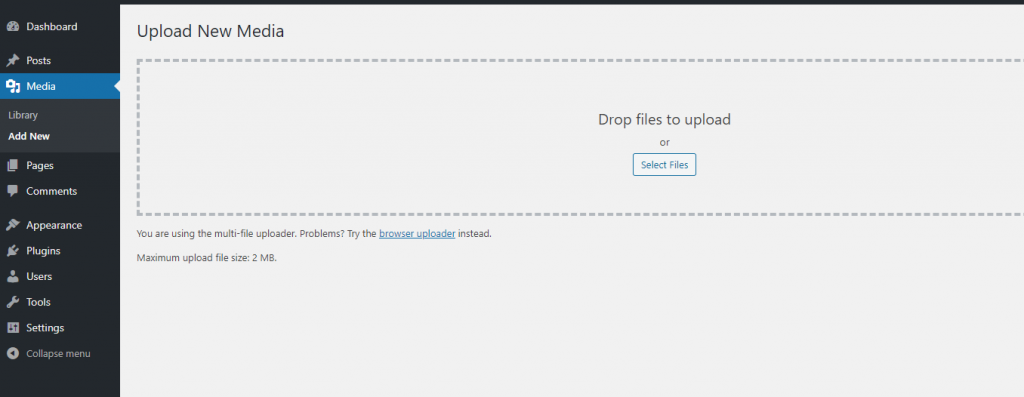
To upload your images you can either drag the file straight from your computer to the page or click the “Select Files” button.
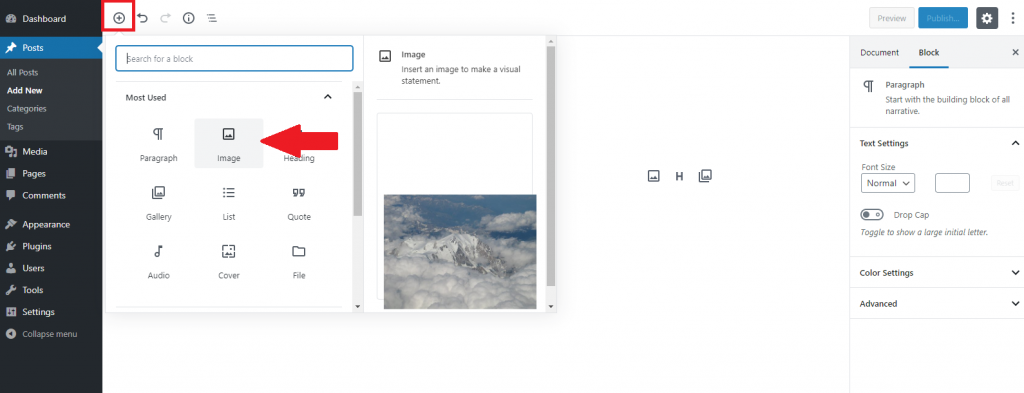
Now that the image is in your library it can be used across your site such as in a post or page. Below is an example of using the image in a post. First you would create a new post, then you click the “Add Block” button, finally you would click the block for “Image”.
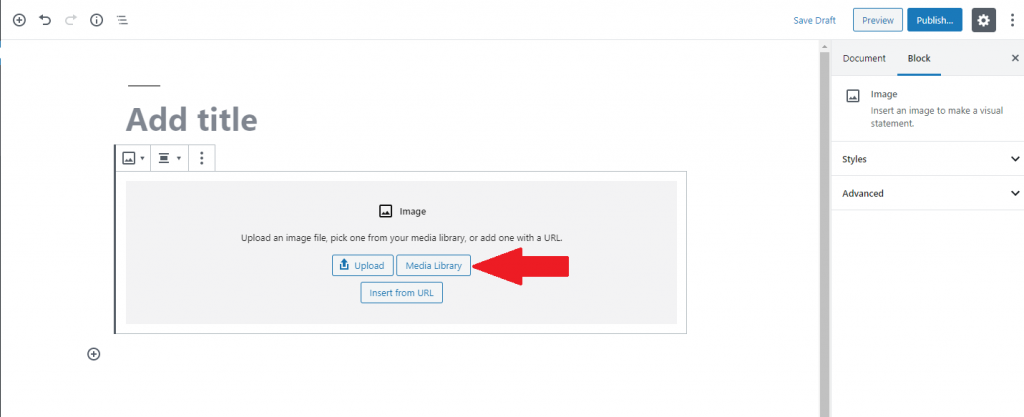
Once the block is added, click on “Media Library” and select your desired image.
That’s about all there is to it and with that we will wrap up this WordPress tutorial, in our next one we will cover installing and configuring plugins and themes. As I mentioned in the last post please feel free to comment if there is anything specific you would like to be covered in a tutorial.
Visit Winhost to learn more about our WordPress Hosting solution