
Site hosting news, tutorials, tips, How Tos and more


Welcome back folks to the next installment in our WordPress tutorial series. Last time we covered the installation of WordPress as well as getting your first post up and running. In this article we will be covering the steps on how upload and insert images to your posts like this one.

As with most cases we are going to start by logging in to the admin section of your site. (The URL should be something like HostingAccountDomain.com/wp-login)
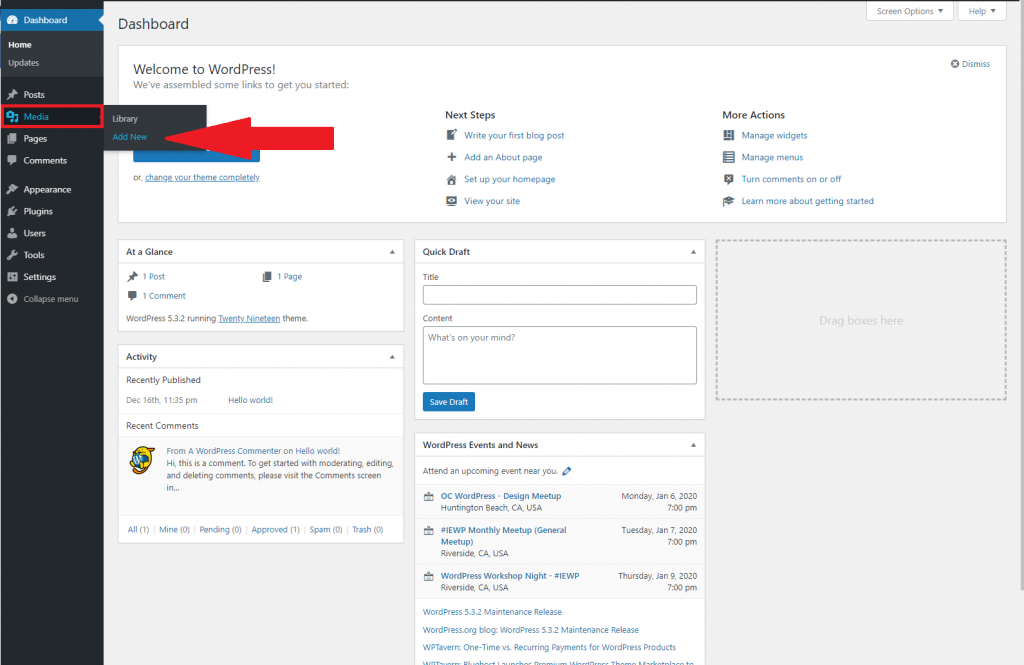
Once you are logged in you will be taken to the WordPress admin dashboard displayed below. On the left hand side you will want to hover over the icon of a camera/music note. On the options that appear you will want to click “Add New”
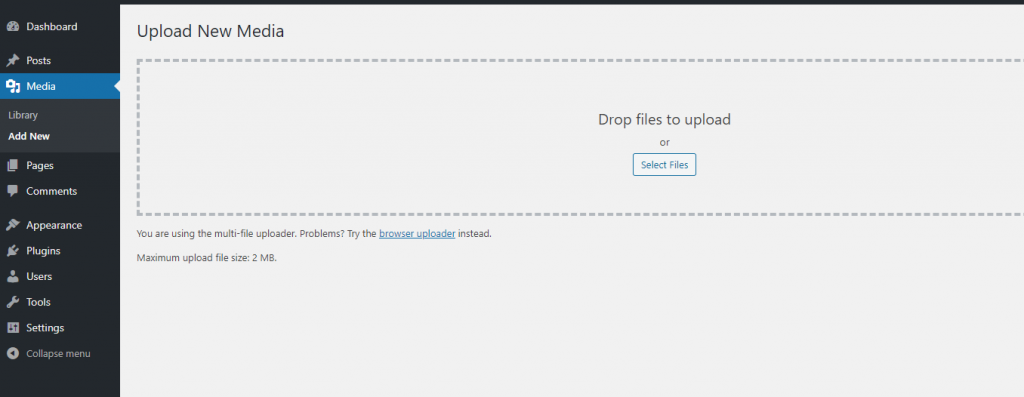
To upload your images you can either drag the file straight from your computer to the page or click the “Select Files” button.
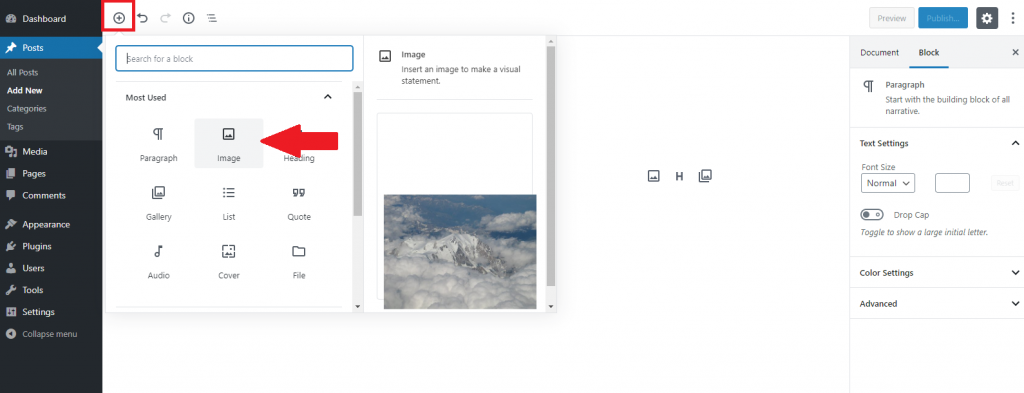
Now that the image is in your library it can be used across your site such as in a post or page. Below is an example of using the image in a post. First you would create a new post, then you click the “Add Block” button, finally you would click the block for “Image”.
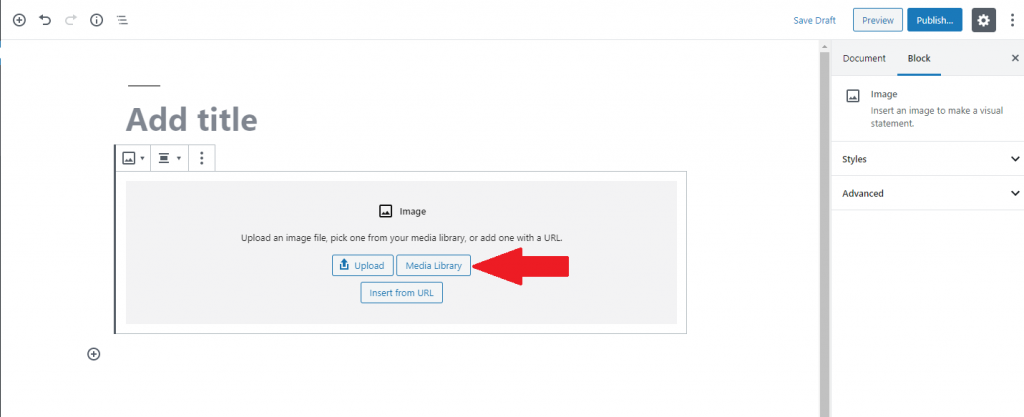
Once the block is added, click on “Media Library” and select your desired image.
That’s about all there is to it and with that we will wrap up this WordPress tutorial, in our next one we will cover installing and configuring plugins and themes. As I mentioned in the last post please feel free to comment if there is anything specific you would like to be covered in a tutorial.
Visit Winhost to learn more about our WordPress Hosting solution
No responses yet