
Site hosting news, tutorials, tips, How Tos and more

The base installation of WordPress can be more than enough for somebody to start their blog or site. With plenty of features already at a user’s disposal you may never even realize that more are available. Where are these additional features you might ask… Plugins!
Plugins are scripts written by the WordPress community that can add a variety of features or functionality to your site and the best part is most of them are free. In today’s tutorial we are going to install a plugin to help beef up the security of our WordPress site.
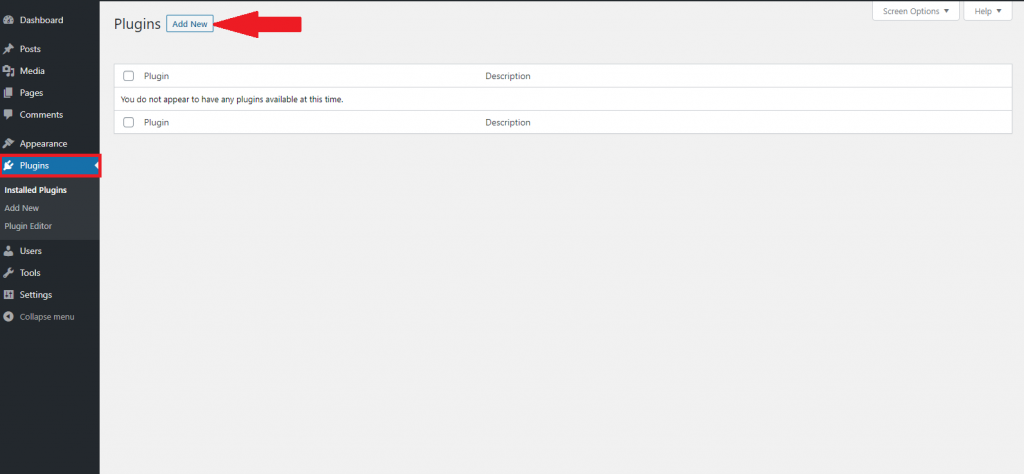
In the admin section of your WordPress site on the left hand side you’ll want to click the “Plugins” tab. Once in the plugins manager page, click on “Add New” toward the top. You will be presented with all the different plugin options you can install. For now, we are looking for a specific plugin. In the search bar in the top right, search for “Wordfence” and the first result should be the one we are looking for.
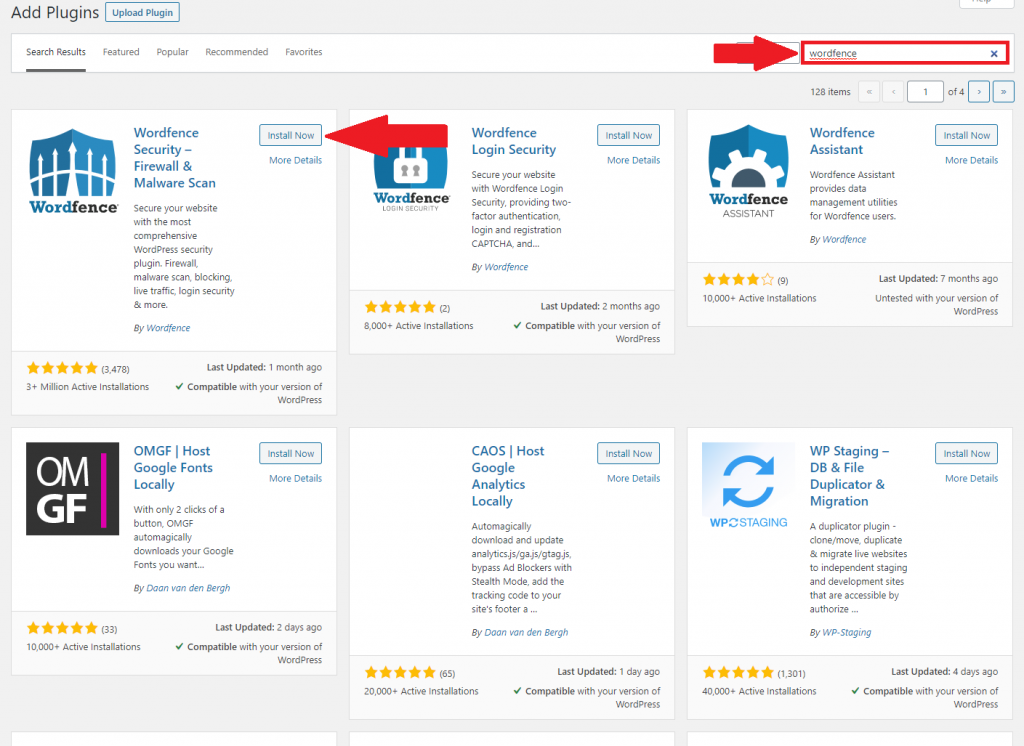
Click the “Install Now” button and then also click “Activate” once the installation is complete.
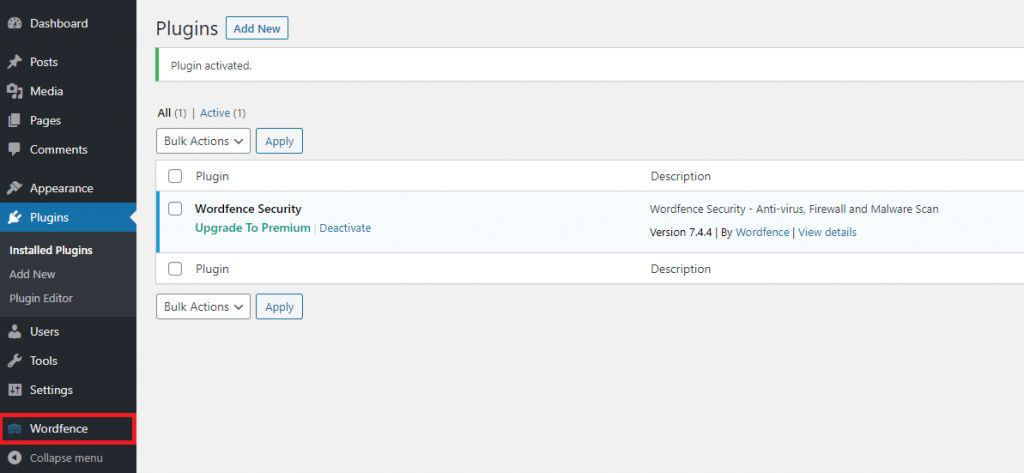
To give some quick background on what we are installing, Wordfence is a security plugin that we recommend to pretty much any WordPress site. With Wordfence you can secure your site against a variety of malicious attacks that I will cover in a future post.
After installation you will see the plugin show up under the plugins tab. Another thing to note is that for some plugins a new tab may appear where you can adjust its settings.
If you have any questions or run into any issues feel free to leave a comment down below or open a support ticket.
Visit Winhost to learn more about our WordPress Hosting solution
No responses yet