
Site hosting news, tutorials, tips, How Tos and more
![]()
Jetpack is one of the most popular plugins available for WordPress (with over 29 million downloads!), created by Automattic – the same people who made the WordPress app itself. It’s a Swiss Army knife for you site with over a dozen different functions all rolled into one plugin.
It includes essential tools like a website stats, subscriptions, social network sharing and a contact form. It will also hookup with WordPress.com to perform related posts and website uptime monitoring. And it’s free!
![]()
If you try to implement Jetpack on Winhost, it won’t work out of the box. By default, we filter requests to the xmlrpc.php file. WordPress.com will try to ping that file during the activation process and it will fail.
One of the reasons we block requests to the xmlrpc.php file is because of an exploit hackers can use to get your WordPress username and password. You can read about the exploit in this excellent Sucuri article.
If you don’t want to bother reading the article, in short, hackers can try thousands of username/password combinations with one request and try to brute force their way into your WordPress site.
But don’t worry, you can still get Jetpack to work by simply overriding our default request filtering. You just have to add this setting in your web.config file:
<configuration>
   <system.webServer>
      <security>
         <requestFiltering>
            <denyUrlSequences>
               <clear />
            </denyUrlSequences>
         </requestFiltering>
      </security>
   </system.webServer>
</configuration>
If you just have a WordPress site on our service, or if you used our App Installer to install WordPress, you might not have a web.config file on your site, so you’ll have to create one. Just follow these instructions:
You should now be able to activate the Jetpack plugin. But before you go, there’s the pesky security issue! Your xmlrpc.php file is now susceptible to that security exploit, which may allow hackers to get your username and password. Let’s fix that!
![]()
The best way to prevent the xmlrpc.php brute force exploit is to get SiteLock with TrueShield CDN. You will need both SiteLock and TrueShield. TrueShield will block those suspicious requests trying to get your username and password, and protect your site from all sorts of other bad stuff not covered in this article. (If hackers were limited to just one exploit, our jobs would be so much easier!) We highly recommend getting SiteLock and TrueShield. It will block malicious bots, comment spammers, and likely make your site faster, too!
Another solution would be to use Jetpack’s own Protect function. You have Jetpack installed, now use it! Just activate the Protect feature in Jetpack in the Admin panel. The Jetpack team confirmed that it works.
Finally, though perhaps foremost: always use a strong password for your site! Please don’t use qwerty123 or pa$$w0rd.
Actually, do all three – get SiteLock with TrueShield, activated Jetpack Protect, and keep those passwords strong!
Magento is one of the leading e-commerce platforms available today with a market share of about 30% among the 30 most popular ones according to Wikipedia. I’ve tried playing around with it in the past, but I was never able to install it and configure it correctly on Windows until now.
Prompted by one of our customer’s request for help, I decided to investigate the problem further. Although Magento was never designed to be supported under IIS (even their developers say so), it is entirely possible to run it under IIS, and I will show you how (and cover some pitfalls you might encounter along the way).
Unfortunately, to get Magento running on Winhost, you’re going to need to install IIS and PHP (preferably version 7.0+) on your own machine and install it there first. That’s because you’ll need to run a command through their CLI (Command Line Interface) to deploy some static files (i.e. .css, .js, etc.) so that it will render correctly in a browser.
It took me weeks to figure out, but the CLI won’t process an argument correctly (i.e. it doesn’t think it exists) unless it thinks Magento has been installed already (i.e. you can’t just run the CLI after extracting the files from the .zip. You’ll need go through the browser setup wizard first.)
I’m afraid I won’t have time to go into details about how to install IIS and PHP on your machine because the process can be different for different versions of Windows, but there are plenty of guides out there on the Internet if you need help. You could even save yourself some time and trouble by using an all-in-one installer like EasyPHP Devserver.
Now, on to the tutorial.
First, you need to create a MySQL database through the Control Panel.
Click on the Sites tab.
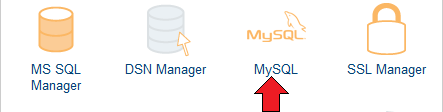
 Click on the link to your domain name and then click on the MySQL icon.
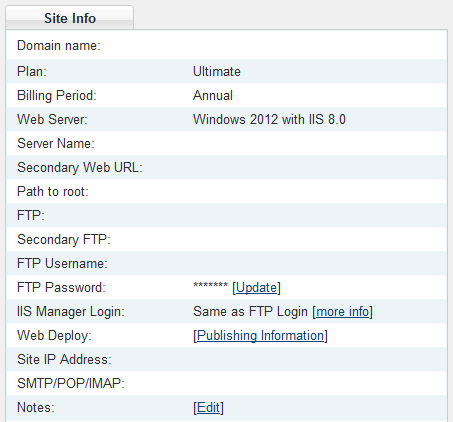
Click the Add button and enter the values for Database Name, Database User, and Quota. Click the Create button to finish creating the database. Now click on the Manage link and record the connection information (Database Name, Database Server, Database User, and Database Password) on a piece of paper or a text editor such as Notepad.
Now go back to the Site Tools section of the Control Panel (where you clicked on the MySQL icon) and click on the PHP Version icon.
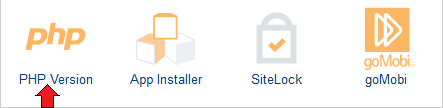
Set the PHP version to 7.0 – Beta in the drop-down box and click on the Update button.
After you have setup IIS and PHP on your local machine, download the source code from Magento’s website.
Extract the contents using a decompression program such as WinZip or 7-Zip. Now, open up the file DbValiditor.php which is in .\setup\src\Magento\Setup\Validator in a text editor and edit line 106.
Change it from:
return $this->checkDatabaseName($connection, $dbName) && $this->checkDatabasePrivileges($connection, $dbName);
To:
return $this->checkDatabaseName($connection, $dbName); //&& $this->checkDatabasePrivileges($connection, $dbName);
Basically, you want to comment out the database privileges validation check, or you will encounter this error when you get to Step 2 of the installation wizard:
Database user does not have enough privileges. Please make sure SELECT, INSERT, UPDATE, DELETE, CREATE, DROP, REFERENCES, INDEX, ALTER, CREATE TEMPORARY TABLES, LOCK TABLES, EXECUTE, CREATE VIEW, SHOW VIEW, CREATE ROUTINE, ALTER ROUTINE, EVENT, TRIGGER privileges are granted to table ‘mysql_#####_magento’.
You get this error because some permissions cannot be granted to you in a shared hosting environment (e.g. CREATE DATABASE).
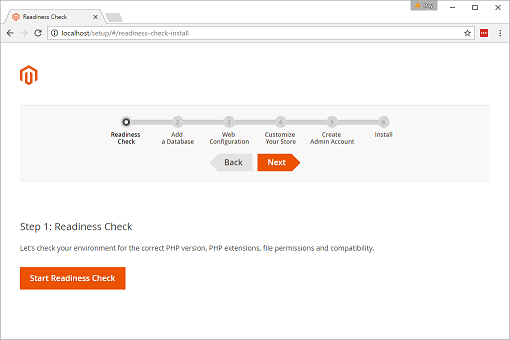
Add a site to IIS, move the extracted files to new site that you created, and then launch the site in a browser. If everything has been installed and configured correctly, it will start a wizard, and you should get a screen like the one below.
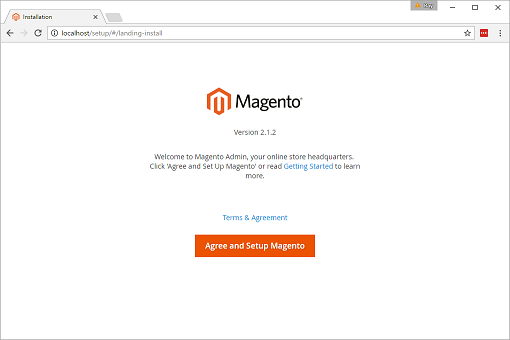 Click on the Agree and Setup Magento button to continue.
Click on the Start Readiness Check button to make sure everything is configured correctly (e.g. you might need to enable some PHP extensions before you can continue). Click on the Next button if everything checks out.
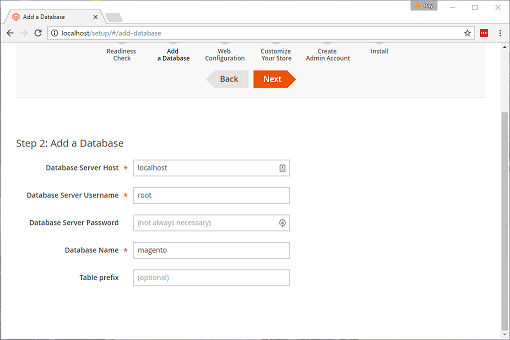
On this page, fill out the fields with the connection string information to your Winhost database that you recorded earlier. Click on the Next button to proceed.
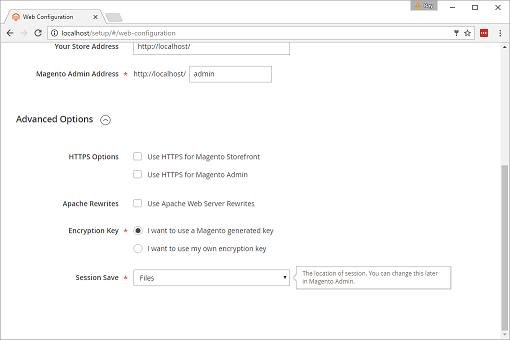
On this page, you can change the default Magento Admin Access directory. You should definitely change the Your Store Address field to that of your domain name and uncheck Apache Rewrites. Click on the Next button to continue.
There’s nothing on this page that needs to be changed, so you’re welcome to customize Magento further if you want before clicking on the Next button.
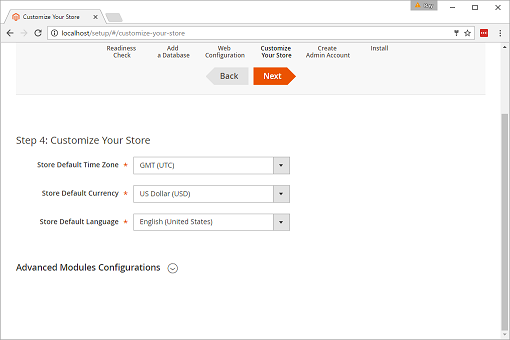
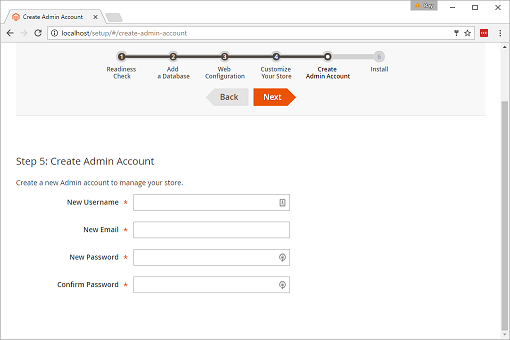
Page is self-explanatory. Click on the Next button when you’re done.
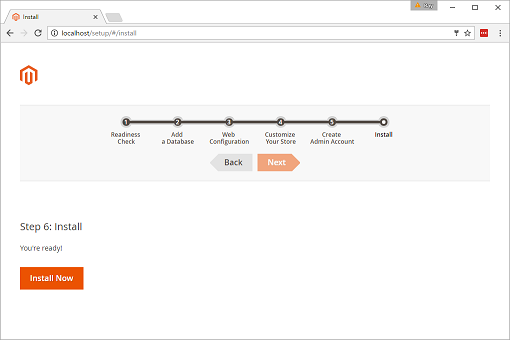
Like the page says, you’re ready. Click on the Install Now button.
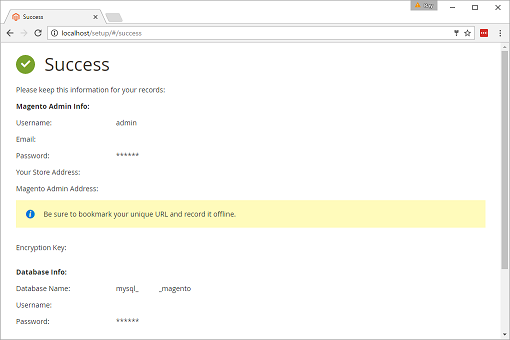
Once the installation has completed, you should see a screenshot like the one below.
Edit your php.ini file and make sure your memory limit is set to at least 256 MB. The following is the line you should look for with the correct markup:
memory_limit = "256M"
This should prevent the error below from being thrown when executing the next step. (I had mine set at 128 MB when I encountered the error.)
Check https://getcomposer.org/doc/articles/troubleshooting.md#memory-limit-errors for more info on how to handle out of memory errors.
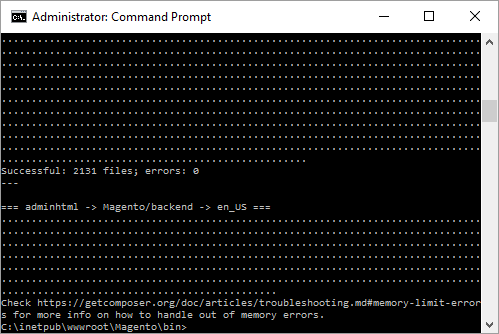
Now open up the command prompt with Run as administrator and navigate to Magento’s bin directory and type in the following command:
php magento setup:static-content:deploy
This will deploy the necessary files to the \pub\static directory that will render Magento’s UI correctly. If it’s successfully, you should get the following message:
New version of deployed files: 1476659614
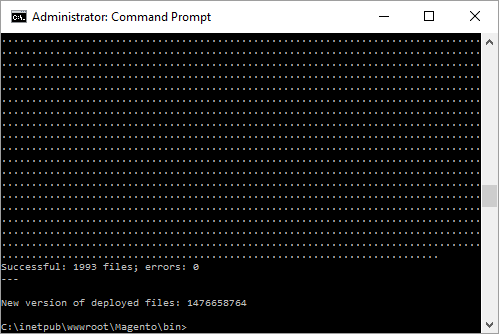
If you encounter the error I mentioned earlier, you could also try running the command again (this also worked for me). You just need to make sure each section says “Successful”, and it ends with “New version of deployed files”, otherwise, you may have some further troubleshooting to do.
Create a web.config file with the following markup and place it in the root of the Magento installation:
<?xml version="1.0" encoding="UTF-8"?>
<configuration>
  <system.webServer>
    <rewrite>
      <rules>
        <rule name="Imported Rule 1" stopProcessing="true">
          <match url=".*" ignoreCase="false" />
          <conditions>
            <add input="{URL}" pattern="^/(media|skin|js)/" ignoreCase="false" negate="true" />
            <add input="{REQUEST_FILENAME}" matchType="IsFile" negate="true" />
            <add input="{REQUEST_FILENAME}" matchType="IsDirectory" negate="true" />
          </conditions>
          <action type="Rewrite" url="index.php" />
        </rule>
      </rules>
    </rewrite>
  </system.webServer>
</configuration>
This is required so you can access the Admin Interface.
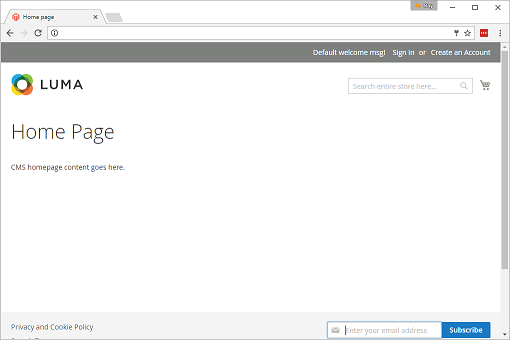
Upload all the files to your Winhost account. Now, enter the URL of your domain in a browser. You see a screen like the one below.
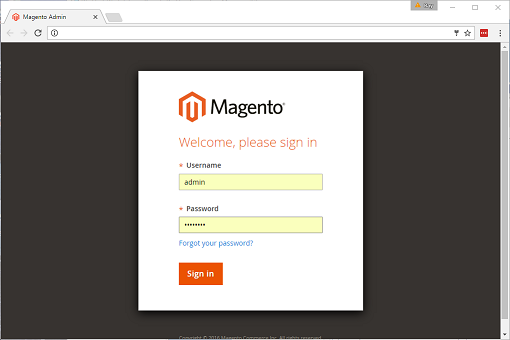
And if you try to access the Admin Interface, you should get a sign in screen that looks like this.
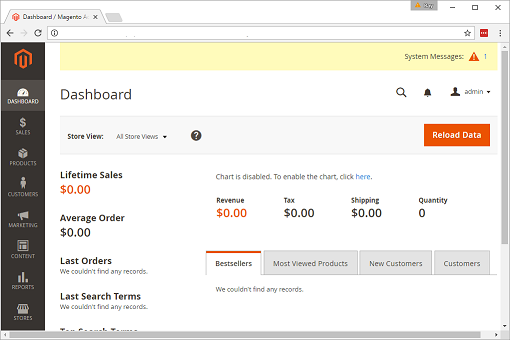
After signing in, the dashboard should look like this.
That’s it! Magento is ready to go. Since I’m not a Magento expert/developer, I can’t comment further, but from the documentation I read, it looks like you might need to execute this command:
php magento setup:static-content:deploy
Every time you change something (code, plug-in, theme, etc.). I recommend doing the development work on your local machine first, testing it, and then re-deploy all the files again to the server to make updates.
![]()
Now that we support it, here’s a quick tutorial on how to deploy an ASP.NET Core 1.0 Application to Winhost using Web Deploy.
Please note that you cannot publish to a sub-directory using Web Deploy at this time due to a bug which Microsoft will correct at a later date. If you want to publish your application to a sub-directory, you will need to use FTP.
![]()
Note: The manual methods in this tutorial are great, but if you’re looking for a “set-it-and-forget-it” automated backup solution, we offer a site backup service that can also back up your MS SQL and MySQL databases. Read about it on our site, or activate it in Control Panel. It’s easy, it’s inexpensive and it’s cool. What more could you ask for?
Making a backup in MySQL workbench is a pretty easy task once you know what to do, but it can be a little confusing the first time around. Allow us to save you some time with these simple instructions.
Version 6.3.7 is shown here, and of course future versions may differ. Download MySQL Workbench here (you’ll need a free Oracle account if you don’t already have one – just click the “Register” link in the upper right corner of that download page).
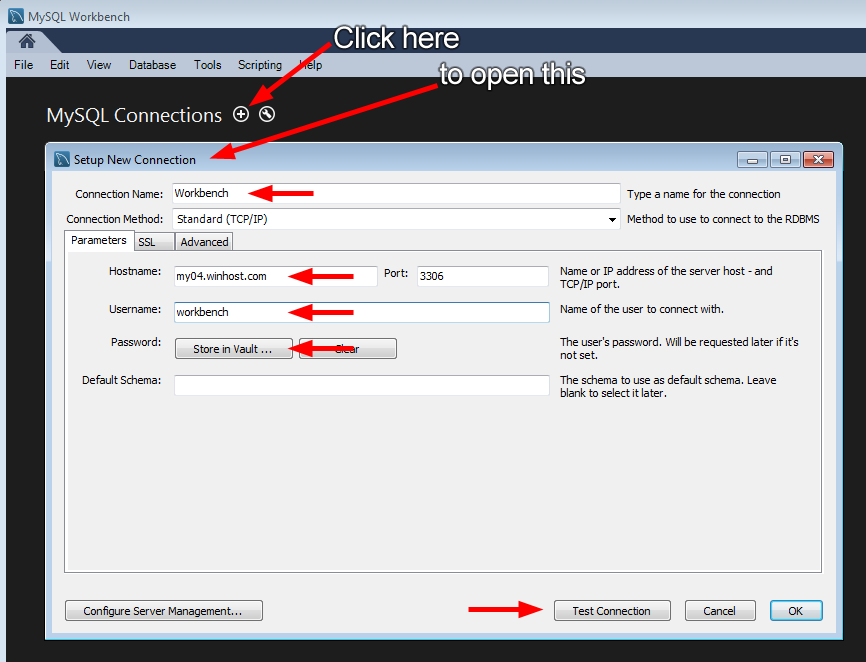
First thing you’ll need to do in Workbench is connect to your database.
If everything is correct you’ll see the successful connection box.
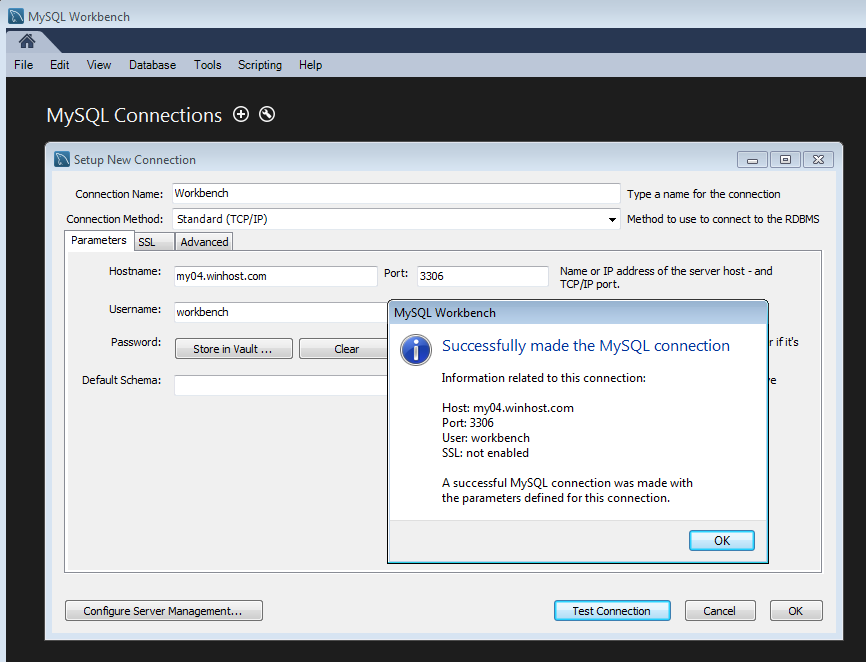
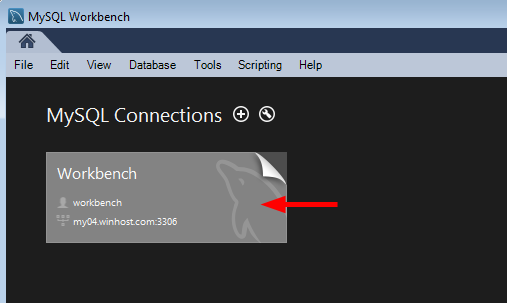
Go ahead and close that, and click the connection that you just set up.
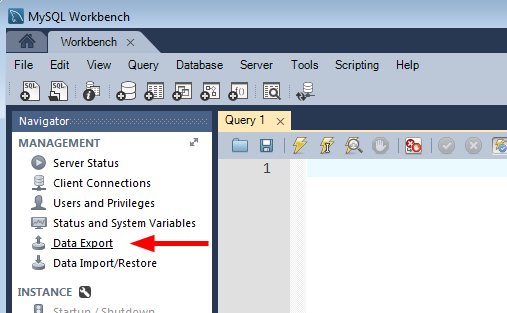
Click “Data Export.”
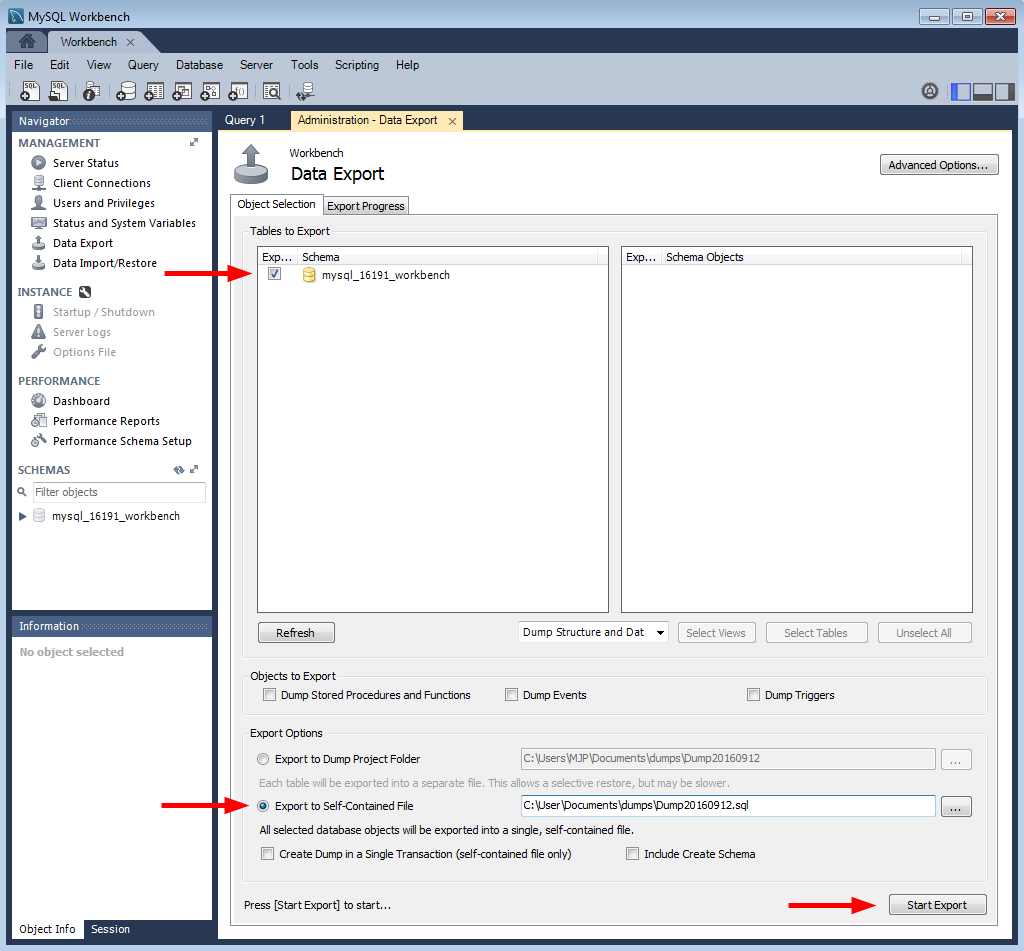
There are a lot of options on the next screen. For the purposes of this how-to we’re just making a simple backup of the entire existing database, so we’re not going to use most of those options. But as you can see, you can do a lot more than just a simple database dump here.
If everything goes according to plan you’ll see the “Export competed” dialog, and you’ll be all set. Your database is backed up for development use or simply for safe keeping.
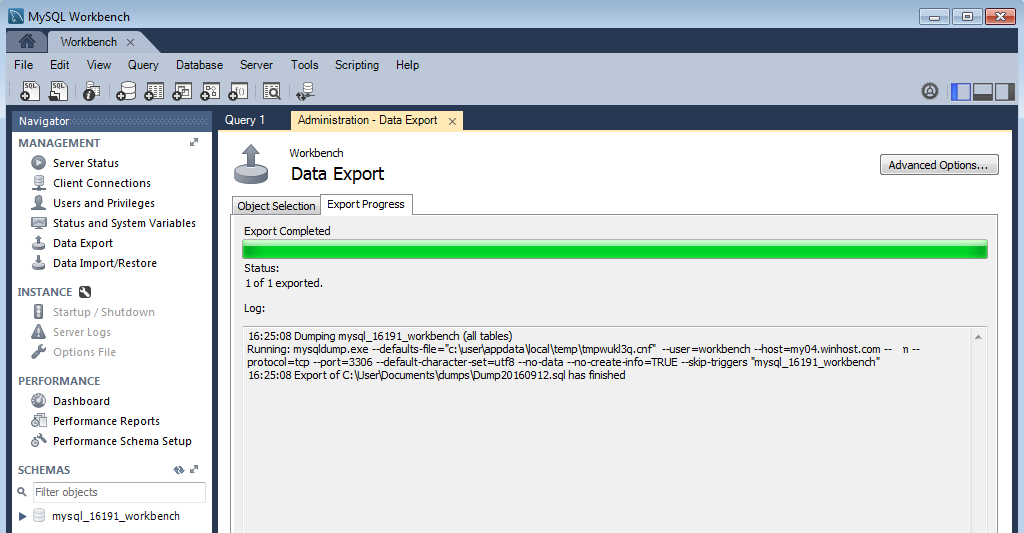
That’s all there is to making a backup.
But check out the “Data Import/Restore” link right under the “Data Export” link. As you might have guessed, you use that link to restore a locally stored backup up to the MySQL server here at Winhost. We’ll talk about that in a future article.
![]() It’s important to keep your web applications up-to-date. This prevents known vulnerabilities from being exploited and wreaking havoc on your site. That goes for any third-party software you might use on your site, but today we’re going to talk about updating DotNetNuke.
It’s important to keep your web applications up-to-date. This prevents known vulnerabilities from being exploited and wreaking havoc on your site. That goes for any third-party software you might use on your site, but today we’re going to talk about updating DotNetNuke.
The most important thing before upgrading is to back up your current DotNetNuke site. Also, if you are using any third-party themes or modules, please contact the author(s) before upgrading to make sure they are still supported in the latest version of DNN.
Backing up the MS SQL database
This will place the backup of your MS SQL database within the App_Data directory with the file extension “.bak.”
Backing up your web site files via FTP
Downloading the upgrade files and Extracting
Important: you must know your SuperUser account login in order to upgrade.
You can download the Upgrade files through DNN’s download page.
Uploading the updated files
Upgrading
![]()
Over the years there have been a number of customers who have asked if Winhost supports NoSQL databases. There is actually one NoSQL solution you can install in our environment, and it’s RavenDB. In this guide, I will show you how to get started with it (i.e. installed and running) if you want to try it out. The instructions have been taken from the official site and modified for our hosting environment.
First, download the .zip file from the RavenDB website and then extract it. Open up the “Web” folder and make the following changes to the web.config file in that folder:
Change line 3 from:
<add key="Raven/WorkingDir" value="APPDRIVE:\Raven\" />
To:
<add key="Raven/WorkingDir" value="APPDRIVE:\web\ftpusername" />
Replacing ftpusername with the correct value.
Add/Insert the following in between the <system.web></system.web> XML tags to enable Full trust:
<trust level="Full" />
Once you have finished making the changes to the web.config file, save it. Then upload the entire “Web” directory into your hosting space.
Using the Winhost Control Panel, create an Application Starting Point for the “Web” folder. Open the “Web” folder using a browser (e.g.: http://www.HostingAccountDomain.com/web).
You’ll get an error regarding WebSockets. You can open up a support ticket to have it enabled and have “Overlapped Recycle” disabled in your App Pool settings, and that should complete the installation so that you can try it out.
If you’ve never heard of a CDN or you’re not sure exactly what it is, CDN is an acronym for Content Delivery Network. What a Content Delivery Network does, in very basic terms, is serve your site files from multiple data centers all over the world so that your visitors download files from a server near them and experience faster page loads. As a bonus, you get to experience reduced bandwidth use due to your content being cached at the various locations on the network.
How does it work? You change your domain’s name servers to point to the CDN, which then handles the requests for your site. When a request comes in to the CDN, here’s what it does:
That makes for a better visitor experience, since visitors are getting files from a local server. And it saves bandwidth on your Winhost account, since the files don’t have to come from the Winhost servers every time they are requested.
There are a lot of CDNs these days, and their setups vary in levels of difficulty. We’re offering a CDN that’s really easy to set up, and if you already have a SiteLock security plan for your site (and you really should, but that’s a separate article), you can add the basic CDN for free.
If you’re thinking that sounds great, but your site doesn’t contain much static content, SiteLock TrueShield CDN can also serve dynamic content from more than 25 data centers around the world via its Dynamic Content Caching system. It’s all completely automatic, but you have control over the cache and can purge files any time you need to, for instance when you update or change content on your site.
On average, sites using the SiteLock TrueShield CDN load 50% faster and use 40-70% less bandwidth.
The TrueShield CDN can also handle end to end encypted SSL (https) requests, and perfoms advanced CDN optimizing techniques, including content minification, image compression, session reuse optimization, “on the fly” file compression, TCP optimization & connection pre-pooling and progressive image rendering.
The TrueShield CDN isn’t only about speed, it also offers a layer of protection for your web applications. Does your site use WordPress? If so, you probably know that WordPress is a common target for exploits, and if someone gets into your WordPress installation, the cleanup can be a nightmare, not to mention the probable damage to your site and your reputation.
The SiteLock TrueShield CDN protects you against many web-based exploits with a Web Application Firewall, which blocks malicious bots from accessing your site, and depending on the plan you use, can protect your site against many SQL injections and cross site scripting. Whether your site uses a third party application that runs on a database or works with a database you designed and built, the Web Application Firewall can help keep you safe.
I know this sounds like a commercial for SiteLock, but we’re big fans of their service, and we’re able to offer you some really cool and useful tools through them. We see the damaging effects of website exploits every day, and as I mentioned, cleaning up after them is no fun. It’s either going to cost you time or money – sometimes both. So prevention, as they say, is the best medicine.
![]() Broken image links are a common problem when you move your WordPress installation to another domain name or even to another subfolder. WordPress uses absolute paths to link images and objects to the page. The absolute path is usually defined during the initial WordPress setup process when you first configure WordPress. No problem right? You understand and know what absolute paths mean, and WordPress is working with no problems.
Broken image links are a common problem when you move your WordPress installation to another domain name or even to another subfolder. WordPress uses absolute paths to link images and objects to the page. The absolute path is usually defined during the initial WordPress setup process when you first configure WordPress. No problem right? You understand and know what absolute paths mean, and WordPress is working with no problems.
But what happens when you change the domain name for your WordPress site, or you move your WordPress site to a subfolder? Now you call on your WordPress site and some links are broken, images don’t show up, or some of the pages may come up with a 404 not found error. You right click on an image or object on the page and you can see the URL address does not match with the URL address on the address bar.
What a mess. Now what?
Fear not, this is actually a fairly easy fix!
There are a few easy way to fix this. The first thing to try is logging in to the WordPress admin section and changing the values in Settings > General. But sometimes the location change can make logging in to the admin section impossible, in which case you’ll want to try setting the new URL by either defining the SiteURL and Home variables in your configuration file, or going in to the database and changing them there.
Updating the wp-config.php file
Log into your site via FTP and look for the WordPress wp-config.php file. Open the file with a text manager such as NotePad and add these lines. Typically you should be able to add the lines under the connection string section of the configuration file.
/**Manually Define SiteURL and Home */
define(‘WP_HOME’,’http://www.newdomain.com’);
define(‘WP_SITEURL’,’http://www.newdomain.com’);
If you have just moved the WordPress files to a subfolder then the URL would look somewhat like this.
define(‘WP_HOME’,’http://www.newdomain.com/newsubfolder’);
define(‘WP_SITEURL’,’http://www.newdomain.com/newsubfolder’);
In my opinion, this is actually the easiest way to fix this. But some site owners don’t like to hard code values into the page, so the second way to solve the problem is to update the database. WordPress uses MySQL as it’s back end, and the SiteURL and HOME URL values are stored in there in plain text, so they’re easy to change.
Updating your WordPress database:
Log into your WordPress database. The table you will be looking for is wp_options. wp_ is the default prefix that WordPress will use in the initial setup. You may have used a different DB prefix during set up, but in general what you are looking for is the “Options” table.
Run this SELECT command against the Options table.
USE [Database Name];
SELECT option_name, option_value FROM wp_options
WHERE option_name="home" OR option_name="siteurl";
You should see results similar to this.
| option_name | option_value |
| home | http://www.olddomain.com |
| siteurl | http://www.olddomain.com |
To update the option_value column, just run this command against your database.
USE [Database Name];
UPDATE wp_options
SET option_value="http://www.newdomain.com"
WHERE option_name="siteurl" OR option_name="home";
If you are moving the WordPress site to a subfolder, the option_value would include the path to the subfolder:
SET option_value="http://www.newdomain.com/subdomain"
That should be it. Either method will work. But don’t forget, at Winhost we can migrate your WordPress website for you. We’ll create and restore the MySQL database, update your connection string and make sure the absolute path it setup correctly. Simply contact our Support Department for more details on what we will need to migrate your site for you.