In some situations, you may not be able to use FTP or Microsoft Web Deploy to upload your applications (workplace FTP restrictions, etc.). To help solve that problem we’ll show you how to install a simple .NET file manager, FileVista, on your site. You can use this tool to upload and download files to your site.
1. Download FileVista from Gleamtech. The single user license is free.
2. On the download page, make sure you select the “Web Deploy Package.”
3. Once you download the zip file, extract it to a temporary location on your computer.
4. Within the extracted directory, you should see a directory named FileVista.
5. Upload the contents to a subdirectory of your site.
6. Once the upload process is completed, log in to the the Site Tools section of Control Panel and click the Application Starting Point icon.
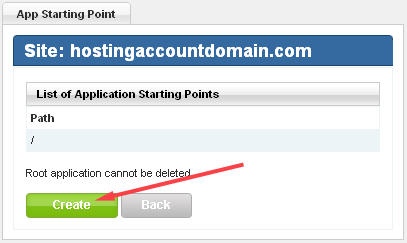
7. In the App Starting Point tool, click Create.
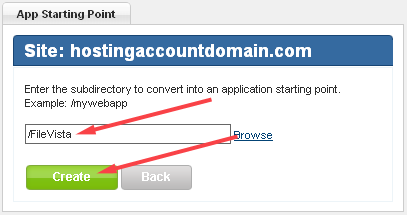
8. Enter the name of the folder to which you uploaded FileVista, and click Create.
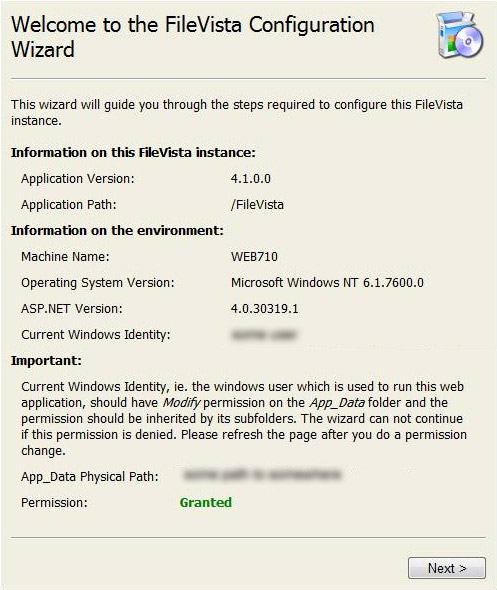
9. Now, on your site, navigate to the location where you installed FileVista, in this case, HostingAccountDomain.com/FileVista. You should see the welcome wizard:
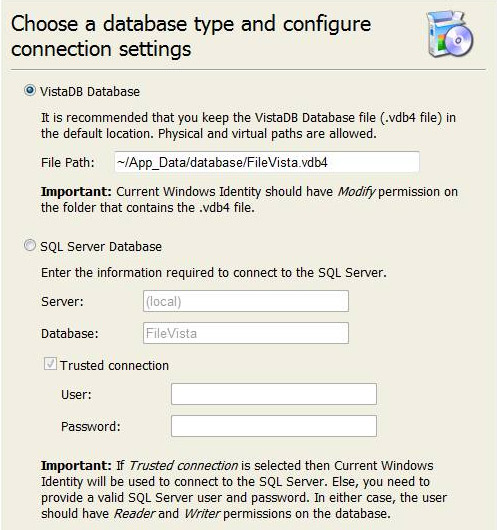
10. Click Next. On the next screen, you can choose whether you want to use a file based database or SQL server. We recommend using the file based database unless you intended to have many users.
11. Click Next. You should see a Pop up displaying the preinstallation test result. Click OK.
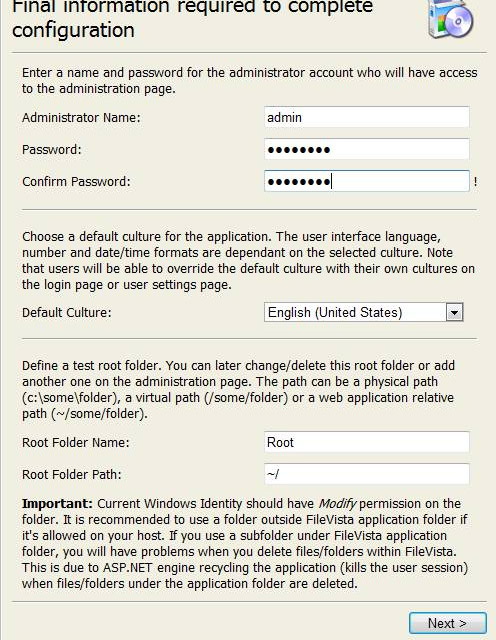
12. On the next page, you’ll configure the following:
a. Set the administrator username and password.
b. Set the default language.
c. Set the Root Folder. The root folder is where the file manager will point when you log in. If you intend to use this tool to manage your entire site, set the root folder to: /
13. Click Next and you’re finished. You’ll be taken to the login screen.
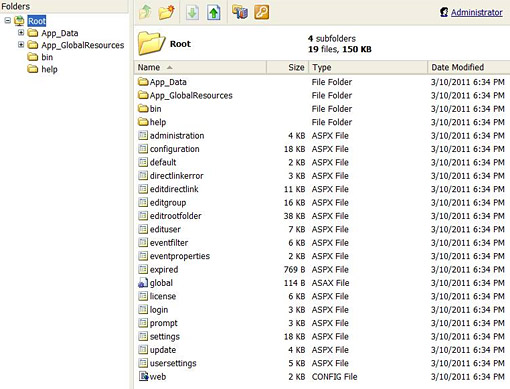
14. Log in with the username/password you specified during installation.
15. You should now see a pop-up asking if you want to use the free version or a commercial version. Select the free license mode unless you have purchased the product.
No responses yet