
Site hosting news, tutorials, tips, How Tos and more

mySQL 8 is now available for all our hosting plans.
Visit Winhost to learn more about our mySQL hosting solutions
Nopcommerce 4.3 was released and with it, the ability to use a MySQL database. In this post I’ll be showing you how to configure your nopCommerce 4.3 with a MySQL database.
Like many applications, nopCommerce is installed in two steps. First, you install the nopCommerce application into your site and then you complete the software configuration by providing information through an Installation Wizard that you access through your web browser.
You can use our Application Installer to install nopCommerce 4.3 in your site. Follow the instructions in the first part of this Knowledge Base article to get the initial nopCommerce install done but you won’t need to create a new MS SQL database. The rest of the information in this blog post will give instructions on how to create a MySQL database and how to complete the nopCommerce Installation screen.
Now that you have installed nopCommerce in you site, we want to pull up the nopCommerce Installation screen to finish configuring nopCommerce. Assuming that your domain is not yet resolving to Winhost, you can complete the nopcommerce configuration using the Secondary URL we provide you. Here is how to find the Secondary URL.
Enter the Secondary URL into your web browser. You will be presented with the nopCommerce Installation screen. In this screen, you will provide specific information about your store and hosting account to finish configuring the application.
Enter the following information into the nopCommerce Installation screen.
Next, you need to create a MySQL database through the Winhost control panel. Here are step-by-step instructions.
Now, you need to specify that you will use MySQL as your database and tell the nopCommerce application where the database is and how to access it. So, go back to the nopCommerce Installation screen and have the Winhost Control Panel MySQL section open in another browser tab so you can go back and forth to get and enter your information.
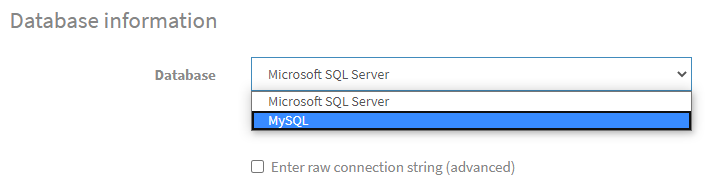
In the Database Information Section of the nopCommerce Installation screen, click on the Dropdown menu and select MySQL as shown below:
Click on the Install button and wait for the installation to complete. This will take a few minutes.
Enjoy
Visit Winhost to learn more about our nopCommerce hosting solution
![]()
We have had a couple tickets come in from customers about backing up their MySQL database and how they followed the steps in a previous blog article and ran in to some trouble. I am going to run through the process I used to get this working and hopefully this should clear up any questions and make the process less confusing.
Before we start you will need the to have MySQL Workbench installed. If you don’t have it, you can get it from here:
https://www.mysql.com/products/workbench/
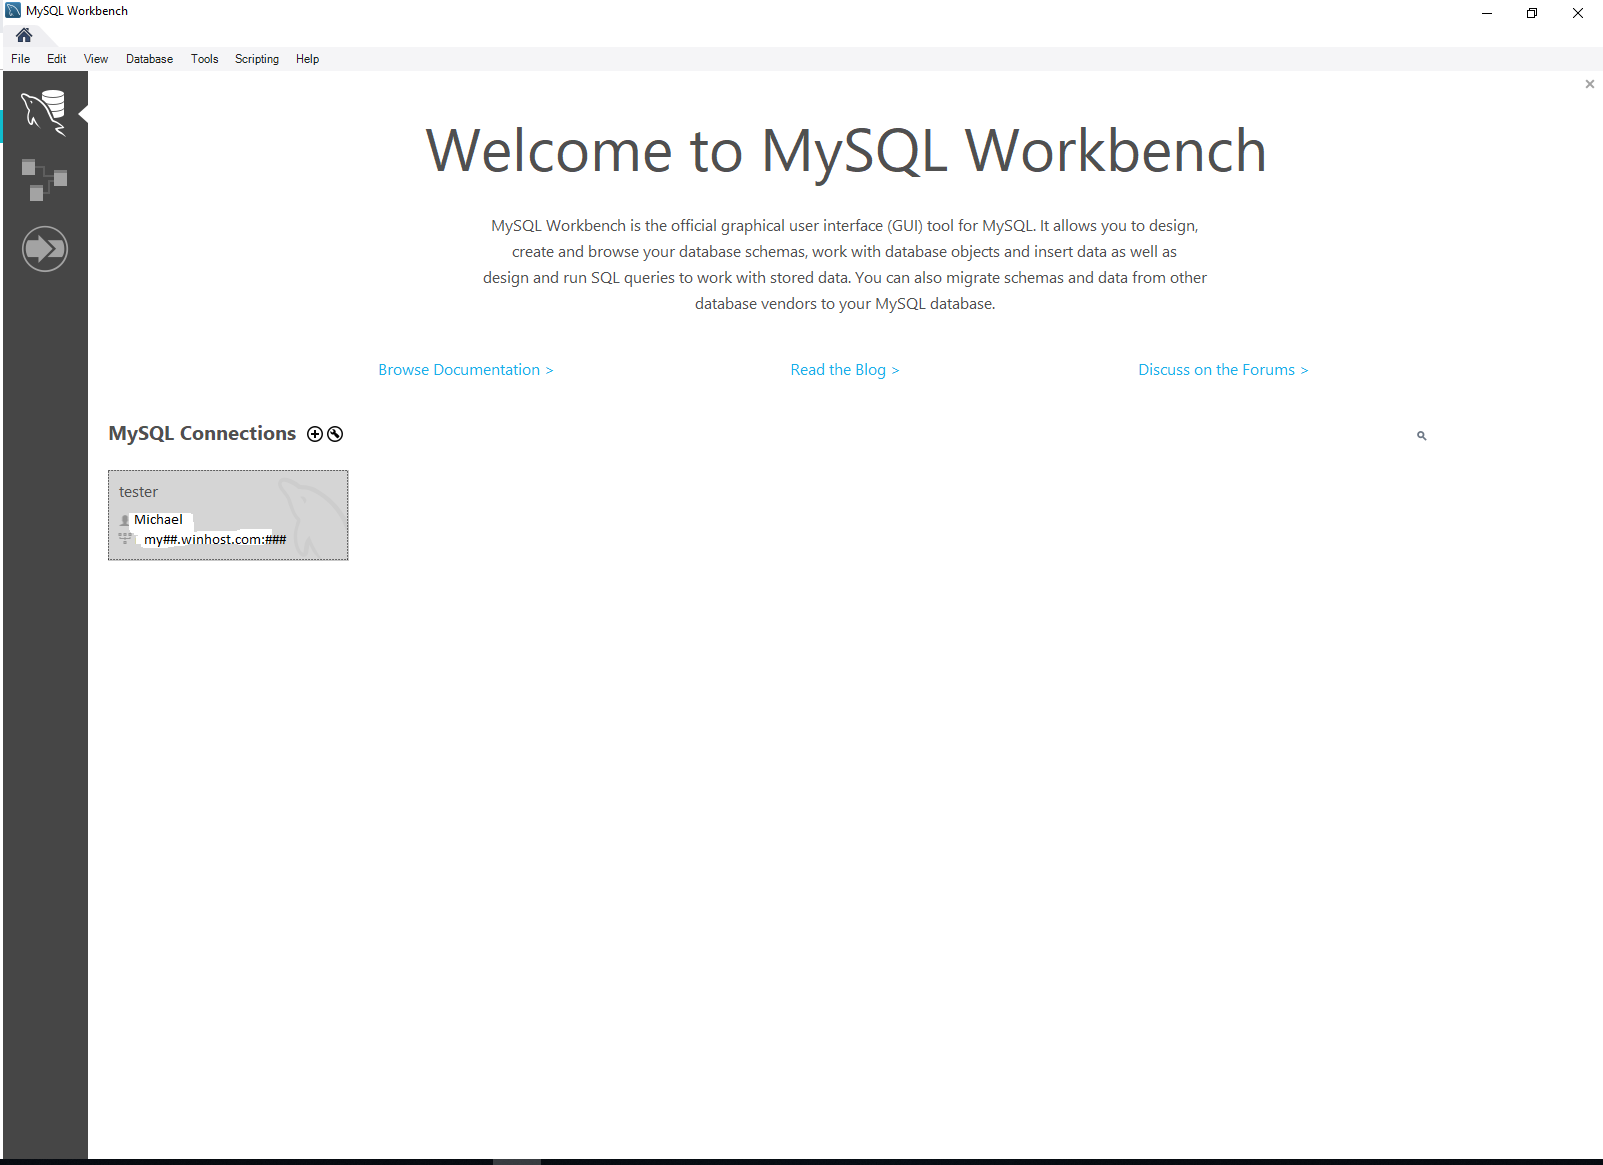
So once you have Workbench installed go ahead and open up MySQL Workbench and you should see the screen below (minus the red arrow). In this post, I used MySQL Workbench v8.x.

You’ll want to click on that plus sign that the red arrow is pointing to (above) and you will be prompted to enter the following info:
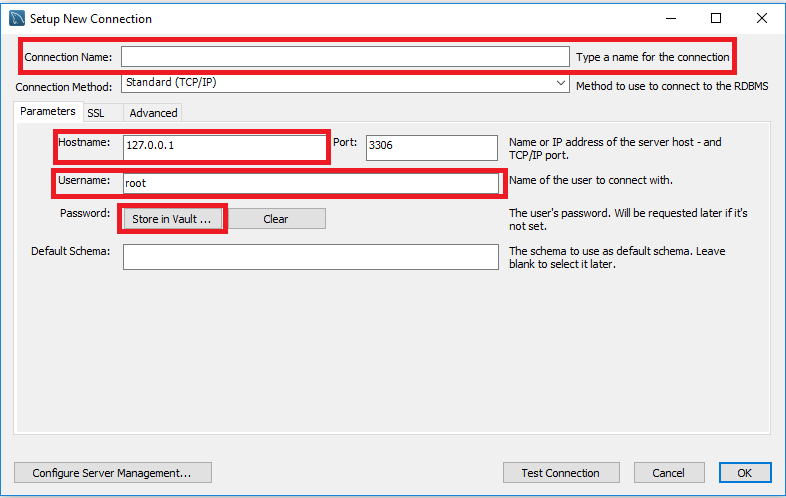
Connection Name: Any name to identify the database.
Hostname: This will be the Database Server found in Control Panel under MySQL | Manage for the database you want to backup. Should look something like: my##.winhost.com
Username: This will be the Database User found in the same place as the last step.
Password: Click on Store in Vault and you’ll be prompted to enter a password. This will be the password set for the database if you never set it, it will be the same as your control panel password.
You can click on Test Connection or OK and it will verify the information you entered and say connection successful. If you get any errors, please double check the information you entered.
After that you should see something like this
Go ahead and double click on your newest connection to connect to the database.
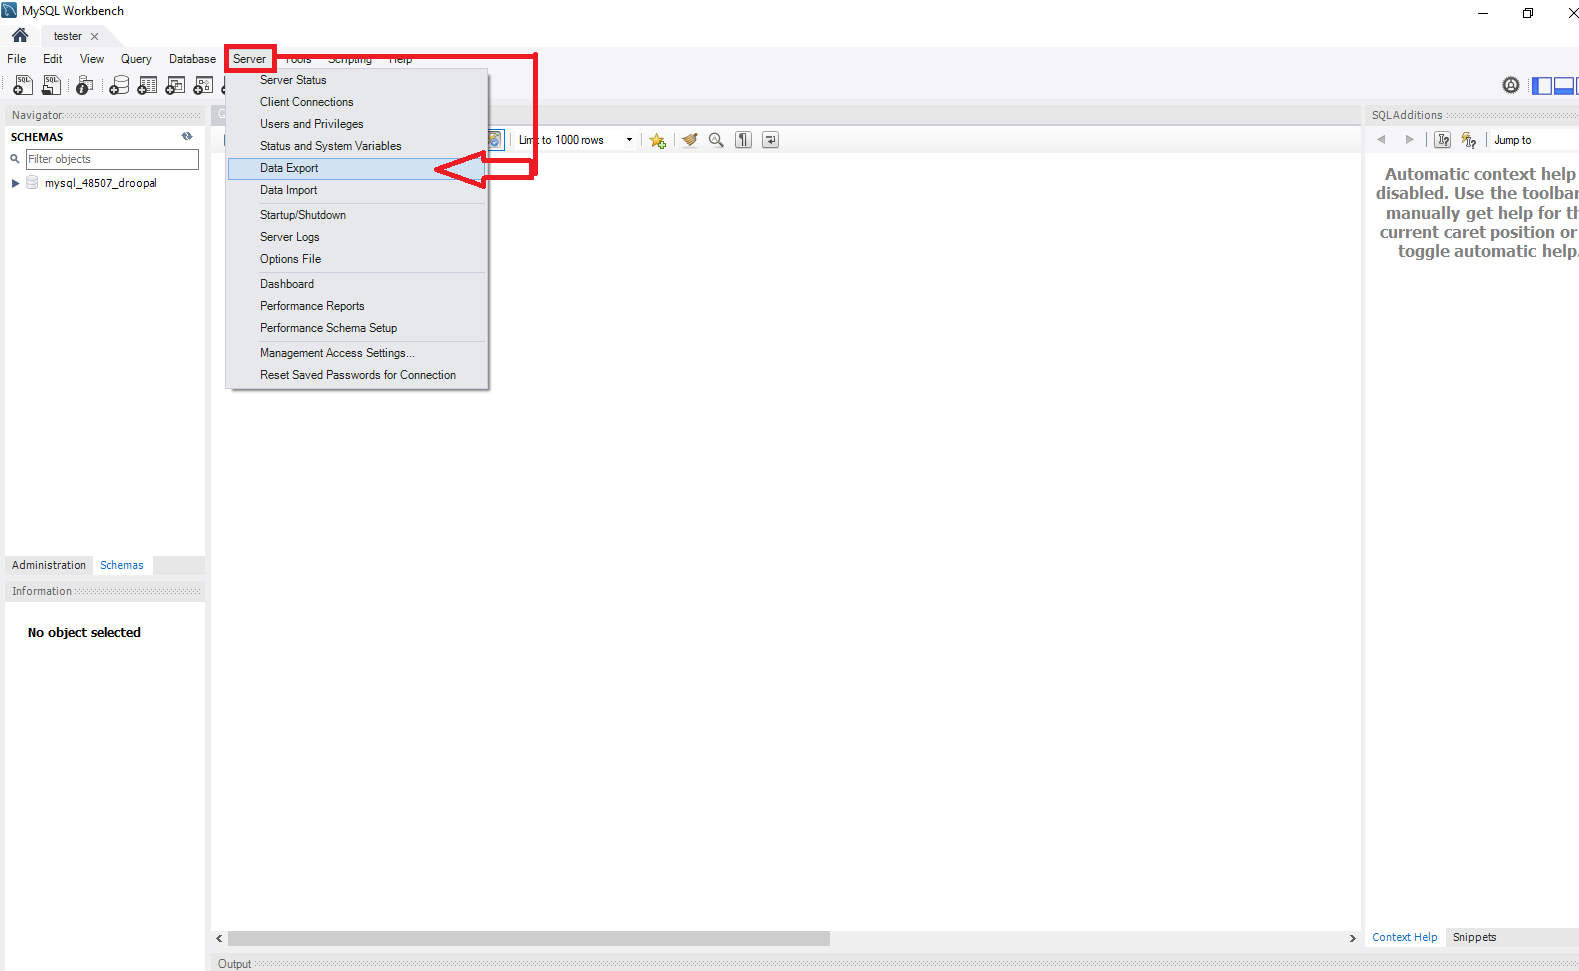
Now to begin the backup process click on Server > Data Export to be taken to a new page.
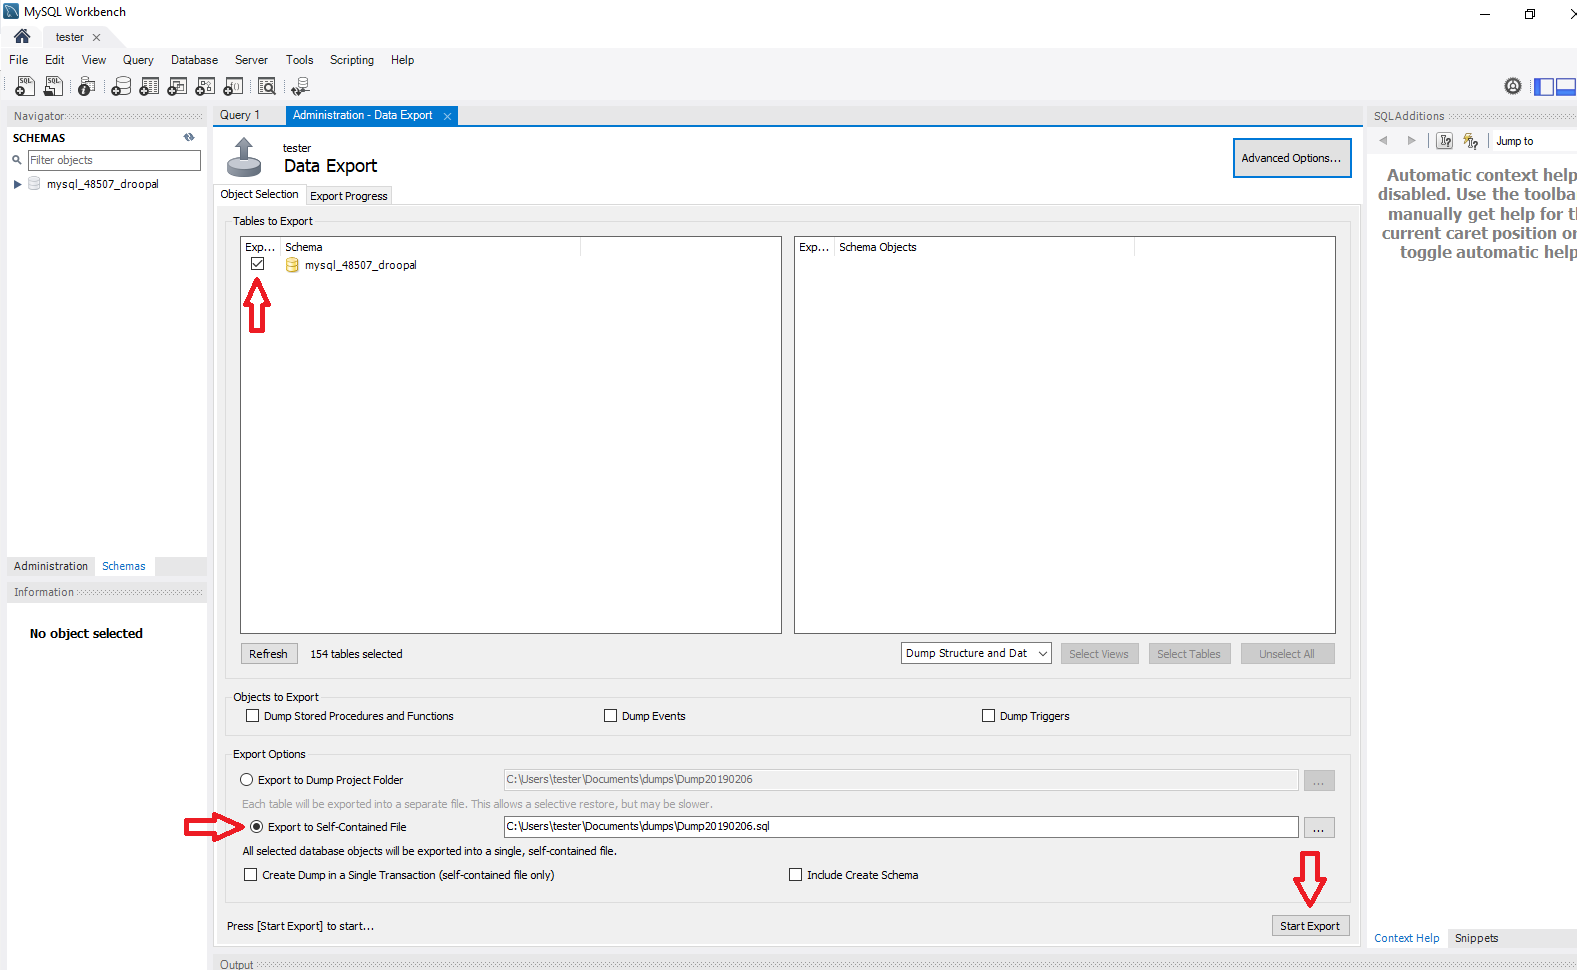
Begin by clicking the checkbox next to the database you want to backup. If you wanted to you can choose specific tables you want to include or exclude by clicking on the database. Make sure you click the option for Export to Self-Contained File and then click Start Export.
If you’re lucky everything works right away and you can find your database dump in the specified file path. If you’re like me however, you might get a warning like this.
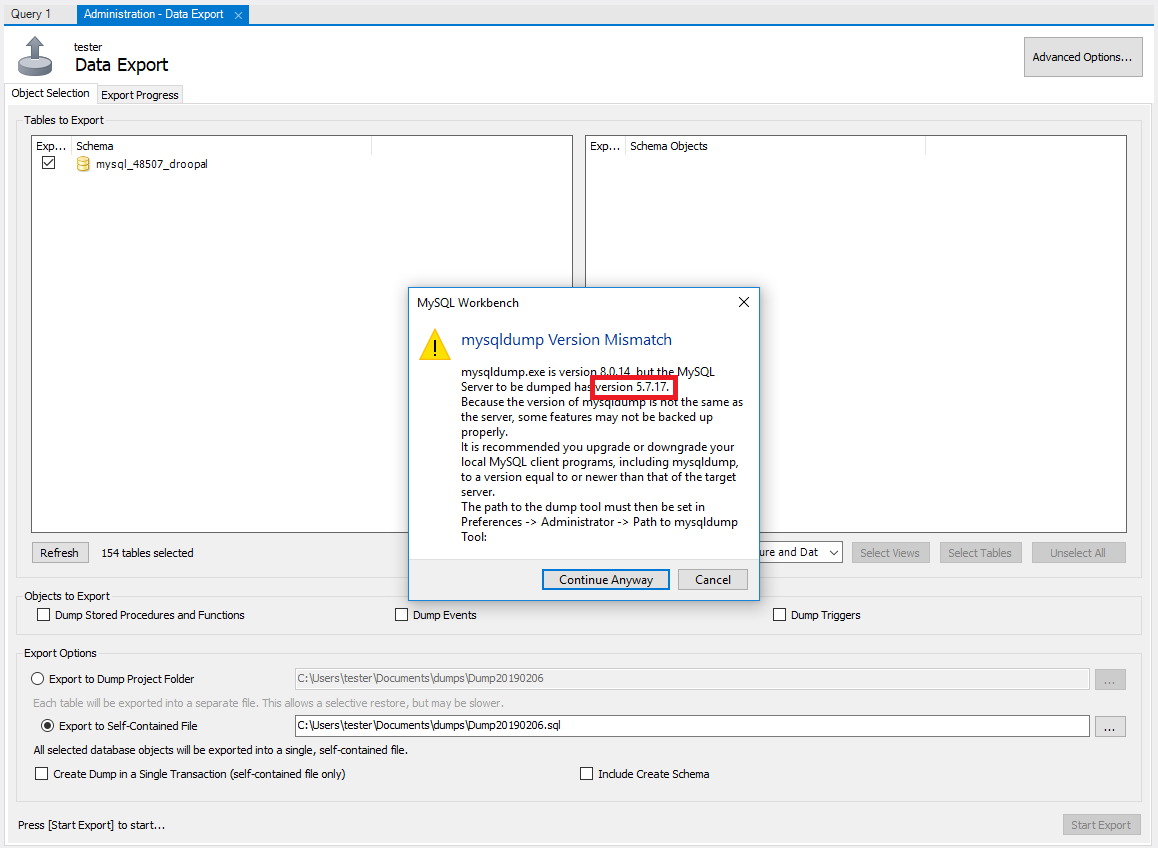
Now you can go ahead and try clicking Continue Anyway, but you will probably end up getting an error code that ultimately ends with “Operation failed with exitcode 2”. So, you’ll want to take a closer look at that warning you received particularly the version number that I have outlined in red. This could be a different number so make sure to check your warning message and not just use mine in this example.
Go to this link: https://dev.mysql.com/downloads/mysql/
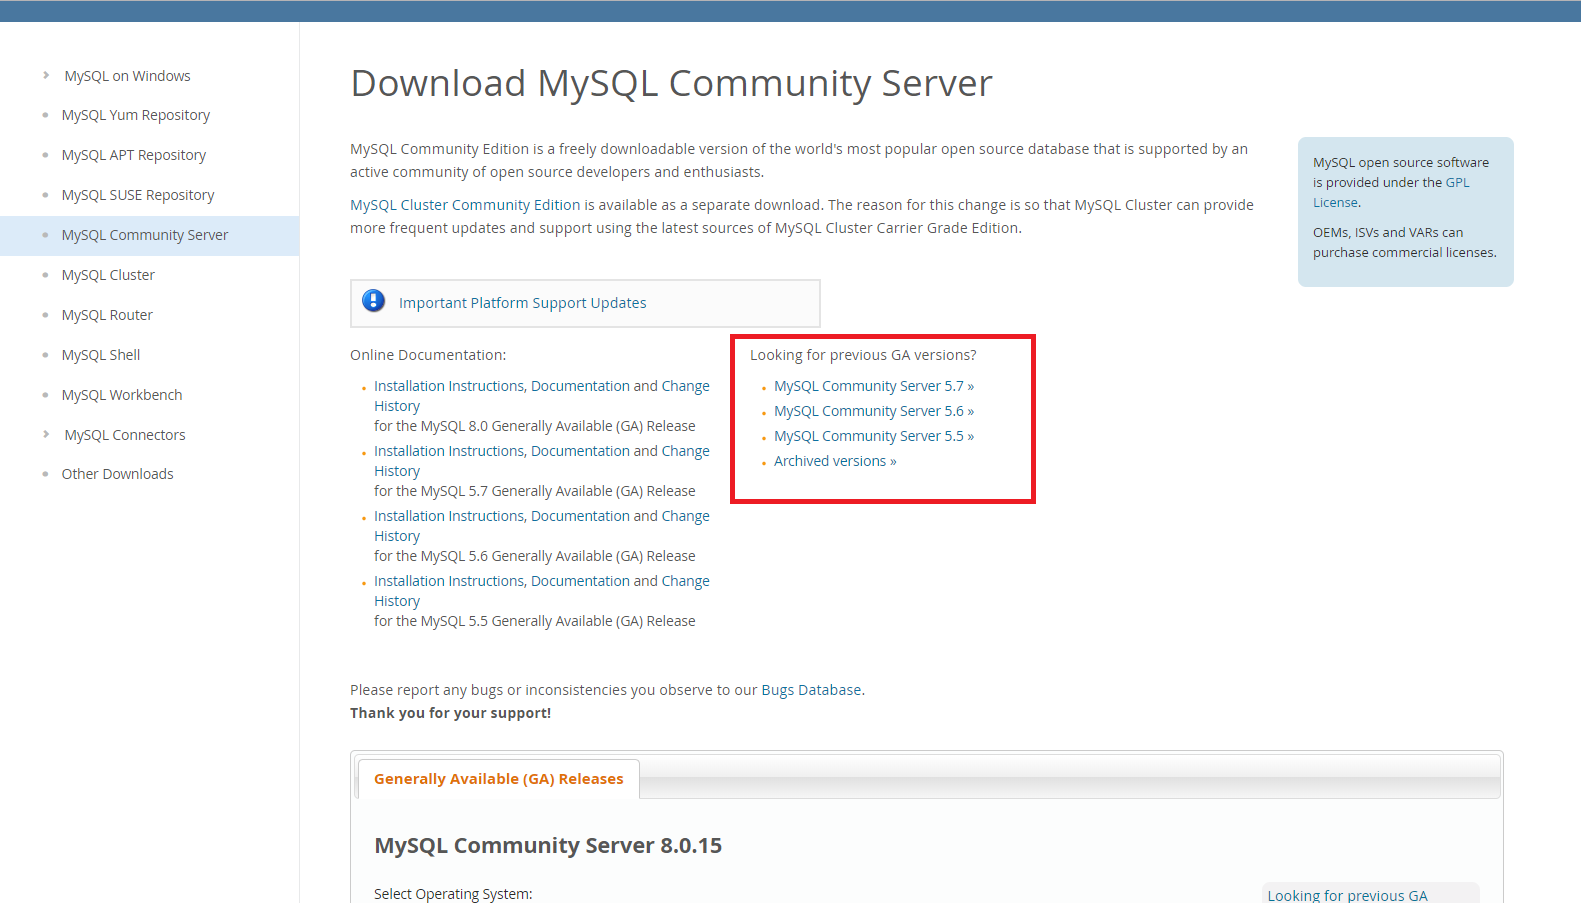
Look at the version that was outlined in red in the previous picture and look for the Community Server with the numbers matching the first two of your version number. In my case I’m looking for Community Server 5.7.

Download the Zip file for your local machines operating system in my case Windows 64-bit.
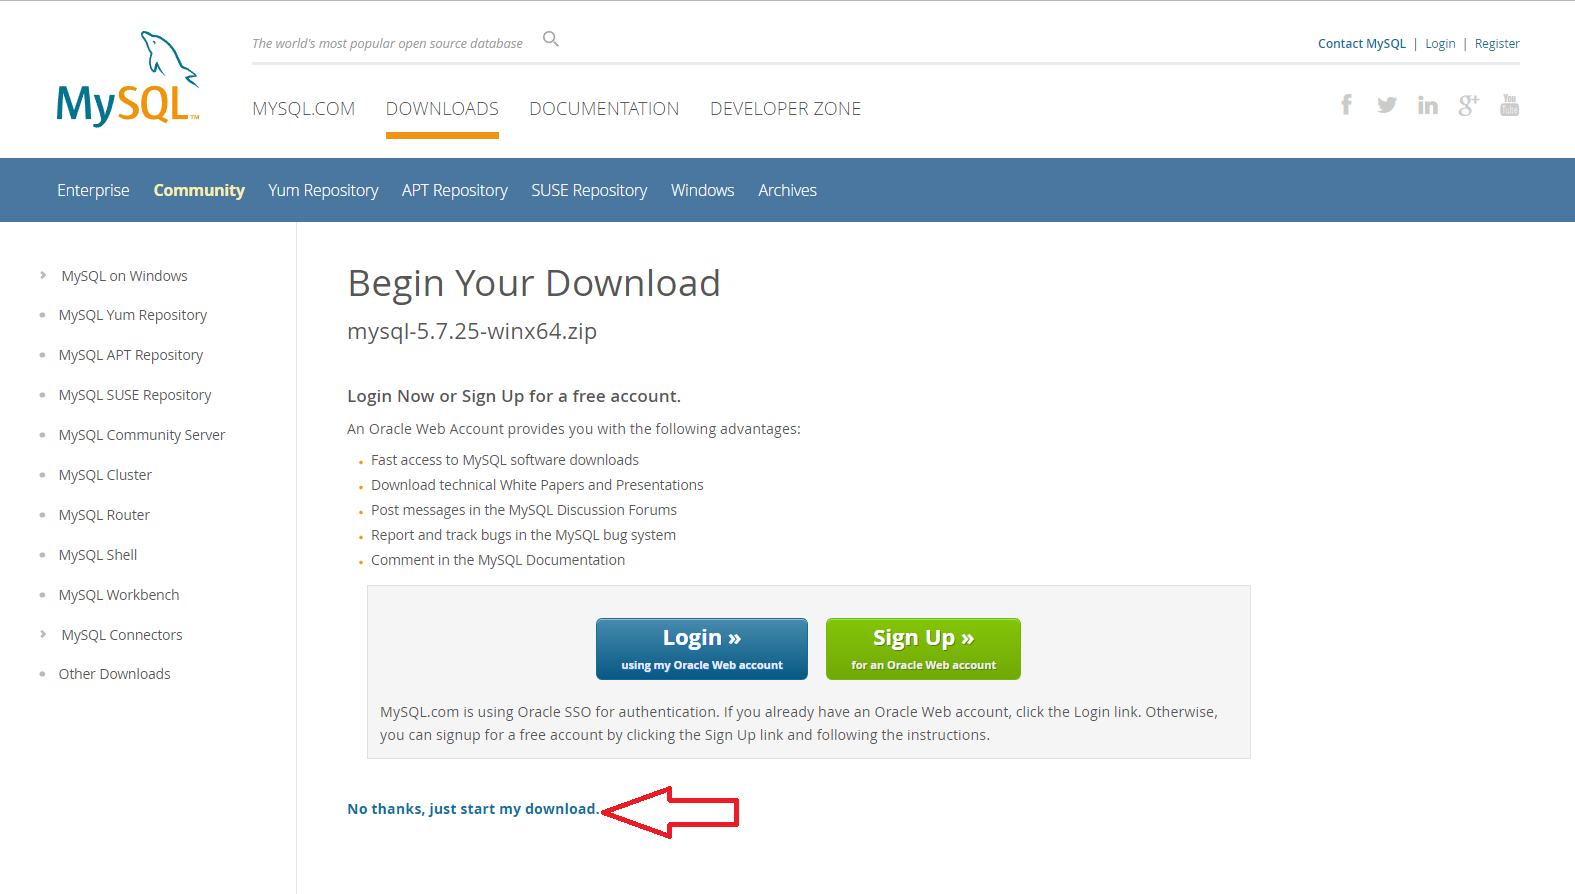
You can create an account or login if you like, I just go to “No thanks, just start my download”. Once it completes open the zip and move the folder onto your desktop.
Now back to Workbench, go to Edit in the top left then click on Preferences and in there you want to go to the Administration tab on the left highlighted in blue.
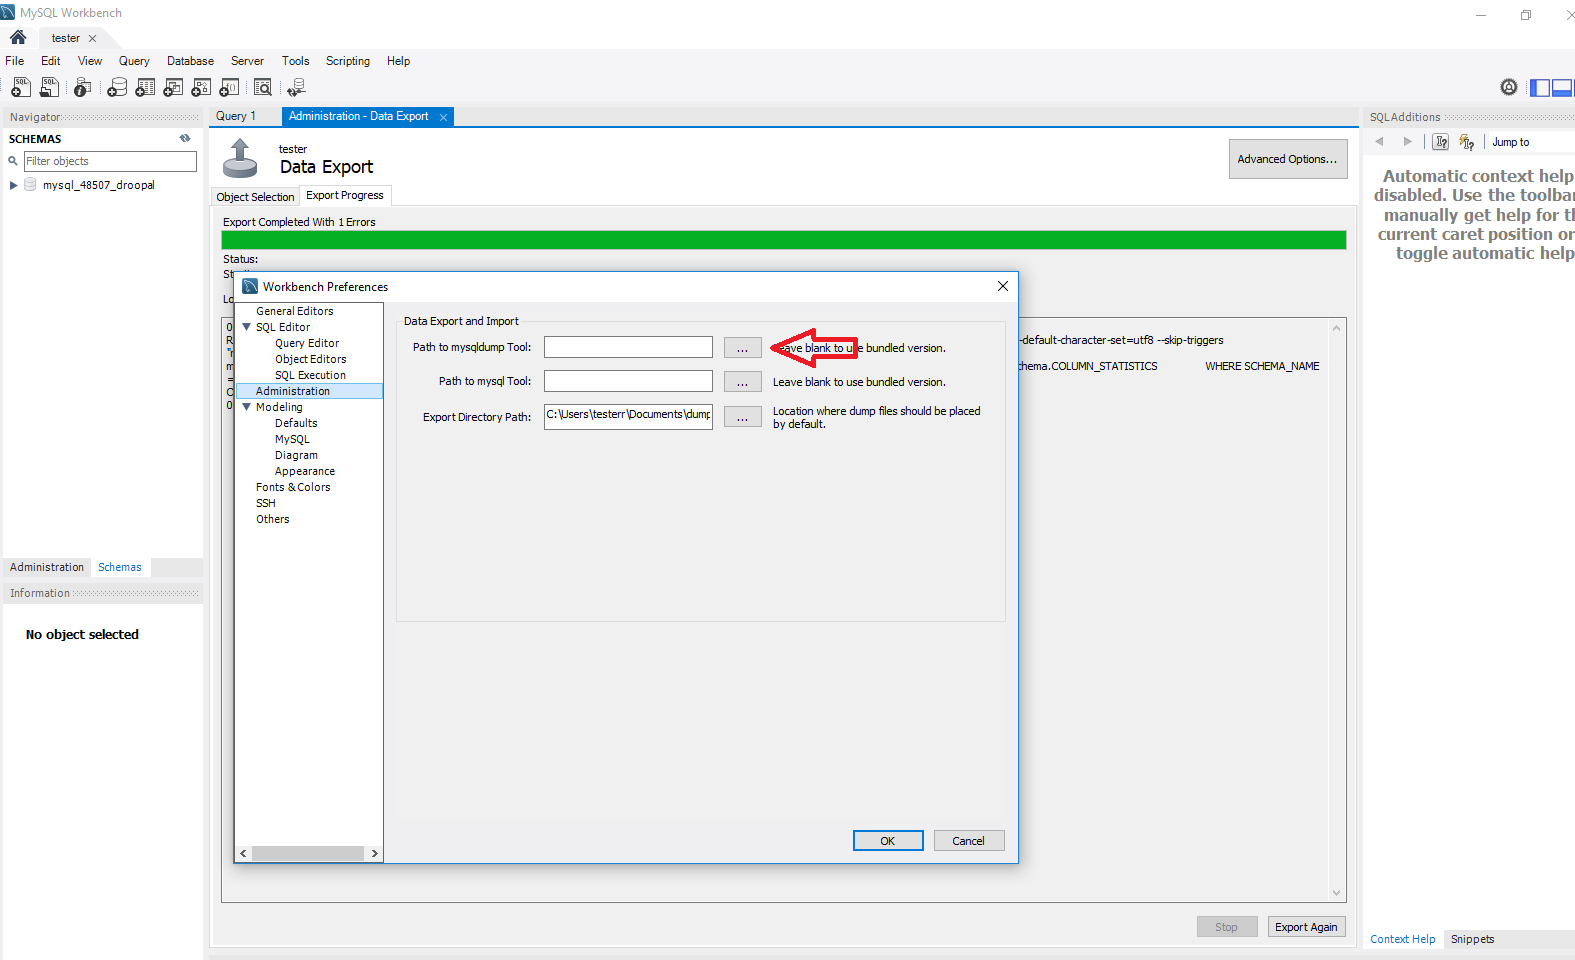
Next to “Path to mysqldump Tool” you want to click on the three dots and locate that folder we just downloaded. If it’s on your Desktop, then the path will be This PC > Desktop > mysql-5.7.25-winx64 > bin. Your version number might vary a bit. Once in “bin” look for the application called “mysqldump” and double click it and then click OK.
Now for the moment of truth, click on export and if everything goes to according to plan you should be seeing something like this.
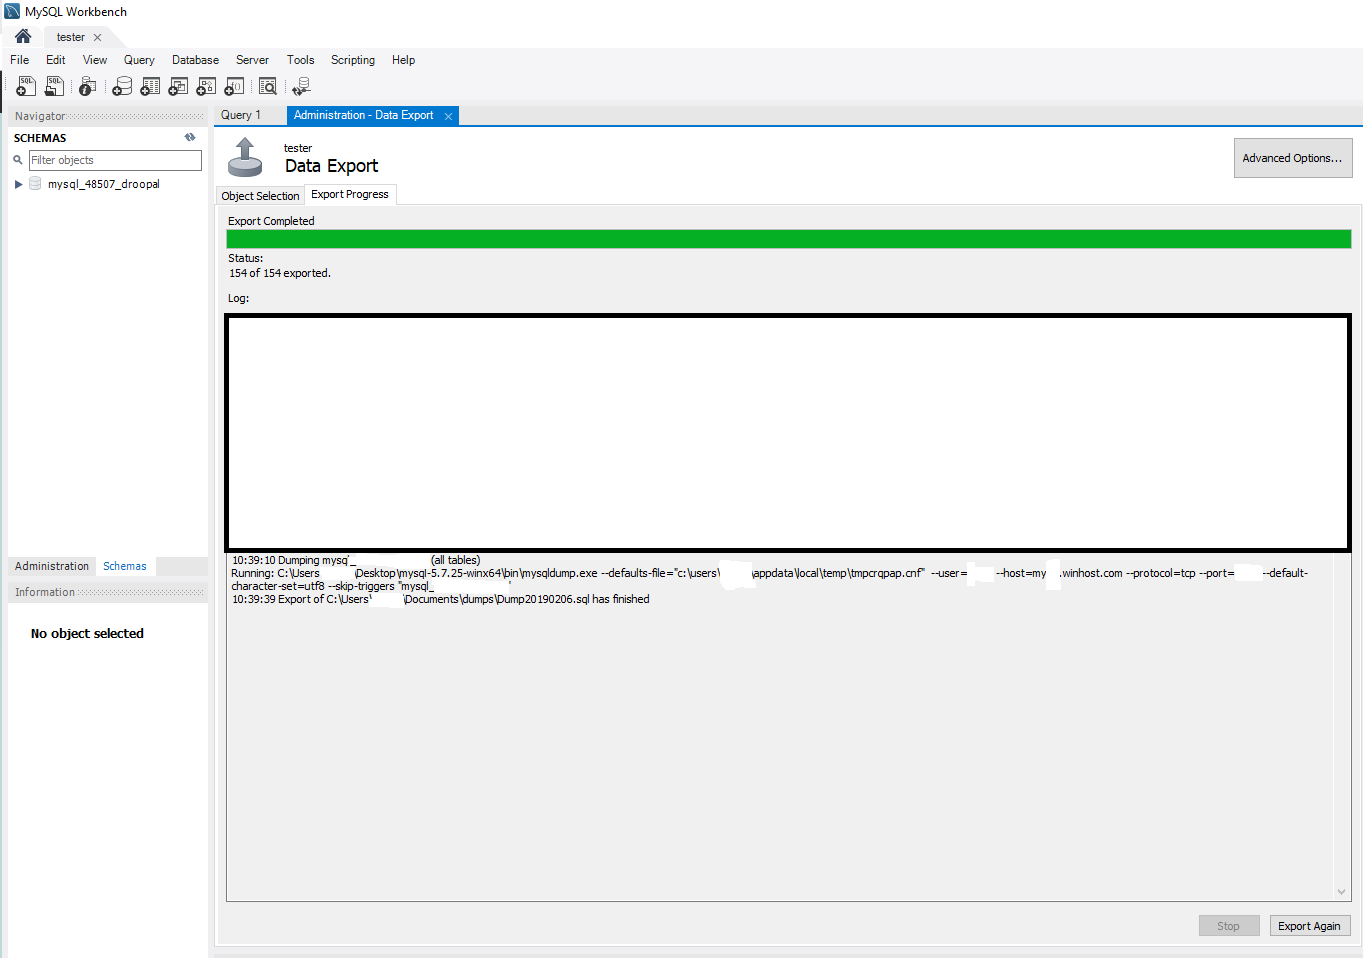
Congratulations! You have successfully backed up your MySQL database.
If you have encounter with this, open a Winhost support ticket.
Visit Winhost to learn more about our mySQL hosting solution