![]()
php is such a popular and widely used scripting language that sometimes it seems as if it’s always been part of website development. It hasn’t, of course, but it’s wide use in many popular third party “canned apps,” and the fact that a lot of people continue to use very old versions, makes it a prime target for hackers.
So if you don’t use php in your site, or an application that is php based, you may want to disable php as a preventative security measure. The bad guys can’t exploit something that’s not there, right?
The good news is disabling php is easy and you can do it in about 30 seconds. Here’s how:
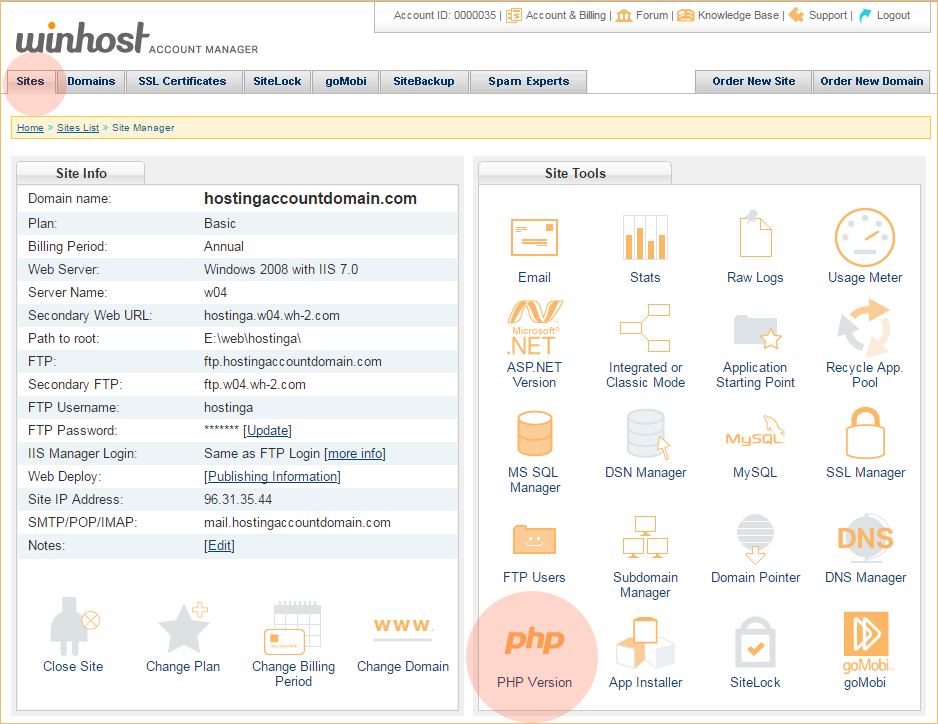
In the Site Tools section of Control Panel, click on PHP Version.
In the dropdown, select “None,” and click the “Update” button.
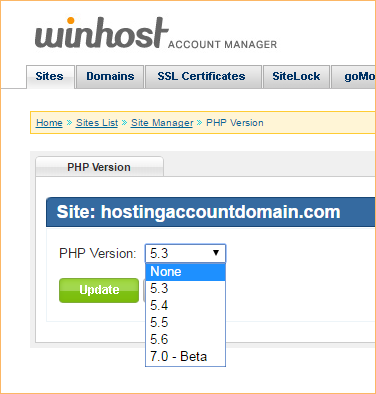
And that’s all there is to it.
See, maybe even less than 30 seconds. 😉
For what it’s worth, php isn’t inherently less secure than any other web technology. It’s popularity is what makes it a frequent target. But it’s certainly possible to safely run any php application, even those third part applications that are the favorite targets of hackers. We’ll be posting more security-related articles in the future.
If you want to take a look at other security measures that are available right now, check the website.
Finally, if you run a WordPress blog – one of the hackers favorite targets – and are concerned about security but don’t necessarily have the time or inclination to tackle all the details, we offer a WordPress Hardening Service that buttons up your WP installation and lets you carry on with your life worry-free. Well, at least you won’t have to worry about WordPress. Log in to the Support Portal and open up a tech support ticket, they can give you all the details.
![]()
As if everything related to domain name registration and maintenance wasn’t already screwy enough, there is a new change on the horizon that promises to make updating your domain names even screwier.
After December 1, 2016, when you change the first name, last name, contact email or organization field for your domain, it will trigger something called the “trade process.” Without going into too much technical detail, what that means is those previously minor ownership information changes will now be treated the same way a domain transfer is treated.
The problem with that is now the domain owner will have to approve those changes via two separate – but similar – emails. That’s because the “current” and “previous” owner – which are the same person in this case – need to explicitly approve the change, or it will not be made.
So if you update your name or the name of your organization, you’ll have to approve that change in two emails. If you update the email address associated with a domain name, you’ll have to approve that change at the old and the new email address. You can probably already see some potential problems, can’t you.

So why are these changes happening? Well, ICANN started reviewing the transfer process almost 10 years ago, when potential issues with the existing transfer policies were identified. So they began looking at “special provisions” for change of registrant during a transfer in order to prevent domain hijacking.
Which sounds like a good thing, but now, a decade later, what we ended up with is a process that may make it slightly more difficult to hijack a domain, but definitely makes a lot of day-to-day maintenance tasks more difficult and confusing.
Every registrar has some leeway in how they implement the changes, so we’re not sure yet exactly how it’s going to work for domains registered through Winhost. We’ll do everything we can to keep the confusion to a minimum, and we’ll post an update here when we have more information on how things shake out.
![]()
The latest versions of the following applications are now available through our App Installer tool in Control Panel:
![]()
Now that we support it, here’s a quick tutorial on how to deploy an ASP.NET Core 1.0 Application to Winhost using Web Deploy.
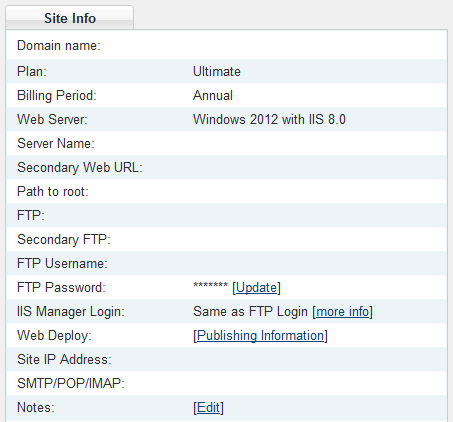
Please note that you cannot publish to a sub-directory using Web Deploy at this time due to a bug which Microsoft will correct at a later date. If you want to publish your application to a sub-directory, you will need to use FTP.
![]()
Note: The manual methods in this tutorial are great, but if you’re looking for a “set-it-and-forget-it” automated backup solution, we offer a site backup service that can also back up your MS SQL and MySQL databases. Read about it on our site, or activate it in Control Panel. It’s easy, it’s inexpensive and it’s cool. What more could you ask for?
Making a backup in MySQL workbench is a pretty easy task once you know what to do, but it can be a little confusing the first time around. Allow us to save you some time with these simple instructions.
Version 6.3.7 is shown here, and of course future versions may differ. Download MySQL Workbench here (you’ll need a free Oracle account if you don’t already have one – just click the “Register” link in the upper right corner of that download page).
First thing you’ll need to do in Workbench is connect to your database.
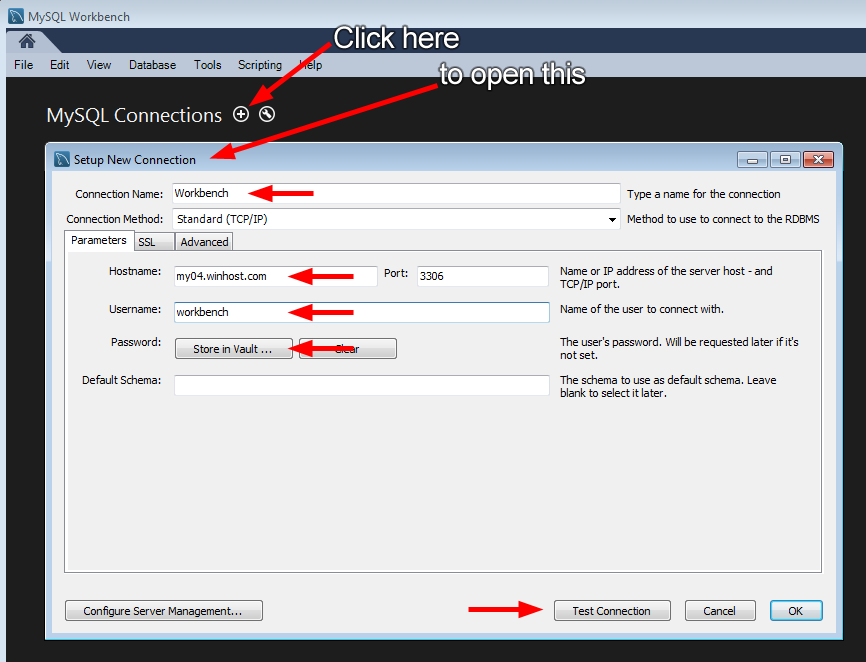
If everything is correct you’ll see the successful connection box.
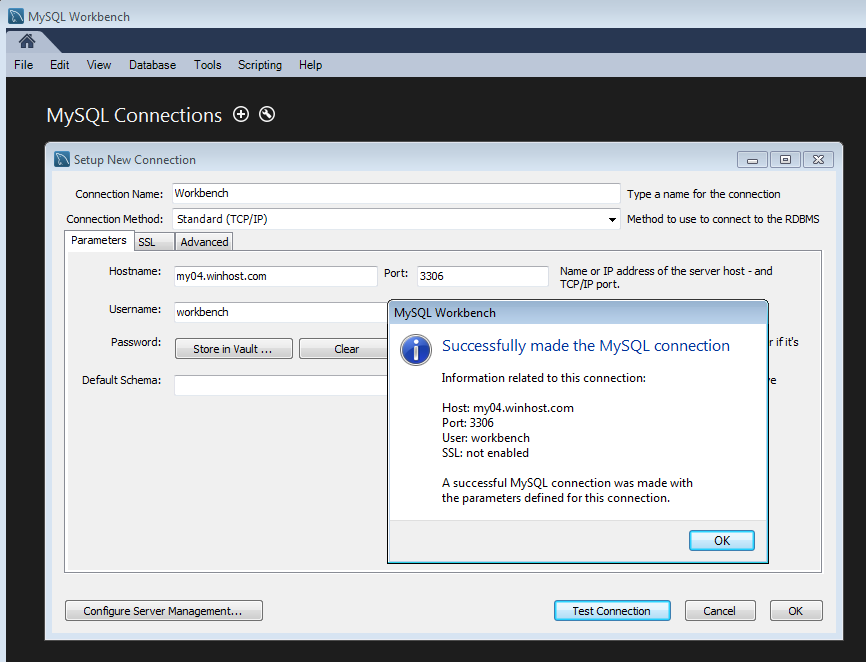
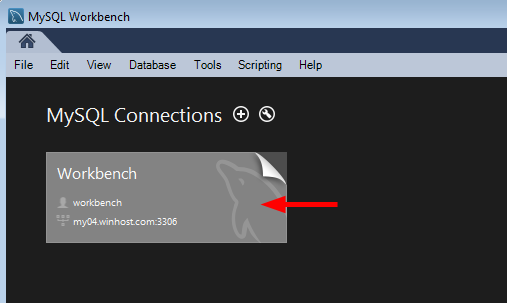
Go ahead and close that, and click the connection that you just set up.
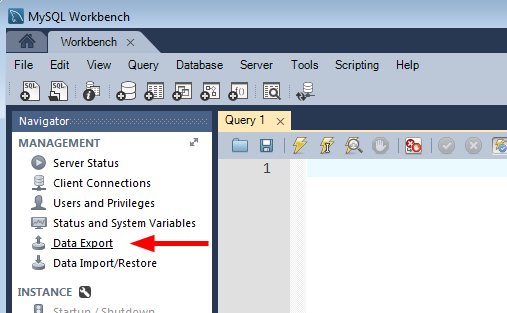
Click “Data Export.”
There are a lot of options on the next screen. For the purposes of this how-to we’re just making a simple backup of the entire existing database, so we’re not going to use most of those options. But as you can see, you can do a lot more than just a simple database dump here.
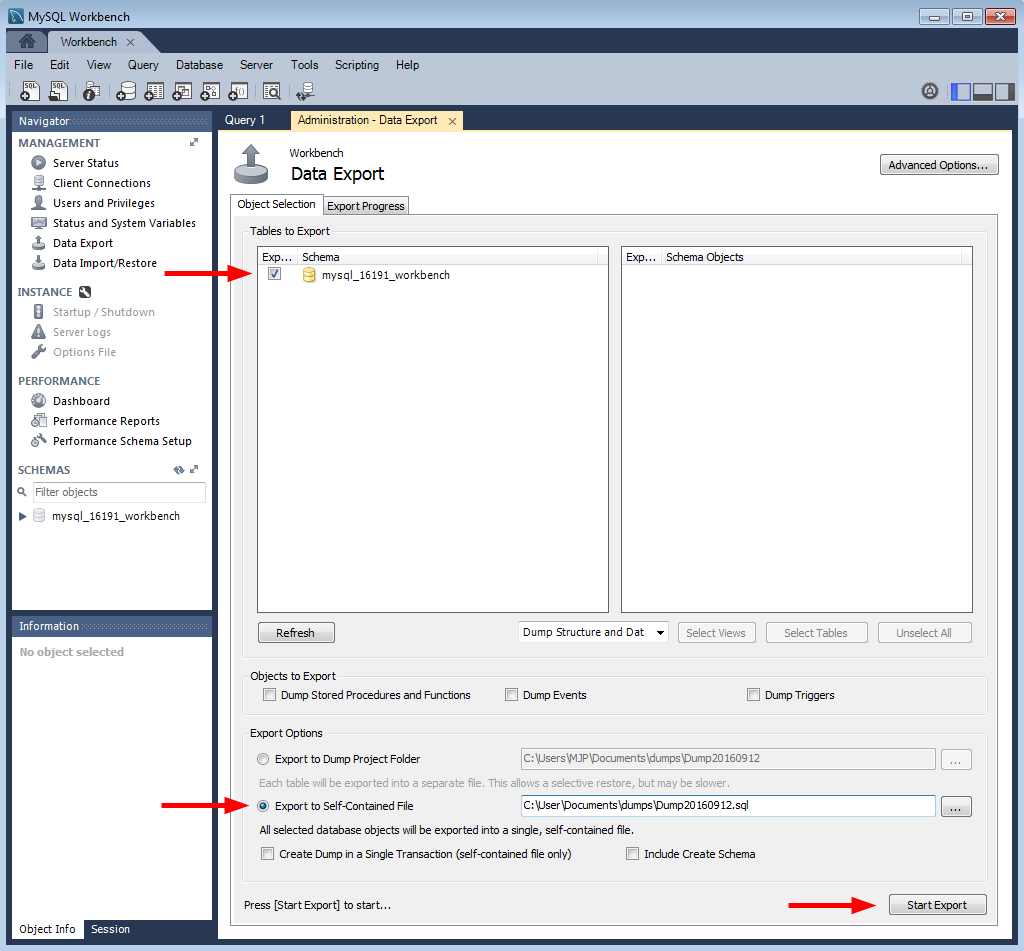
If everything goes according to plan you’ll see the “Export competed” dialog, and you’ll be all set. Your database is backed up for development use or simply for safe keeping.
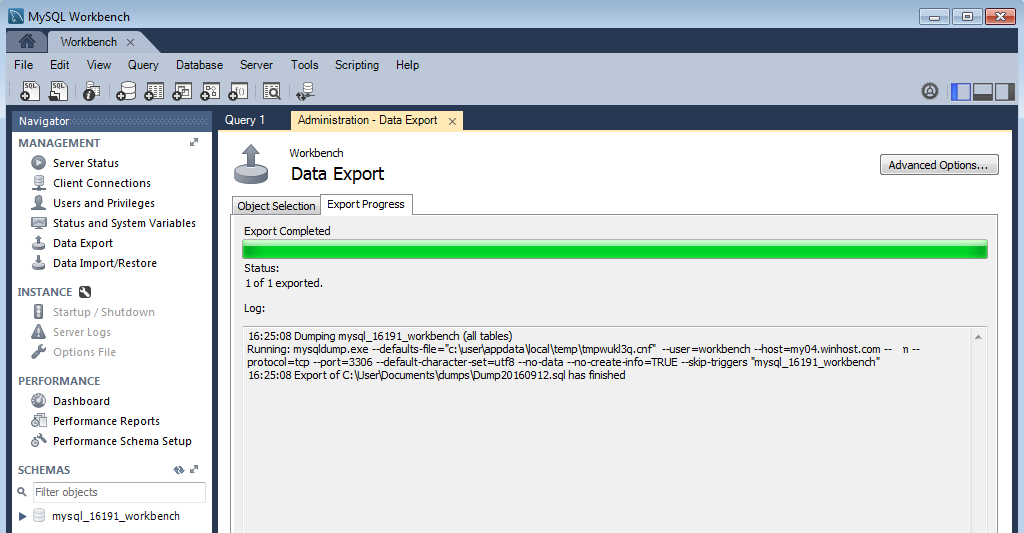
That’s all there is to making a backup.
But check out the “Data Import/Restore” link right under the “Data Export” link. As you might have guessed, you use that link to restore a locally stored backup up to the MySQL server here at Winhost. We’ll talk about that in a future article.