In this tutorial we will be showing you how to install WordPress using the App Installer feature in the Winhost Control Panel.
You will need a MySQL database, which you can add from within your hosting account.
To get started, log in to the Winhost Control Panel.
Click the “Sites” tab at the top.
Click “Manage” next to the site you wish to install WordPress on.
On the next page you will set up the MySQL database that you will be using for WordPress.
Click the “MySQL” icon:
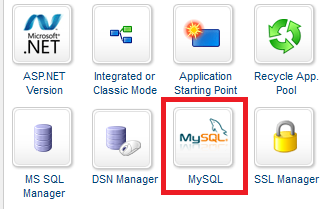
Now create a MySQL database by clicking the “Add” button.
Enter a database name and user name and the amount of disk space you wish to allocate to the MySQL database:
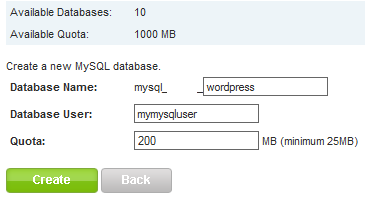
Click “Manage” next to the MySQL database to change the password for the MySQL User you just created:
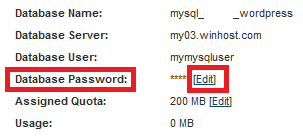
IMPORTANT: Make a note of the MySQL information because we will need this when installing WordPress.
Go back to the “Sites” tab and click “Manage” next to the site you wish to install WordPress on.
Click the “App Installer” icon:
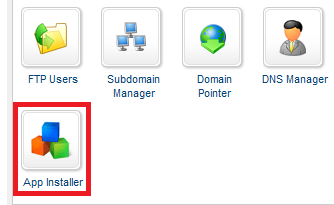
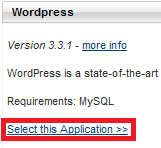
Scroll all the way to the bottom of the page and look for WordPress. Then click “Select this Application”:
For the sake of this tutorial I’ll be installing WordPress on the root of my site. To do this you will need to remove the “wordpress” text in the AppPath field, leaving the text field empty:

If you wish to install WordPress in a subdirectory, enter the subdirectory in this field. Where you install WordPress depends on how your site is laid out. In most cases the application will be installed in a subdirectory.
WARNING: Installing WordPress on the root of your site will delete everything that is currently on your site’s root. If you install in a subdirectory, the installer will clear the subdirectory and not your root (of course it’s always best to backup your site files first when installing a new web application in case something goes wrong with the installation).
Click the “Install Application” button when you are ready to continue with the installation of WordPress.
If every went according to plan then you should receive the following message.
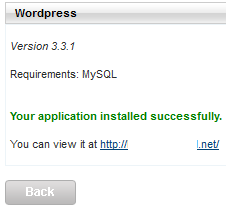
Click on the link after “You can view it at” to continue with the installation.
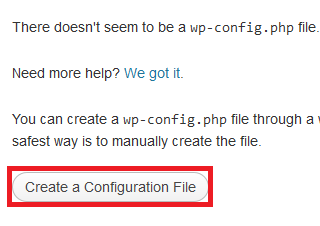
Click the link to go to your WordPress Installation. You’ll see the error message below. Click the “Create a Configuration File” button:
On the next page you will see a list of things you will need in order to install WordPress; Database name, Database username, Database password, and Database Host.
Next, click the “Let’s Go!” button.
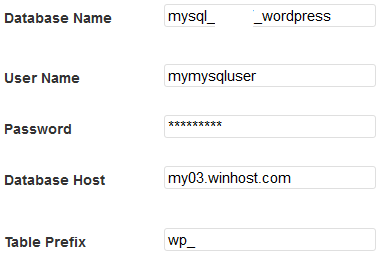
Enter the information you made note of when you set up the MySQL database:
Click the “Submit” button.
Click the “Run the Install” button.
On the next page you will choose the settings that you wish to use for your WordPress application. Be sure to remember the Admin User Name and Password for WordPress. If you forget the user name and password you may need to repeat the installation.
Once you have configured the settings you wish to use, click the “Install WordPress” button. This will bring to the next page confirming you have successfully installed WordPress.

If you run into any issues or have any questions regarding WordPress. Please post your questions in our Community Forum. The Technical Support department is unable to assist with WordPress installation or configuration.
Many people may not realize this, but there are a few things you can do to help yourself receive a timely resolution when asking for support here at Winhost.
1. Open up a support ticket through the Winhost Support Portal at https://support.winhost.com.
Opening up a support ticket will authenticate your ticket and reduce the amount of time that it takes our support personnel to look up your information or verify that it is a legitimate support request. We cannot provide account-related information unless a ticket is authenticated. It also helps us keep a good ticket history and allows us to find more permanent solutions if there is a re-occurring problem.
 2. Be as specific as possible when you are trying to describe a problem.
If the issue you’re having is generating an error message, please provide it to us along with instructions on how to reproduce it, if possible. If you have screen shots or logs that you think might be helpful, include them as attachments.
Example of a support ticket that is too generic:
“I am having problems with my email.”
Example of a support ticket that is more specific:
“I am having problems with my email account [email protected]. I am unable to send or receive messages using Microsoft Outlook. I have also attached a screen shot of the error that Microsoft Outlook is generating.”
3. Open a different support ticket for separate issues.
For example, if you are having a problem with your database and email, open a support ticket for each issue as they are often unrelated. Please note that billing questions should be directed to our Billing Department and sales questions to our Sales Department.
By following these simple tips, your ticket will be routed correctly and resolved in a timely manner.
It used to be when choosing a TLD (Top Level Domain – the part of the domain name after the dot) you had very few choices, and most people went with .com. Originally .org and .net were reserved for organizations and networks. So your host or your ISP might have a .net domain, but few “normal” sites did. And if you wanted to register a .org domain you had to jump through hoops that involved actually mailing or faxing documents to the registrar.
But those weird dark ages passed pretty quickly, and in the early 90s people began registering .net and .org domains to use for their personal sites. In those days it was usually done in order to be different and stand out, as .com names were still widely available. When the common (and not-so-common) words were used up in the .com namespace, .net and .org registrations increased, and for several years, those three TLDs – known as generic TLDs – ruled the roost.
Two letter country code TLDs have been around for as long as .com, .net and .org, but in the early days they were typically reserved for residents of the countries they represented. Then a few of those countries struck on the idea of selling domains on their TLDs, so you saw TLDs like .cc and .tv enter the mainstream.
Now there are very few countries that still enforce resident-restrictions on thier TLDs, which is why we have domains like bit.ly and ma.tt. Country codes continue to open up, as we saw recently when .me opened up registration. And while a lot of startups and social media companies are fond of spelling words with country code TLDs, most people still gravitate toward one TLD: .com
For a personal site, or a small startup venture, most people want a .com domain name. And for good reason. Even though there are more than 250 TLDs that you can use to register a domain, the Internet and the web as we know it today still tends to stubbornly rotate around .com. Need proof? If you’re unsure of a company’s domain name, what’s the first thing you try? Okay, the first thing you try is a Google search, I know, but if you are typing a domain, you’ll try the .com.
So you may spend a week trying to brainstorm a .com name that someone else hasn’t thought of, and find yourself frustrated at every turn. It can seem as though every possible .com has been registered. They haven’t, and I’ll give you a tip for finding your .com in a minute, but first I want to blow the whole idea of a “choosing a TLD” post out for the water by saying:
The TLD that you use doesn’t matter.
Five years ago I may not have made that claim, but the trend is clearly toward search and away from typing domains, so as far as being found on the web (a monumental task in itself, and the subject of another post – or book), search rules, and search doesn’t care how your domain name ends. So if you can force yourself to look beyond king .com, it may be in your interest to do so.
It’s a wide world of TLDs out there. One of them may have your name on it. You may have marketing considerations to take into account, and you should always look at which country some of the more popular country code TLDs represent. For example, .ly is extremely popular, but it’s the Libyan country code, and not everyone necessarily wants to be associated with Libya. No offense Libyans.
You’re probably thinking, “Hey, Michael, you guys don’t even register all these different TLDs, why are you telling me to go to someone else?” It’s true, we only provide registration for a few generic TLDs. That’s because that small handful of TLDs are still far and away the ones that people want to use. This article is for those of you who don’t mind stepping out into the great vast void and seeing what there is to find. It’s cold out there, but I’m told the view is spectacular.
Oh, that tip for finding an available domain in the ever-desirable .com namespace? Join two unrelated words. I know it sounds simple and obvious, and it is. But it’s also an endless source of available domain names, and one most people overlook. If you’re creative, you can find a combination that works for your project in a few minutes. I’ve used that little trick to find dozens of domain names for people who thought they could never find a .com domain.
And when you find your .com (or .net, .org, .biz, .cloud, .club, .info, .name, .pro, .store or .xyz) domain, you can easily register it directly from your Winhost Control Panel.
Wikipedia has a useful list of all TLDs, along with information on country code TLD domain registration. If you want to register a country code TLD domain without a lot of research, sites like EuroDNS can be very useful.
If you’ve been a Winhost customer for more than a year, you may not know that we added the option to enter a second account security question.
You may be thinking, “I created one security question when I opened the account, why should I add a second?” The reason we recommend adding a second question/answer is because we run into a lot of instances where a user will forget their account password and also the answer to the primary security question. Having the second question/answer available could save you a lot of trouble if you ever find yourself locked out of your account.
Go to the Account & Billing section of Control Panel and click the “Security Question” icon. One of the cool features of the additional security question is the ability to add your own question, rather than choosing from one of the standard selections. From the “New Question #2” dropdown, choose “Other: Type in your own security question below.” That will open up a text entry box for your own question.
When you’re finished just hit the “Update” button and that’s it.
Security can be inconvenient, but we really recommend that you change your account password and security questions at least once a year. We’re on your side, but we have very stringent security policies, so if someone gets into your account, it can be difficult for you to regain control. Rotating your passwords and security questions regularly can prevent unfortunate problems down the road.
If you want more than one domain name to bring up your site, Winhost provides an easy to use Domain Pointer service.
By default, the domain pointers point to the root of your primary hosted domain. They are primarily used to direct multiple domains to the same site. You can direct domain pointers to subdirectories, but that requires a bit of redirect coding. This article doesn’t address that, but we do have Knowledge Base articles to help you down that path.
So if you want to add a domain pointer, here’s all you have to do. Log in to Site Manager in Control Panel. In the Site Tools section, click the Domain Pointers icon.
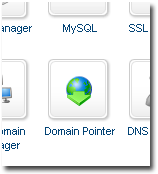 Once you’re in the Domain Pointer section, click the Add button.
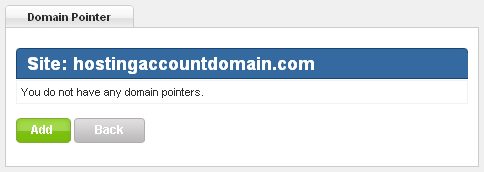 Now enter the domain name that you wish to point to the existing site and click the Create button. It’s important to note that the domain pointer order is not a domain registration system. If you need to register the Domain Pointer, click the Domains tab in Control Panel. Once the new name is registered, come back to this process.
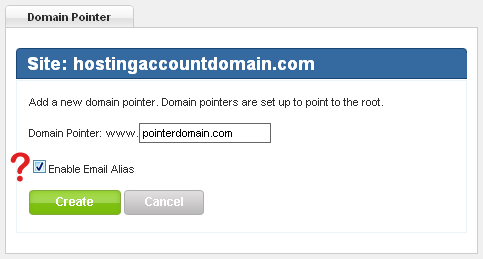 You probably noticed the big red question mark in the image above. Do you want to be able to use email on the Domain Ponter? If so, make sure you check Enable Email Alias. That will activate an alias-based email service for the Domain Pointer. What that means is any email address on your primary domain will also accept messages sent to the same address on the new pointer domain.
For example, let’s say your primary domain is primary.com, and you use pointer.com as a domain pointer. If you set up the email address [email protected], that mailbox will also accept mail for [email protected]. Any pointer.com addresses have to point to an email address on the primary domain name. [email protected] will not work unless [email protected] exists.
For more information on Domain Pointer Email Aliases, see this Knowledge Base article.
The last thing you have to do is make sure that the name server records for the domain name you just added point to Winhost:
ns1.winhost.com
ns2.winhost.com
ns3.winhost.com
If the name servers already point to Winhost, the Domain Pointer should work right away. If not, allow 24 to 48 hours after changing the name servers for the Domain Pointer to start to resolve to your main site.
Need help changing name servers for your domain? Here are instructions for updating name servers for some popular registrars.
Here in Los Angeles there will be an annular solar eclipse visible on Sunday, with the moon covering 86% of the sun at its peak. Since it’s not necessarily wise to look directly at the sun, we made some ultra-high-tech eclipse viewers available to everyone here in the office.

The first 20 or so were snatched up pretty quickly, but there are still a few available if you find yourself in my office between now and Sunday.
And if you are in my office on Saturday or Sunday – get out of there! Jeez, there’s no privacy anymore.
If you look through the eclipse viewer and you aren’t looking in the direction of the sun, here’s what you see:

It’s actually pretty cool to look at the sun through these things, but also a little weird. Your brain seems to know you shouldn’t be doing it, but it’s safe, and the sun doesn’t look so tough when you filter out all that light.
On June 5th we also get to watch Venus pass in front of the sun. which is just as cool as a solar eclipse, but much more rare. It will probably look less impressive too—a little dot crawling across the sun—but I’ll still be out there looking at it.
The last time we could see that was 1882, and if you miss it on June 5th you’ll have to wait until 2117 for the next one.
At which point we’ll all be way too old to look at the sun.
One of the most daunting tasks a webmaster must perform is uploading a large web site to a remote web server. Depending on your Internet connection speed, the task can be tedious as files are uploaded to your root directory one file at a time. If you have 10 or 20 files this is not a big deal. But what if you have hundreds or thousands of files to upload? The files can range from code behind files, to images, audio files, DLL files and more.
Luckily Microsoft has introduced a solution to this problem with MS Web Deploy. Web deploy can be used with IIS 7, Web Matrix, Visual Studio, or through the command prompt MS DOS. The first thing that you will need to do is download MSDeploy. This is the tool that will help you package or zip your web site.
Run through the installation wizard to install the “Web Deployment” tool on your computer. You do not need IIS 7 for this. Although Web Deploy and IIS 7 can work side by side, the Web Deployment Tool can run independently. You can install and run this on Windows 7, Vista, or XP without setting up your own local web server.
One thing you do need to install is the “Remote Manager Service.” This should be part of the Web Deployment Tool installation Wizard, but by default the installation does not install it, therefore you will have to manually install it.
The installation will install the MSDeploy command. This command can be invoked using the MS DOS command prompt. One thing you need to be aware of is that MSDeploy requires administrator rights to run properly. The easiest way this can be done is to navigate to MS DOS using Windows Explorer. Go to C:\Windows\System32 and right click on CMD.EXE. Choose “Run as Administrator”.
Once the command prompt is up, you will navigate to the folder level where MSDeploy.exe exists. On Windows 7, the default installation will place msdeploy.exe in C:\Program Files (x86)\IIS\Microsoft Web Deploy.
msdeploy.exe has an extensive command base. Typing [MSDeploy /?] in the command prompt will yield a large selection of commands and conditions you can run. There are two core tasks that MSDeploy can be used for. One is Archiving and the other Packaging. The two are different and each have their own unique properties. For zipping files and publishing to a remote IIS web server, you will be using the Package Provider. Archive is mainly used for backing up your site for safe storage, where as the packaging method zip up the files for you. For a list of provider settings, you may want to look at this Microsoft site to get your feet wet.
To get started deploying your site with a zip file, one thing you need to know is that you cannot simply use your OS compression tool to zip a website. You will need to use MSDeploy for that. When MSDeploy zips a file, it will also create a couple of xml files. These files are archive.xml and systemInfo.xml. These files describe the properties of your web application. You will need these files to deploy to an IIS server with MSDeploy.
Technically you can manually create these files and then manually zip. However, creating these files from scratch is much more complicated than running MSDeploy. To properly zip your web site, you will first need to navigate to the folder where msdeploy.exe exists. The path to MSDeploy should be C:\Program Files (x86)\IIS\Microsoft Web Deploy V3. Once you are there, run this command in your MSDOS command prompt:
msdeploy.exe -verb:sync -source:iisApp=”C:\ Test_site\Website” -dest:package=c:\Test_site\testsite.zip
You will need to use the provider iisApp so that MSDeploy will know the destination folder will be an application folder. If you are uploading to the root it shouldn’t be a problem since most IIS root folders are already set as an application folder. But if you are going to upload it to a subfolder, zipping the files with the iisApp provider will be important.
Bear in mind that the paths I am using are examples, and it will be up to you to determine the path where your website exists and the path where you want to place the zip file. Once this is done, you can run the MSDeploy command against your remote IIS server:
msdeploy.exe -verb:sync -source:package=”c:\Test_site\testsite.zip” -dest:iisApp=”domain.com/subfolder01″,
wmsvc=domain.com,username=IIS_username,password=IIS_password,
skipAppCreation=false -allowUntrusted=true
The “skipAppCreation” command forces a subfolder to be created as an application folder. By omitting this command the default value will be “true.” If you are uploading directly to your root, you do not need to define this value. You will need to use the iisApp provider as your destination. Otherwise, MSDeploy will not know how to connect to the remote IIS server.
Lastly, the target server where you will be placing your packaged file and uncompressing it will need to have Remote Manager Services installed. Without you will not be able to publish your site with MSDeploy. In addition to that, the MSDeploy (Web Deploy) tool is only for Microsoft platforms. From what I’ve read it will work on an Windows XP, Windows Vista, Windows 7, and even Windows Servers such as Windows 2008. It is not compatible with non-Microsoft platforms such as Linux or Mac.
It’s a common question, and one that can have serious ramifications if you don’t consider it:
Where should I register my domain name?
Domain registrars can come in many different forms. The difference between web site host and registrar is often blurred these days. Network Solutions, Register.com, Go Daddy, Namecheap, etc., were originally established to register domain names. Over the years they began to offer additional services such as email and web site hosting. There are also companies that started their lives as web site hosts, then later became domain registrars as well. Then, just to make it confusing, there are resellers—companies (like Winhost) who can offer domain registration services, but are not registrars themselves.
Technically, as far as your web site and users are concerned, where your domain is registered is irrelevant. A site hosted at any host can use a domain registered with any registrar. The DNS system will route your traffic like the post office routes your letters. Well, hopefully better than the post office routes your letters.
For the sake of convenience, many people choose to use their host as their registrar, so that everything can be managed from one location. Whether you do that or use a registrar that is unrelated to your host is a matter of preference.
 Here at Winhost your user account contains your domain registrations, so they are separate from your hosting accounts. That’s an ideal set up for anyone who wants to maintain that separation and flexibility without managing payments in multiple locations. The independence and control that you have can save you headaches in the long run.
If price is a concern, then you’ll want to go with a registrar who can offer the lowest price on the kinds of domains that you need. These days there are very few truly “budget” registrars left. The market has leveled out and you will not typically find a difference of more than a dollar or two between registrars. But for those who are strapped for cash, there is the lure of the free domain name. But be aware of the pitfalls that may come along with “free.”
You may have heard horror stories of domains being held hostage, or made unavailable through the neglect or – in some cases – vindictiveness of the host. A common tool that many hosts use to get your business is the offer of a “free” domain name. While that may be a tempting offer, you should get some details about that free domain. Before you pour your time and effort into creating a site around it, ask the host following questions:
Who owns the domain?
Typically the host will make themselves the administrative contact for any domain names they provide for free as part of a hosting package. The administrative contact controls the domain, so you always want your contact information to be the admin contact information. At the very least, you want your email address to be listed in the admin section.
Can I keep the name if I change hosts?
Some hosts may allow for this, but only after you pay them a fee. Sometimes that fee is retroactive, meaning you’ll wind up paying for the domain from the day they registered it. Back when it was supposed to be “free.”
Can I keep my hosting but transfer the domain to a registrar of my choice if I opt to pay for it myself?
If you spend six months creating a site and building an audience you may want to take further control of your domain by moving it away from the host and paying for renewals yourself. Make sure the host will allow you to do that. If you are the admin contact, you can usually move the domain, but if the host is listed as billing contact, they can make the move difficult if they want to.
If you use a domain that you don’t own or you can’t move, you may be in for trouble down the road. We have seen many new customers having difficulty gaining control of what they thought was their domain name. But if you are aware of the “gotchas” surrounding domain name ownership, you can avoid those kinds of problems.
Here at Winhost you always have full control of domains that are registered through us. You are the administrative contact, you can cancel your site or move it to another host, switch the domain on your hosting account—whatever you do you’ll always have access to your domains.