
Site hosting news, tutorials, tips, How Tos and more

The latest version of these apps are now available through the control panel app installer:
Visit Winhost to learn more about our application hosting solutions
In this post I wanted to discuss some background about our recent launch of our new Power Plan.
We receive a lot of customer comments on ways to improve our hosting services, as well as suggestions on features customers would like to see implemented. We try to take all this feedback into consideration and, when possible, work towards turning it into something real.
For example, we received feedback from customers whose sites outgrew the Ultimate Plan because their application required more resources. Applications growing in their resource usage requirement is a general trend we are seeing. Every year, each new version of an application has more features, which typically leads to its need for more server resources to run. We’ve seen this happen with applications like nopCommerce, where the older versions worked fine on our Max and Ultimate plans, but newer versions required more resources than our Max Plan. With its recent conversion to .NET Core and new features, we recommend running nopCommerce on our Ultimate Plan but active nop sites are now hitting the resource limit of the Ultimate Plan.
So we launched our new Power Plan to help resource intensive sites that outgrow the Ultimate Plan. We also built a separate high performance shared hosting infrastructure just for Power Plan users. The servers have less site density and are optimized to run resource intensive applications.
Now let’s dive into some of the Power Plan details. The table below shows some of the differences between the Ultimate Plan and the Power Plan. You’ll see that the you get double the resources on key hosting features.
| Ultimate Plan | Power Plan | |
| Memory Allocation | 500 MB | 1 GB |
| Email Storage | 5 GB | 10 GB |
| SQL Database | 5 GB | 10 GB |
| mySQL Database | 5 GB | 10 GB |
| Idle Timeout | 20 min | 60 min |
For a complete feature list for the Power Plan, vist our website. If you have any questions about the new plan feel free to contact us or open a support ticket.
Visit Winhost to learn more about all our Windows hosting solutions
Today we launch a new fourth plan which we are calling the Power Plan. The new plan includes more resources than our Ultimate Plan.
The Power Plan is designed for extremely active sites, resource intensive applications and customers that need more database storage – basically, for the power users.
The Power Plan hosting platform is on a separate shared hosting environment solely dedicated for Power Plan sites. To optimize performance, we use high performance hardware and the servers have less site density. This also means that existing Winhost sites moving to the Power Plan will require a migration. Of course, if any existing customers upgrade to the Power Plan, we’ll take care of migrating your site.
For more information on the new Power Plan, check out our website: https://www.winhost.com/hosting-plans/power.aspx
We’ll be following up with another post to look at the Power Plan with more detail shortly.
Visit Winhost to learn more about our Windows hosting solutions
Having an email message to take forever to arrive can be very annoying and sometimes it leaves people wondering why is this even happening. In this article I’ll show you how to analyze email headers of an email message.
What is an email header?
An email header is a timeline of where the email message went through to get to you and the different email systems it touched during the delivery process. It’s sort of like looking at the tracking information of your UPS delivery. The only way to find out where the slowness is happening is to review the email header of that sluggish email message.
Where can I find the email header?
First, the email message must arrive at the destination before you can review the headers. We have instructions on how to view email headers in our knowledge base. There are multiple ways of viewing the headers. Here is another list that can help you find your email headers.
How to analyze the email header
Email headers can look ugly and hard to understand. Luckily there is a email header analyzing tool provided by MxToolBox.com that can help with that.

Copy and paste that ugly looking email header into the empty field and click on Analyze Header.
In the results, the email server with the longest bar graph is going to be the email server that is causing the most delay.
Why is this occurring?
There are many different reasons why an email message could be slow. One common reason is that the email server that caused the most delay had a large amount of email messages to process. If you see that the latency is happening in one of our email servers, we will gladly check our system for you and the logs to see what might be happening. Please contact our support department via our support portal for assistance.
For the most part most email servers are temporarily handling large volume of emails and will go back to normal performance on their own. However, if you’re seeing this issue keeps happening at a particular email server, you can contact the email administrator of that email system and provide them with the email header as proof.
Visit Winhost to learn more about our Windows hosting solution
One of the most popular ways attackers are able to compromise WordPress sites is through a brute force attack. Through this method, they can try large number of passwords in a very short time. If your password can be easily guessed, there is a higher chance of an attacker gaining access.
In this post we will be covering how to add reCAPTCHA to your WordPress site. This can effectively shut down bots that are trying to abuse your pages, especially your login page.
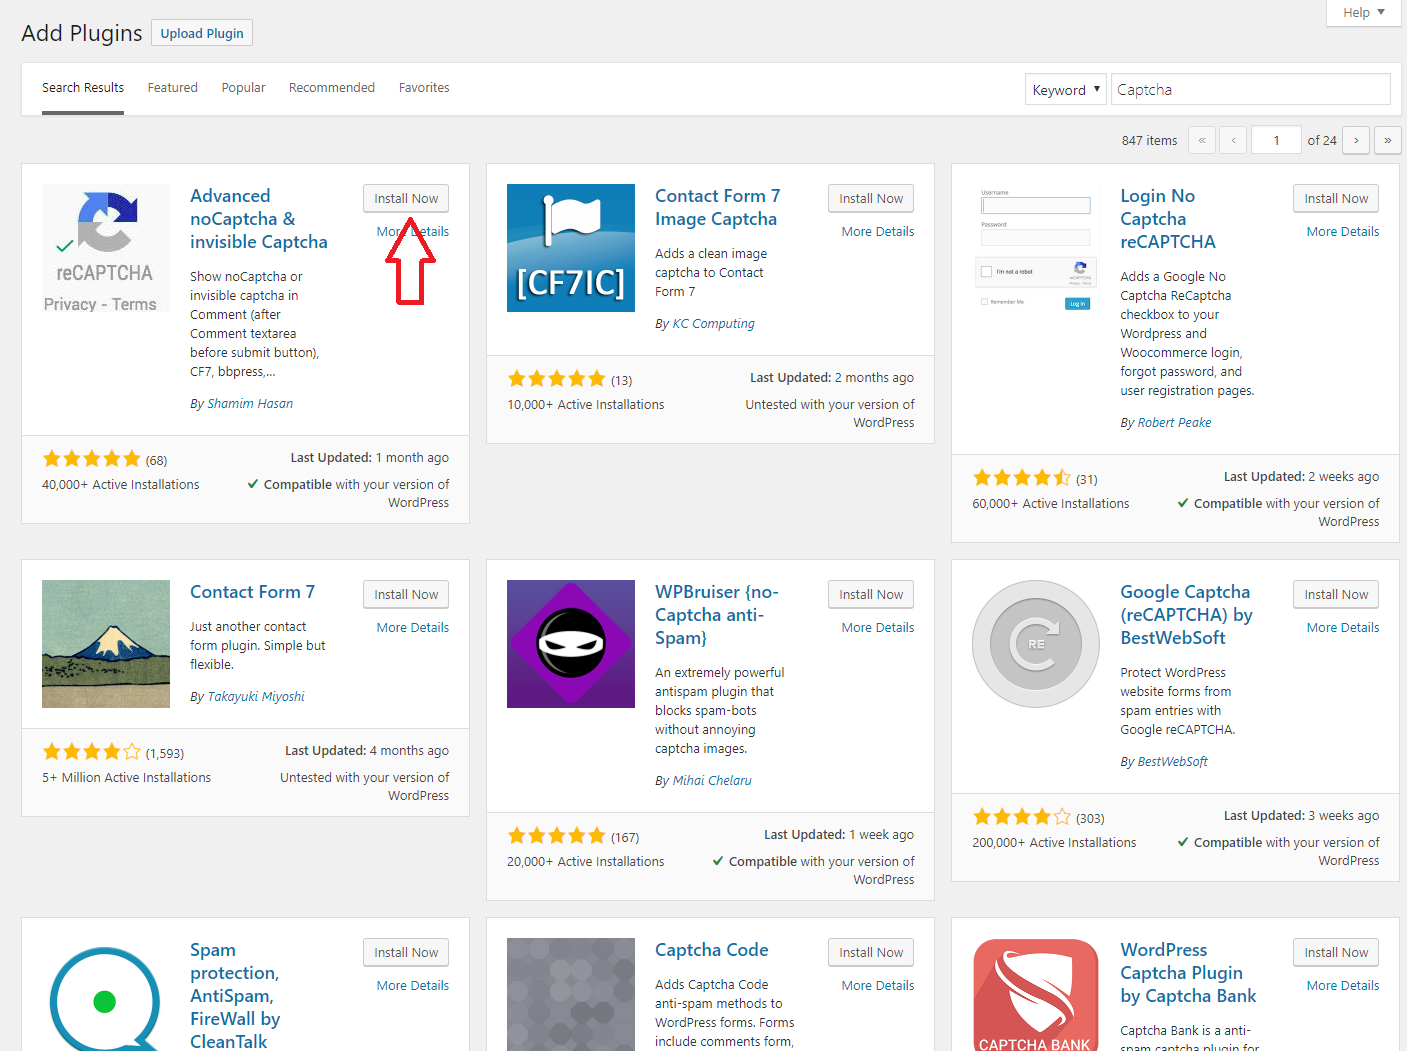
To begin, you will need to log in to your admin section of your WordPress site. Go to Plugins > Add New, on this screen search for “captcha”. The plugin I have used and have not had any problems with is the “Advanced noCaptcha & invisible Captcha” plugin. Click “Install Now” , “Activate”, and then click settings.
For this next step a Google account is required. Go to this link:
https://www.google.com/recaptcha/intro/v3.html# and click Admin console on the top right. Fill in the label field with your domain name, be sure to choose reCAPTCHA v2, enter your domain, and accept the Terms of Service.
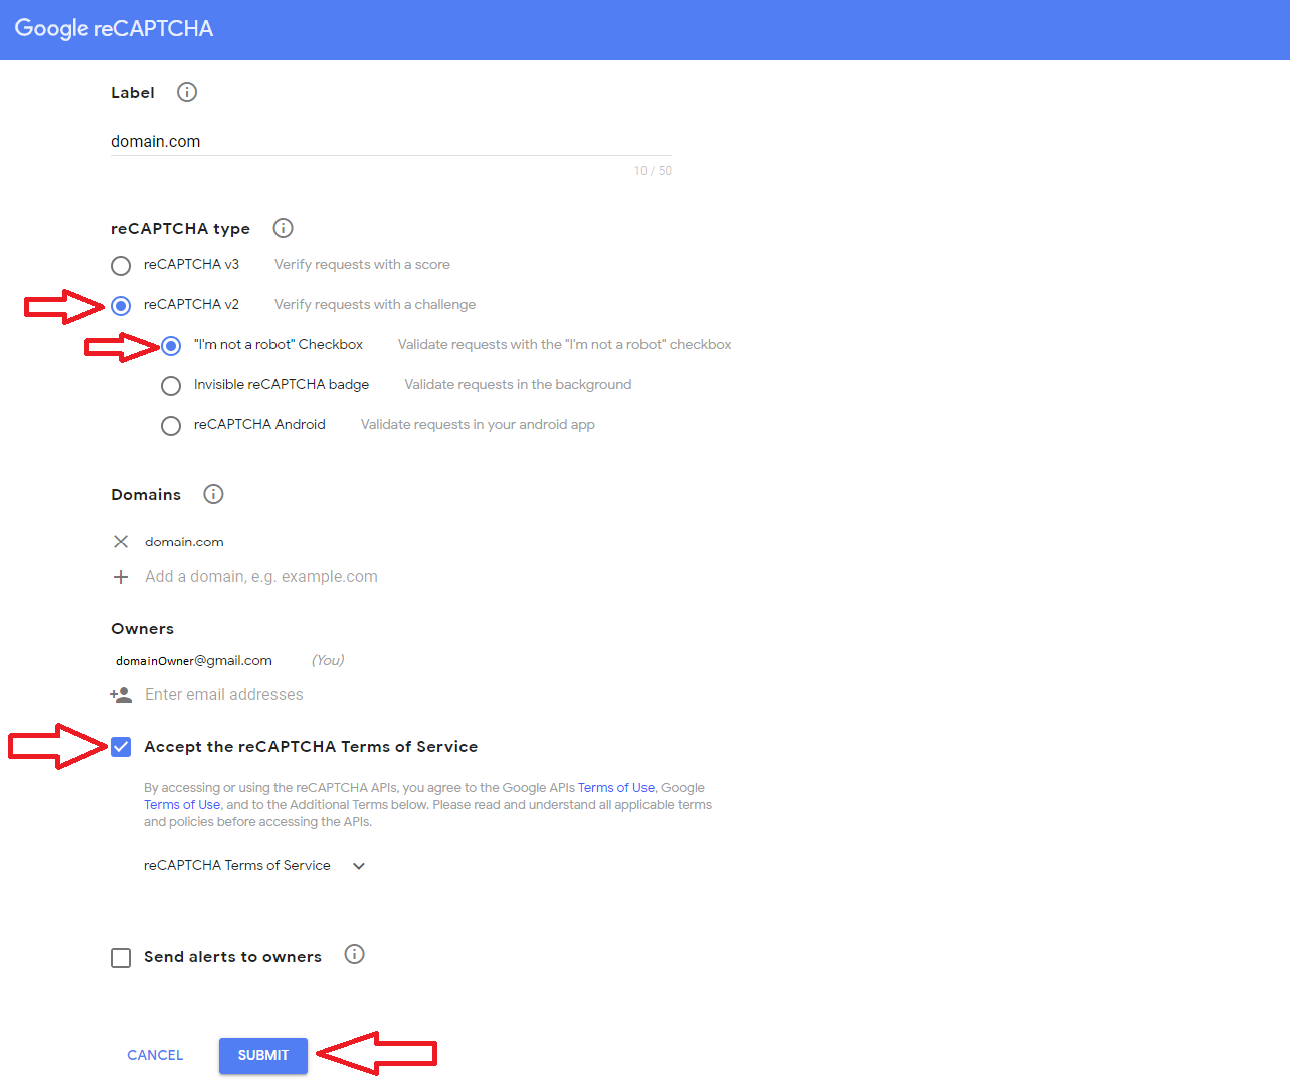
Click submit to be given your “Site Key” and “Secret Key”, go back to the settings page for the plug in and paste the keys in there. Fill in the rest of the fields as needed. **I would highly recommend testing it on only the Comment Form first and not the Login as it can lock you out if done incorrectly. ** You can also set how many attempts are allowed before a user is prompted, the default is set to always ask.

Click “Save Changes”, then visit a comment section on your site. The result should be the newly added reCAPTCHA prompting you to verify you are not a robot.
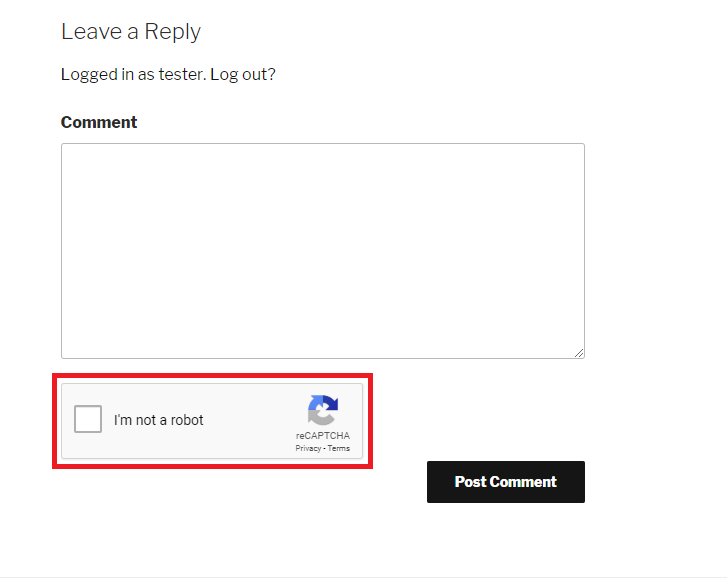
Congratulations! You can now go back to the settings page and enable it on the log in page, as well as any other pages you would like to protect from bots. Should you encounter any problems during the process please open a support ticket.
Visit Winhost to learn more about our WordPress hosting solution
When I see one of these tickets, I know I’m in for the long haul. I’ve seen this problem a handful of times and each time the solution was different and less obvious than it’s predecessor. So instead of struggling to remember what it was I had done the previous time that succeeded , I decided to consolidate some of the fixes into this blog post.
1) Check your database.
In the control panel go to the MySQL icon and look for “Usage”. If you reached the assigned quota for that database, you may have found the issue. You will either have to raise the quota or if you have reached the max quota for the account, then you will have to free up some space. Once you make this change check back in an hour and your login may start working again.

2) Disable Plugins or Themes.
If you recently installed a new plugin or theme when you encounter this login problem, that may be the culprit. Connect to your site via FTP, navigate to the “wp-content folder”, and find your “plugins” folder. Try renaming the “plugins” folder to “pluginszzz” and attempt to log in. If it works, then you know for sure that one of the plugins was interfering with the login.
If the last step did not reveal anything check the “themes” folder by double clicking it. Rename the theme you are currently using to anything so WordPress will revert back to the default theme. If the login is successful then you know the theme was the cause.
3) Define your site URLs in wp-config file.
Connect to the site via FTP. In the root of your WordPress directory look for your “wp-config” file. Download it and open it in a text editor such as Notepad or Notepad++. Add the following two lines to the file, save it, and upload it back to the site.
define(‘WP_HOME’,’http://domain.com’);
define(‘WP_SITEURL’,’http://domain.com’);
***Be sure to change ‘domain.com’ to your actual domain name***
4) Reset your password.
This is a fairly self-explanatory step. Just click on the forgot my password link, reset it and try again.
The above list has been the solutions that worked to resolve the login issue for me, but there could be other resolutions to the login problem that I haven’t encountered yet.
If none of the above successfully resolves your issue, the next step would be to open a technical support ticket so we can try looking into the issue further and find the cause. If we find more solutions we’ll try to post them in the future.
Visit Winhost to learn more about our WordPress hosting solution
![]()
The latest version of these apps are now available in the control panel app installer:
Visit Winhost to learn more about our application hosting solutions
In this tutorial we’ll be using an empty ASP.NET Core application within Visual Studio 2017 and show you how to deploy an ASP.NET Core 2.2 application that is running in InProcess on a Windows IIS Server.
ASP.NET Core 2.2 was recently released and with some new cool features. You are now able to use InProcess with your ASP.NET Core application. By default older versions of ASP.NET Core used OutOfProcess. When using InProcess the ASP.NET Core application only uses the IIS Worker process (w3wp.exe) whereas the OutOfProcess Core application uses the Kestrel server along with the IIS Worker process.
Kestrel is used in ASP.NET Core because it’s supported on different web servers like Apache, IIS, and Nginx. In a Windows server environment, OutOfProcess uses the Kestrel process (dotnet.exe) and IIS Worker process as a reverse proxy to handle the HTTP requests and other various requests normally handled by the IIS Worker Process.
When using InProcess hosting the IIS worker process handles all of the HTTP requests without Kestrel. No more reverse proxies being utilized meaning for a quicker result and a boost in performance.
On Winhost we support both InProcess hosting and OutOfProcess hosting with ASP.NET Core 2.2. If you want to test this on Winhost try to find our hidden promo code within this blog post. (Hint: It’s not a clickable link.)
Open a new Visual Studio Project as shown below:

Select ASP.NET Core Web Application.
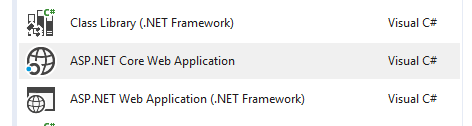
Click OK and on the next window select Empty making sure ASP.NET Core 2.2 is selected from the drop down menu as well. Click Okay again.
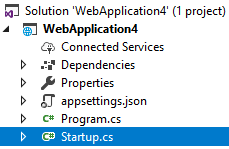
In this project we’re only interested to focus on what process the ASP.NET Core 2.2 is running on. To do this we need to edit the Startup.cs file from the Solution Explorer page.
Go to Line 30 and replace the following code:
await context.Response.WriteAsync("Hello World!");
With the following:
await context.Response.WriteAsync(System.Diagnostics.Process.GetCurrentProcess().ProcessName);
The above code replaces the typical “Hello World!” text from the empty application and displays the process name the application is running on. This step isn’t necessary if you want your application to use InProcess hosting model. We are doing this here just to see what process is being used once it’s been deployed onto the web server.
When selecting a new ASP.NET Core 2.2 project in Visual Studio 2017 the defaults to InProcess within the Application’s Project file. However, you have the ability to check what hosting model your core application is going to use by checking the Project file. See below example:
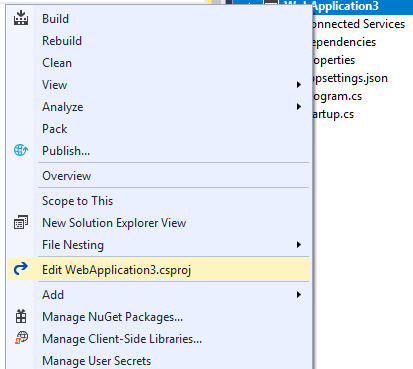
In the project file on line 5 you should see the following:
<AspNetCoreHostingModel>InProcess</AspNetCoreHostingModel>
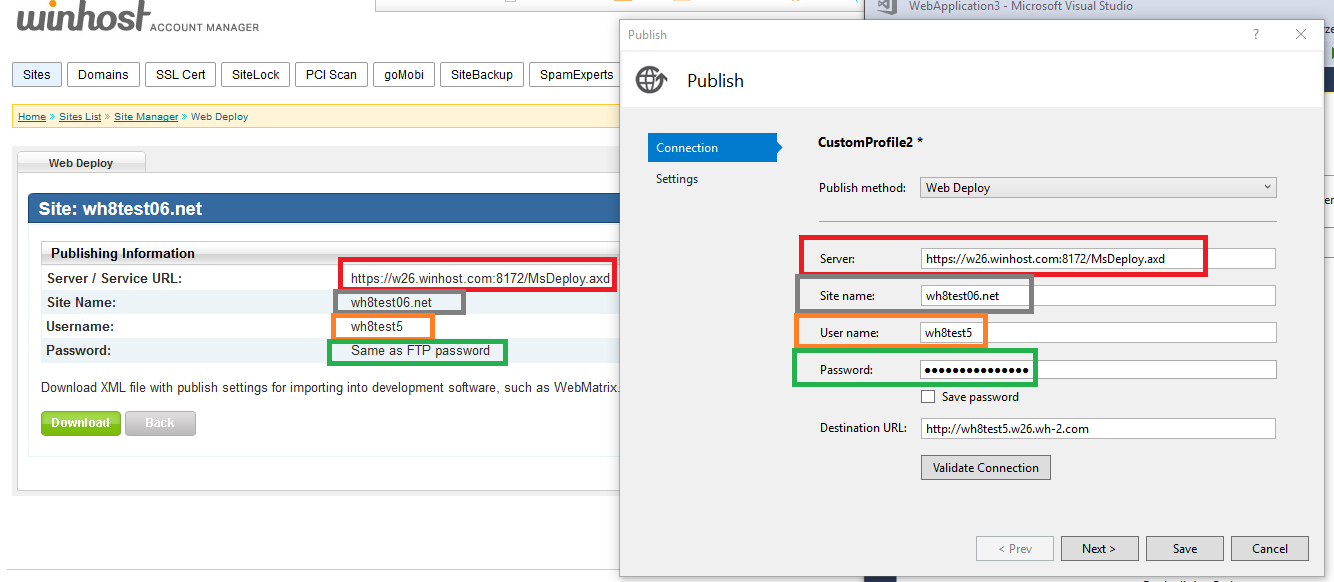
Log into your Winhost control panel if you haven’t done so already.
In the Publishing information section you will need these settings within Visual Studio when doing a Web Deployment. See below:
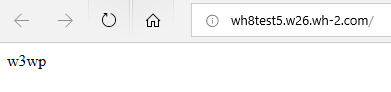
If your application is on a IIS server and it’s running InProcess the text you will see in the web browser is: w3wp
If your Core application is running OutOfProcess then it will return: dotnet

In closing, InProcess according to Microsoft is, quicker compared to OutOfProcess. Nicely done Microsoft… Nicely done, indeed.
Visit Winhost to learn more about our ASP.NET Core hosting solution