
Site hosting news, tutorials, tips, How Tos and more

The newly released nopCommerce v4.5 is now available in the WH Control Panel Application Installer.
Visit Winhost to learn more about our nopCommerce hosting solution
Nopcommerce 4.3 was released and with it, the ability to use a MySQL database. In this post I’ll be showing you how to configure your nopCommerce 4.3 with a MySQL database.
Like many applications, nopCommerce is installed in two steps. First, you install the nopCommerce application into your site and then you complete the software configuration by providing information through an Installation Wizard that you access through your web browser.
You can use our Application Installer to install nopCommerce 4.3 in your site. Follow the instructions in the first part of this Knowledge Base article to get the initial nopCommerce install done but you won’t need to create a new MS SQL database. The rest of the information in this blog post will give instructions on how to create a MySQL database and how to complete the nopCommerce Installation screen.
Now that you have installed nopCommerce in you site, we want to pull up the nopCommerce Installation screen to finish configuring nopCommerce. Assuming that your domain is not yet resolving to Winhost, you can complete the nopcommerce configuration using the Secondary URL we provide you. Here is how to find the Secondary URL.
Enter the Secondary URL into your web browser. You will be presented with the nopCommerce Installation screen. In this screen, you will provide specific information about your store and hosting account to finish configuring the application.
Enter the following information into the nopCommerce Installation screen.
Next, you need to create a MySQL database through the Winhost control panel. Here are step-by-step instructions.
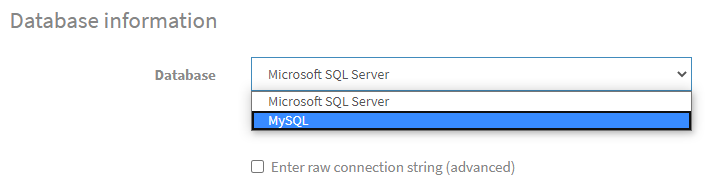
Now, you need to specify that you will use MySQL as your database and tell the nopCommerce application where the database is and how to access it. So, go back to the nopCommerce Installation screen and have the Winhost Control Panel MySQL section open in another browser tab so you can go back and forth to get and enter your information.
In the Database Information Section of the nopCommerce Installation screen, click on the Dropdown menu and select MySQL as shown below:
Click on the Install button and wait for the installation to complete. This will take a few minutes.
Enjoy
Visit Winhost to learn more about our nopCommerce hosting solution
In this post I wanted to discuss some background about our recent launch of our new Power Plan.
We receive a lot of customer comments on ways to improve our hosting services, as well as suggestions on features customers would like to see implemented. We try to take all this feedback into consideration and, when possible, work towards turning it into something real.
For example, we received feedback from customers whose sites outgrew the Ultimate Plan because their application required more resources. Applications growing in their resource usage requirement is a general trend we are seeing. Every year, each new version of an application has more features, which typically leads to its need for more server resources to run. We’ve seen this happen with applications like nopCommerce, where the older versions worked fine on our Max and Ultimate plans, but newer versions required more resources than our Max Plan. With its recent conversion to .NET Core and new features, we recommend running nopCommerce on our Ultimate Plan but active nop sites are now hitting the resource limit of the Ultimate Plan.
So we launched our new Power Plan to help resource intensive sites that outgrow the Ultimate Plan. We also built a separate high performance shared hosting infrastructure just for Power Plan users. The servers have less site density and are optimized to run resource intensive applications.
Now let’s dive into some of the Power Plan details. The table below shows some of the differences between the Ultimate Plan and the Power Plan. You’ll see that the you get double the resources on key hosting features.
| Ultimate Plan | Power Plan | |
| Memory Allocation | 500 MB | 1 GB |
| Email Storage | 5 GB | 10 GB |
| SQL Database | 5 GB | 10 GB |
| mySQL Database | 5 GB | 10 GB |
| Idle Timeout | 20 min | 60 min |
For a complete feature list for the Power Plan, vist our website. If you have any questions about the new plan feel free to contact us or open a support ticket.
Visit Winhost to learn more about all our Windows hosting solutions
![]()
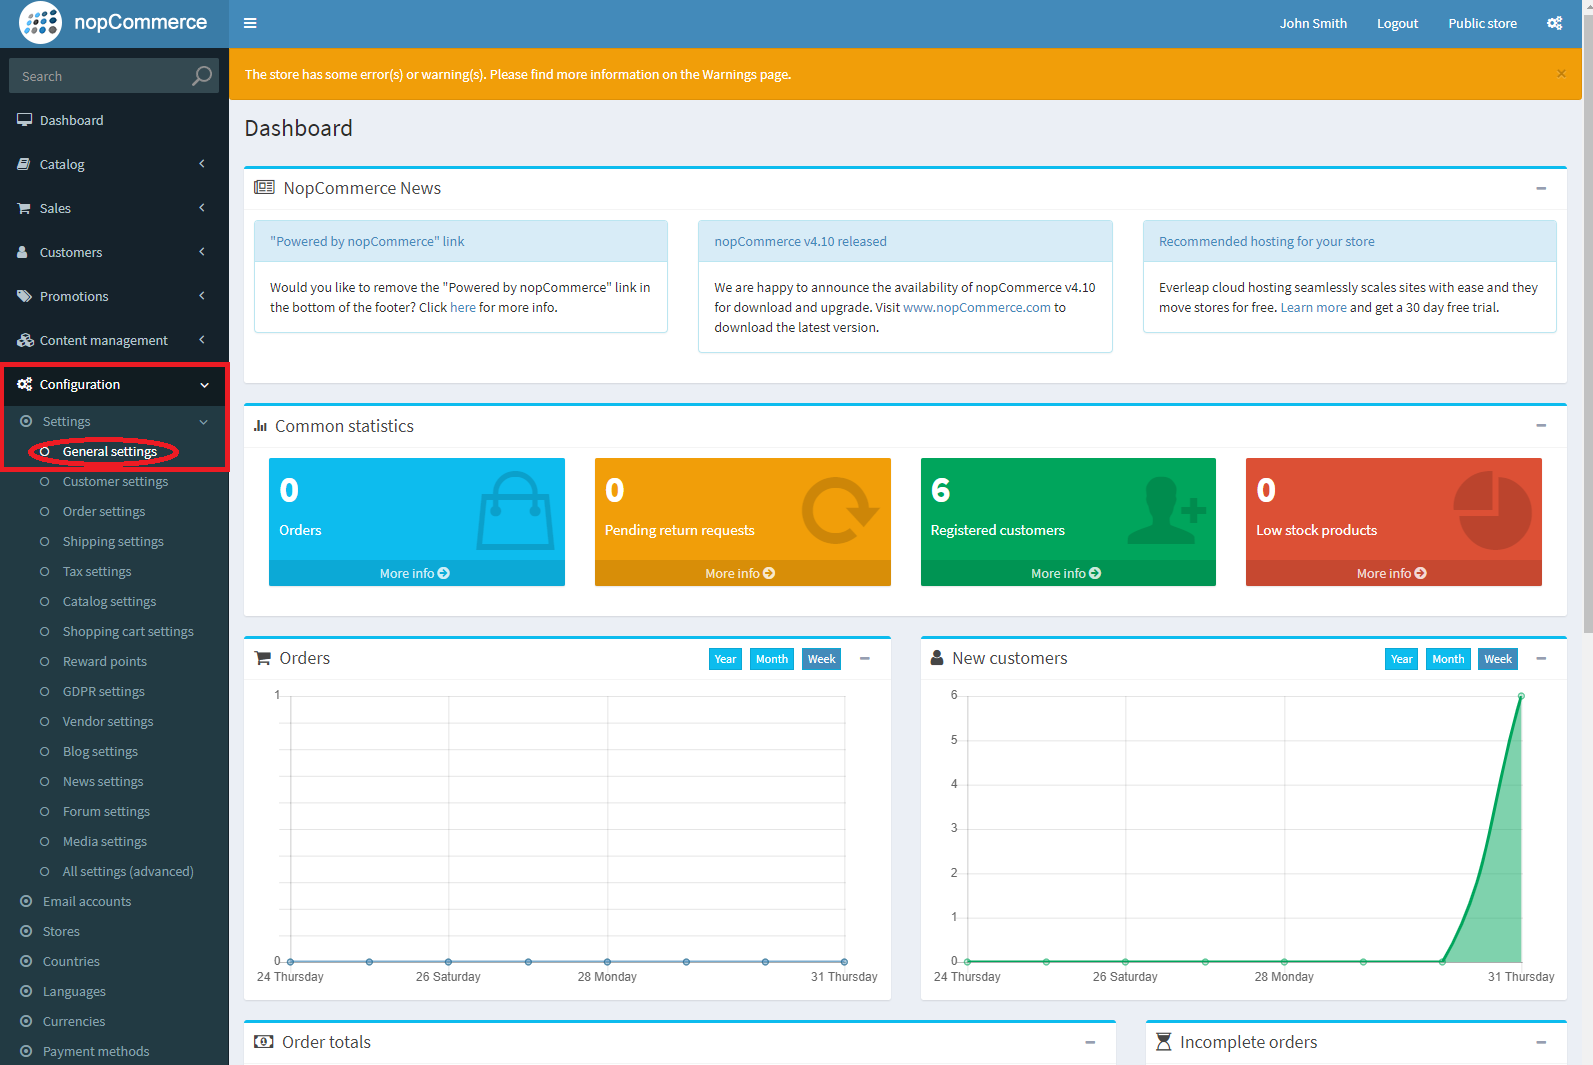
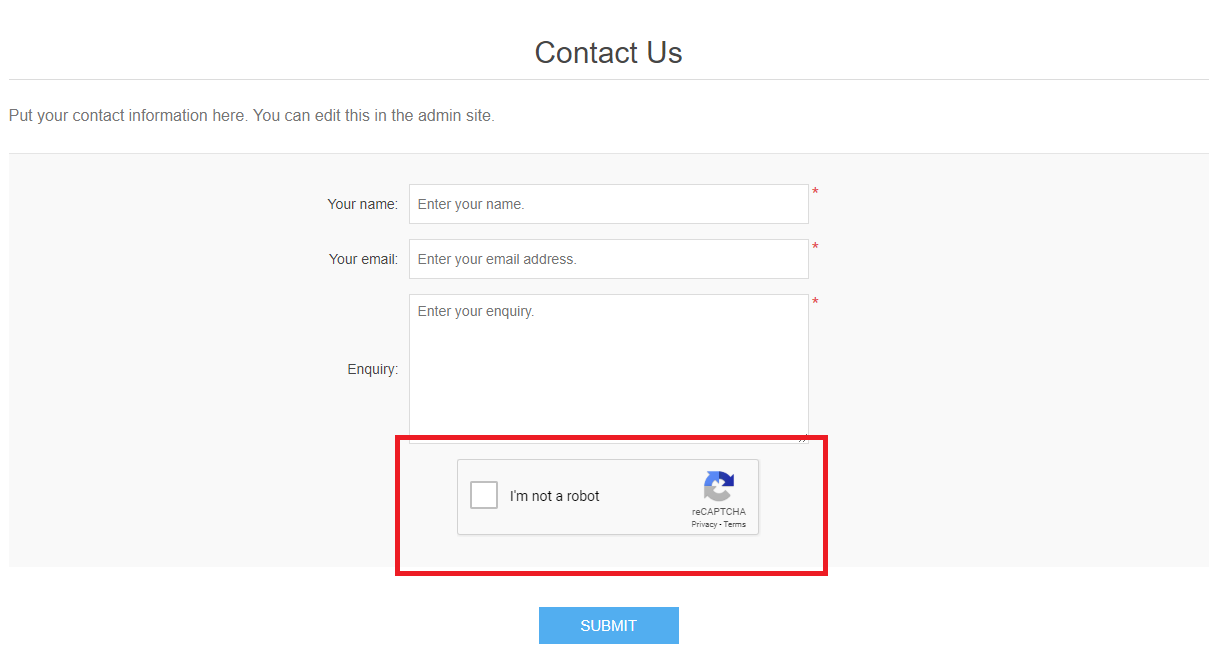
One of our nopCommerce hosting customers was getting major spam on their site so we suggested to add CAPTCHA and this helped get rid of the spam and their headaches. In this post, I’ll describe the steps to enable CAPTCHA on your nopCommerce store so you can stop or reduce spamming activities on your site.
CAPTCHA is a great way to prevent bots from running wild. The seemingly simple test can prove to be an difficult task for a computer program attempting to spam your site.
In this post, we are using nopCommerce 4.10.


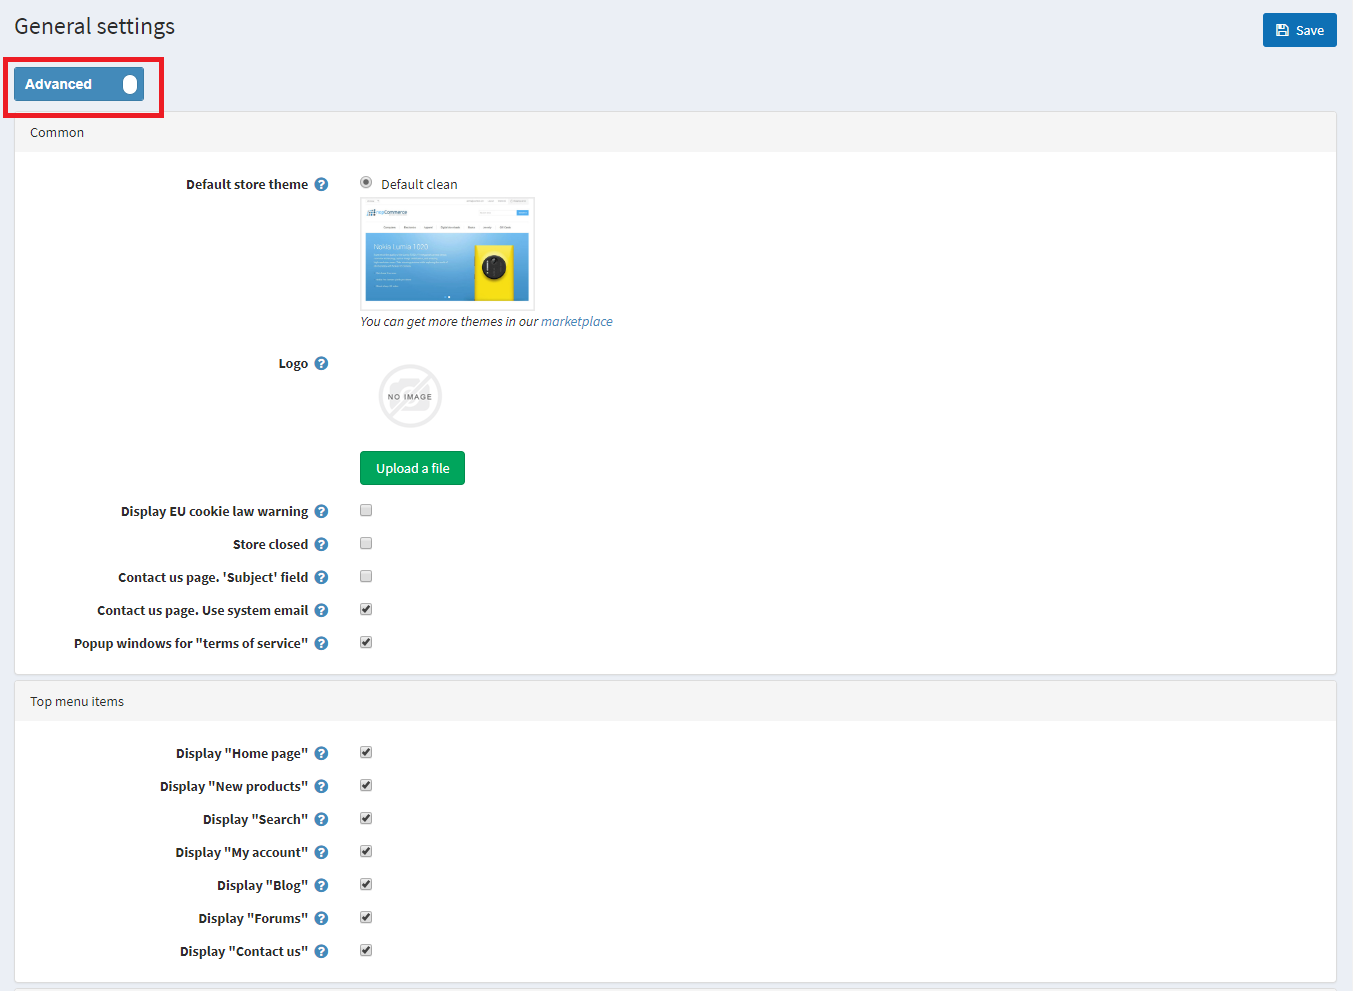

**For testing I recommend NOT enabling “on login page” just yet.
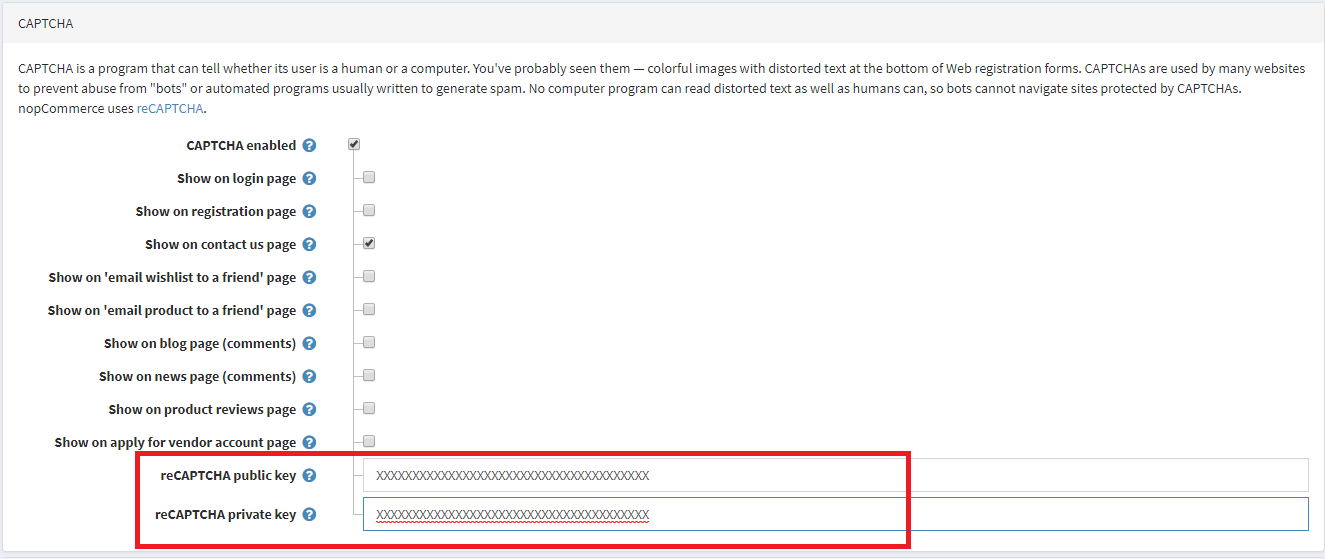
***Note: Be sure to test it before checking the “Show on login page” – if done improperly you can end up getting locked out of your account.

I hope that this helps you prevent getting bombarded by spam.
Visit Winhost to learn more about our nopCommerce hosting solution