
Site hosting news, tutorials, tips, How Tos and more
![]()
Here is a list of updated applications for the Winhost Control Panel App Installer:
A tip for DotNetNuke, mojoPortal, MonoX installs: the wizard for each CMS works fine if you install it to an empty database. Please also remember that nopCommerce 2.7 and above requires Windows 2012/IIS8/.NET 4.5 Framework.
![]()
OpenCart is an open source PHP based ecommerce solution, and in this tutorial, I will show you how to get it up and running here at Winhost. First, I suggest you create a MySQL database through the Control Panel.
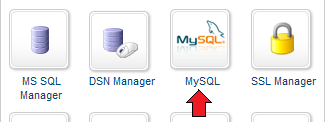
Click on the Sites tab.
 Click on the Manage link and then click on the MySQL button.
 Click the Add button and enter the values for Database Name, Database User, and Quota. Click the Create button to finish creating the database. Now click on the Manage link and record the connection information (Database Name, Database Server, Database User, and Database Password) on a piece of paper or a text editor such as Notepad.
Next, you’ll need to obtain the source download from the OpenCart website.
Extract the contents using a decompression program such as WinZip or 7-Zip. Navigate to the upload folder of the extracted files. Rename the php.ini file to user.ini and create a web.config file with this configuration:
<?xml version="1.0" encoding="UTF-8"?>
<configuration>
<system.webServer>
<!-- Set the default document -->
<defaultDocument>
<files>
<remove value="index.php" />
<add value="index.php" />
</files>
</defaultDocument>
</system.webServer>
</configuration>
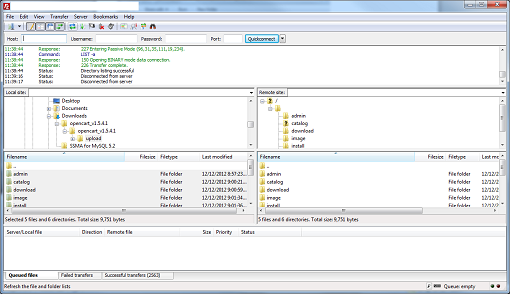
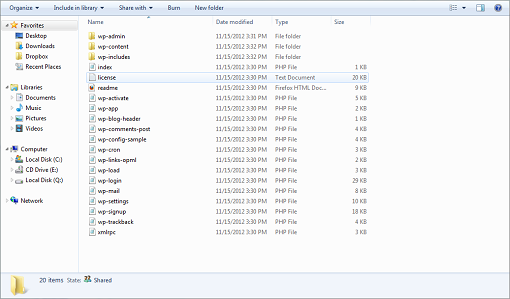
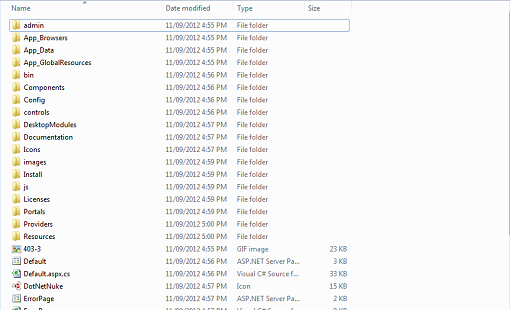
The file structure should look like this:
 We rename the php.ini file to user.ini because the php.ini settings are global and cannot be accessed by an individual user. Please read our other blog for more information. If you want a list of settings that you can manipulate in the user.ini file, please see these links on the official PHP site and look at the Changeable column.
http://php.net/manual/en/configuration.changes.modes.php
http://php.net/manual/en/ini.core.php
We add the web.config file so that “index.php” will load automatically. Now upload the files to the root of your site account, preserving the directory structure as shown here:
 Now browse to your site using either your domain name (if you have already set it up correctly) or Secondary Web URL to start the installation.
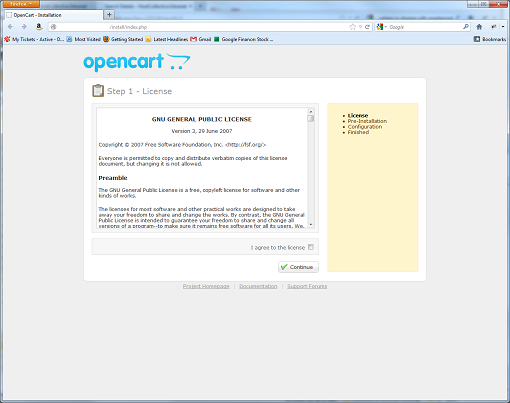 Check I agree to the license and the Continue button to proceed.
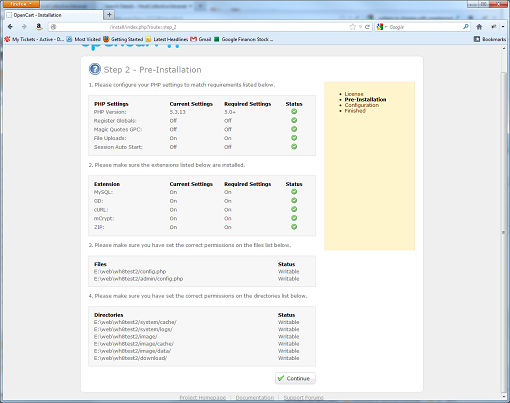 After a PHP check, click on the Continue button to proceed.
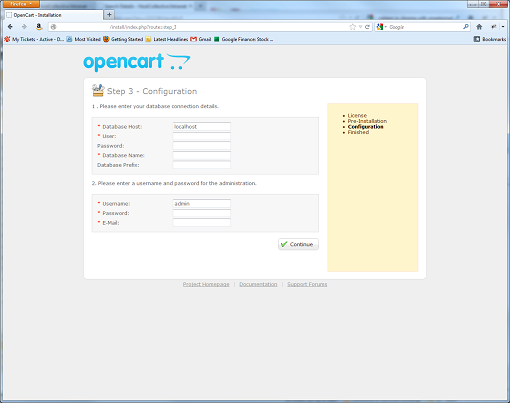 Enter the MySQL connection credentials you recorded earlier and fill out the information for the admin account. Click on the Continue button to proceed.
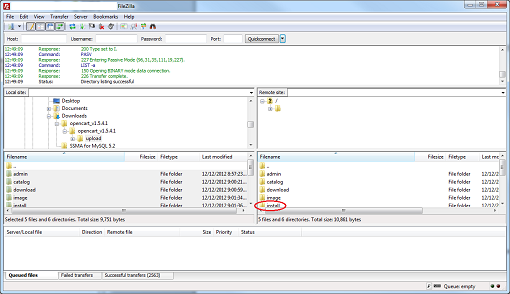
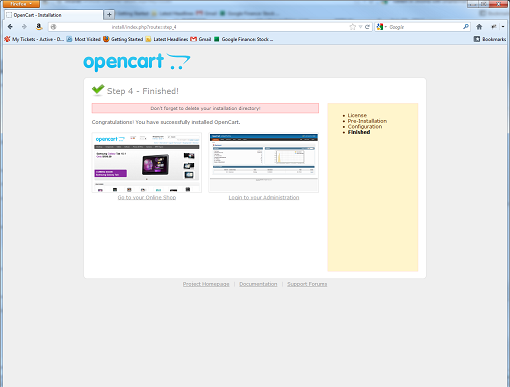 The installation has been completed. The last thing you should do is to delete the /install directory using FTP.
 You can start developing your site or make other configuration changes.
![]()
Here is a list of updated applications:
![]()
Here are some small tips you can use to make your WordPress site a bit more secure and slightly increase performance. Make sure the version of WordPress you’re running is the most recent version. This will ensure any security vulnerabilities found in the Content Management System will be addressed.
To perform an in-place upgrade of WordPress:
1) Log into WordPress as the admin user.
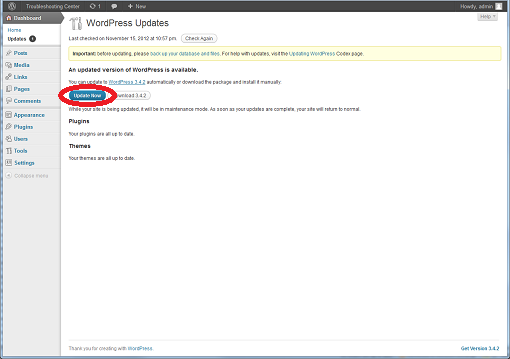
2) On the Dashboard, it should say WordPress x.x.x is available! Click on the Please update now link.
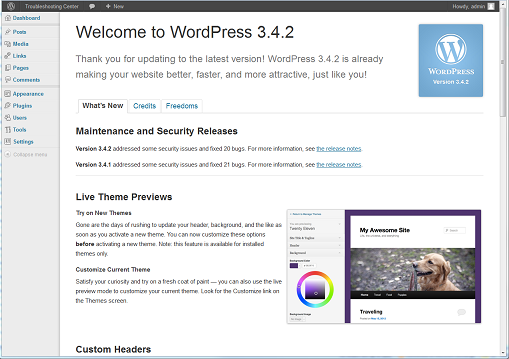
3) Click the Update Now button.
4) Finished!
Alternatively, you can perform a manual upgrade by:
1) Instead of clicking the Upgrade Now button, click Download x.x.x
2) Extract the .zip file’s contents.
3) Upload the files using FTP, matching the same directory structure.

4) Once you refresh the admin screen in the browser, you should get an Update WordPress Database button. Click on it and then the Continue button to complete the process.
You can also add an extra layer of security for the admin section. Ruslan’s Blog shows you how.
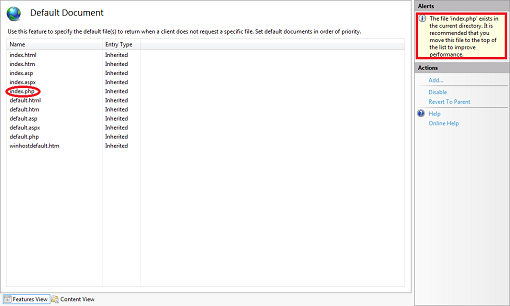
According to IIS7 Manager, you can improve the performance a bit by moving the index.php file to the top of the Default Document list.
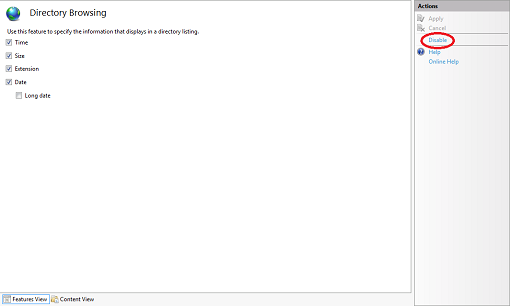
I also suggest you disable Directory Browsing.
Take note that any changes you make through IIS7 Manager will be written to your web.config file, so you should always make a backup of it before proceeding.
![]()
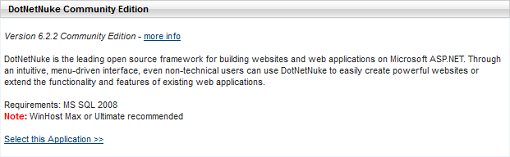
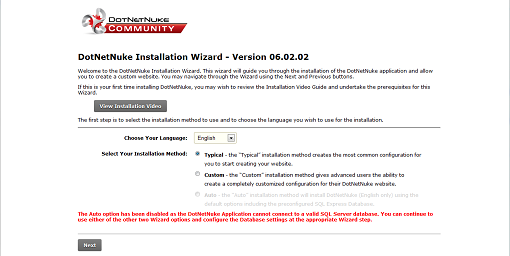
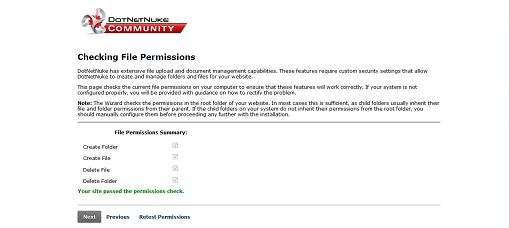
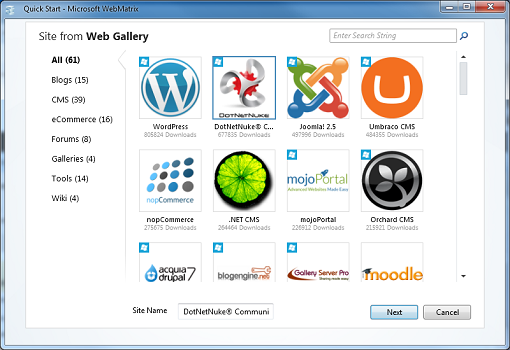
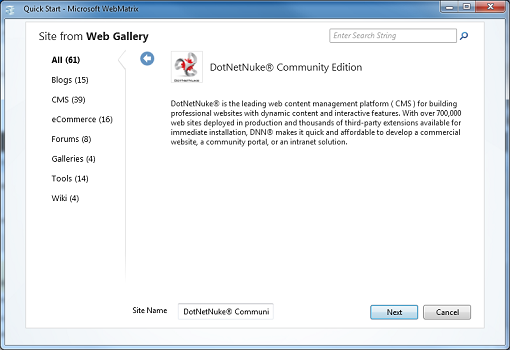
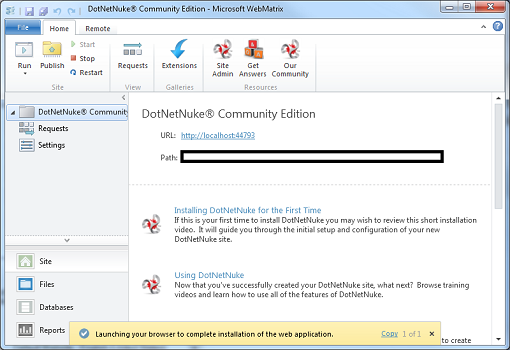
Did you know there are multiple ways of installing/deploying your favorite Content Management System at Winhost? Below, I provide 3 general guidelines and briefly explain the benefits/drawbacks of each. (I’ll be using DotNetNuke as an example.)


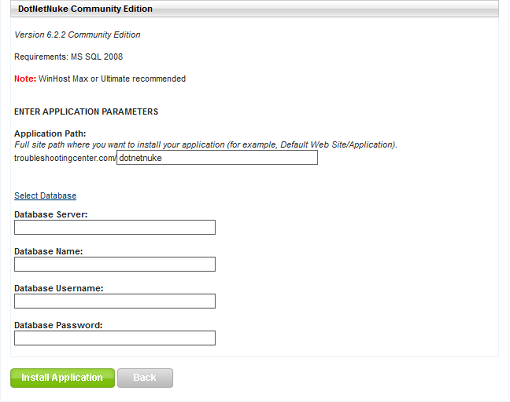
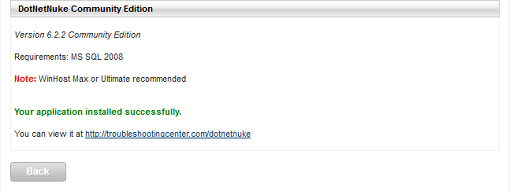
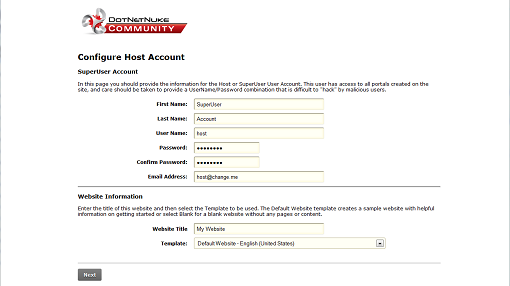
Configuring DotNetNuke example:

Benefits: The benefit of using this method is that you do not have to upload any files.
Drawbacks: A slight drawback is that CMS version might not be the latest. This may not be a problem as most CMS nowadays have upgrade modules which you can invoke after the install.
Please also note using the App Installer tool will wipe out any files in the installation directory. If you have files in the root, this is not a good idea. Make sure you make a backup copy of your site before using the App Installer tool.
If you install the application to a sub-directory, it will also mark it as an application starting point. If you have multiple apps running on your site, you will need to take this into consideration if you need to make web.config modifications.

Benefits: The benefit of using this method is that you can use the latest version of the CMS or install a CMS that is not available through the App Installer such as OpenCart.
Drawbacks: The drawback is that you need to be more aware of the CMS’ requirements and may need to perform more steps to configure it properly. It also may not be a viable option if the CMS is particularly large, and you have a slow Internet connection (i.e. it would take a very long time to upload the files).

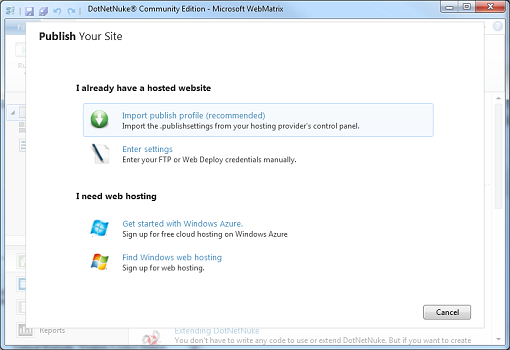

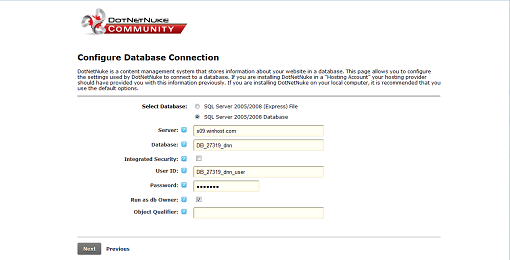
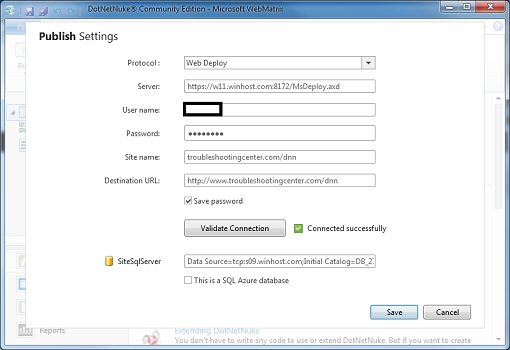
10. For this example, I will use Import publish profile (recommended). Below is a sample screen shot, and I’ve manually entered the database connection string (found in the Control Panel). Click on the Validate Connection button. If it does not say Connected Successfully, then you may have entered the wrong settings or you may have antivirus/firewall software blocking the connection. Click on Save and Continue a few times. (Don’t worry if you get a warning about site compatibility. It should still work.)
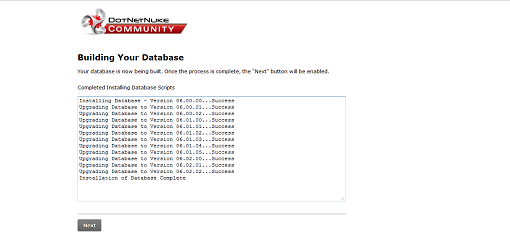
11. You will now see a Preview screen, and you can choose what you want to publish. Click Continue when you are done checking the files/database you want to update.

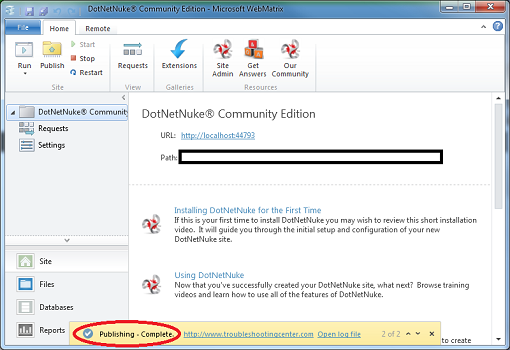
12. You will get a Publishing – Complete message when you are done.
Benefits: The greatest benefit to this method is that you can develop your site locally.
Drawbacks: The drawback with this method is that you may need to perform a lot of prerequisite setup prior to the installation. Configuring changes locally may also not work when you deploy to Winhost. You may still need to make some further alterations to the web.config file.
As with Method 1, you need to be careful when publishing as files in the destination could be overwritten. Always make a backup of your site prior to publishing.
You may also want to spend some time reading this great post from one of our customers on the forums:
http://forum.winhost.com/showthread.php?t=8565&highlight=dnn+installation
![]()
Our team has updated the App Installer tool in the Winhost Control Panel. Here is a list of the updated applications:
![]()
Our team has discovered that since the launch of Windows 2012 and IIS 8 there have been some issues with installing and running some of the more popular Content Management Systems such as DotNetNuke and Orchard.
The problem can be resolved by setting the Trust Level to Full in the web.config file. To do this:
If you find that you’re having difficulties with other Content Management Systems, you might want to try setting the Trust Level to Full as well to see if that will correct the problem.
![]()
Did you know that SQL Server Management Studio has an excellent tool to help you export the data contained in your tables to other useful formats? Here’s a guide on how to use the SQL Server Import and Export Wizard.
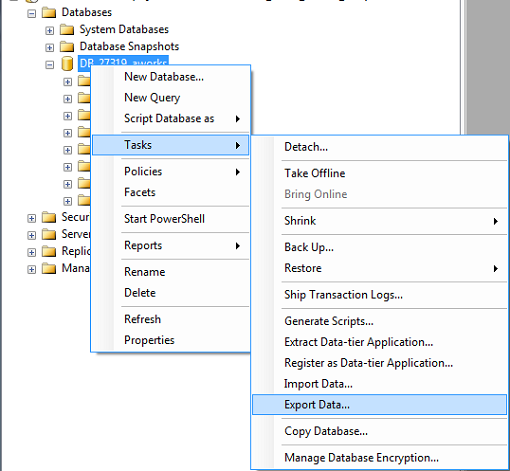
First, connect to your Winhost database using SQL Server Management Studio. For this tutorial, I am using the sample AdventureWorks database provided by Microsoft. Once you have logged into your database, right click on it and select Tasks -> Export Data…
This will launch the SQL Server Import and Export Wizard.
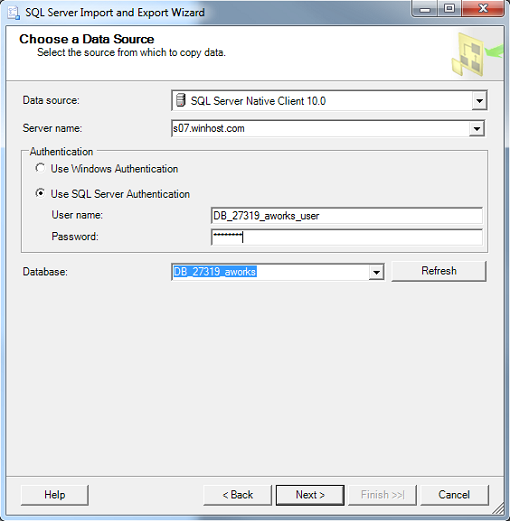
Click on Next to continue. Now, you will need to choose a Data Source. You can leave the Data source as SQL Server Native Client 10.0. Enter the Server name. Check SQL Server Authentication and enter the User Name and Password for your database. For the Database dropdown menu, select the name of your database.
Click on Next to continue. In the Choose a Destination window, you can select a variety of formats to export to including Microsoft Access, Microsoft Excel, and another Microsoft SQL Server database. For this tutorial, I will be showing you how to export your data to a flat file (i.e. .txt and .csv).
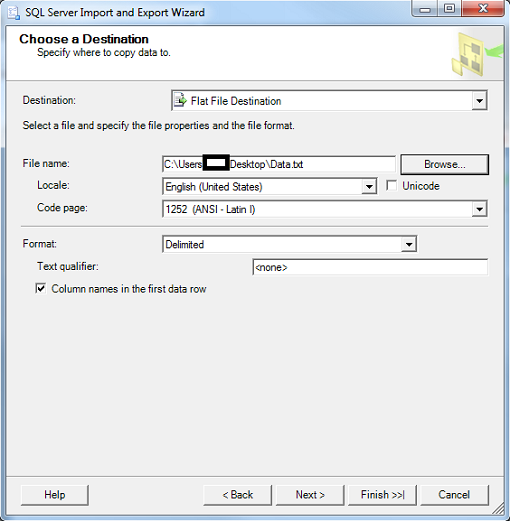
 In the Destination dropdown menu, select Flat File Destination. For the File name, click on the Browse button, select Desktop and give the file a name. You can choose either .txt or .csv format by clicking on the dropdown menu next to the file name.
You can leave the Locale as English (United States) and Code page as 1252 (ANSI – Latin I). The Format will be Delimited and check Column names in the first data row. You can set a Text qualifier if you’d like, but I’m not going to.
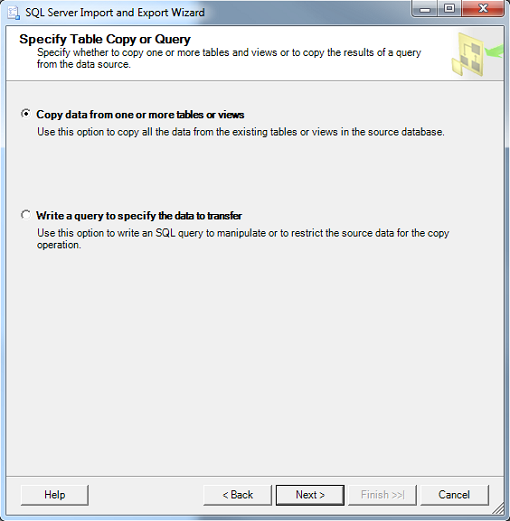
Click on Next to continue. In the Specify Table Copy or Query window, check Copy data from one or more tables or views. If you check the other option, you can write your own SQL query (SELECT statement) to extract the data you want from two or more tables.
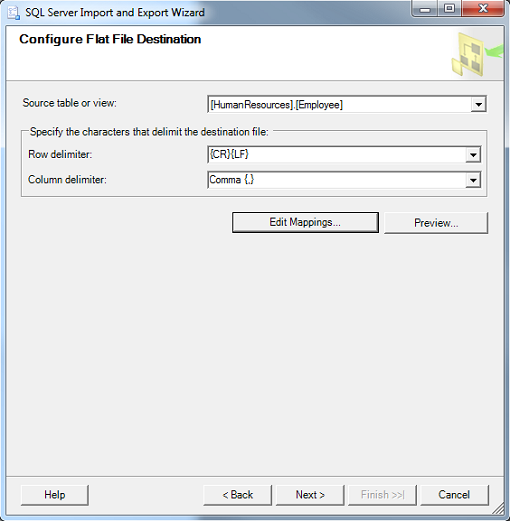
Click on Next to continue. In the Configure Flat File Destination window, I will be drawing data from the Employees table. In Source table or view, select [HumanResources].[Employee]. You can leave the Row delimiter as {CR}{LF} and the Column delimiter as Comma {,}
You may also want to spend some time looking at Edit Mappings. For a flat file, you can choose not to include certain columns to be exported by selecting the Destination column name and choosing <ignore> as shown below.
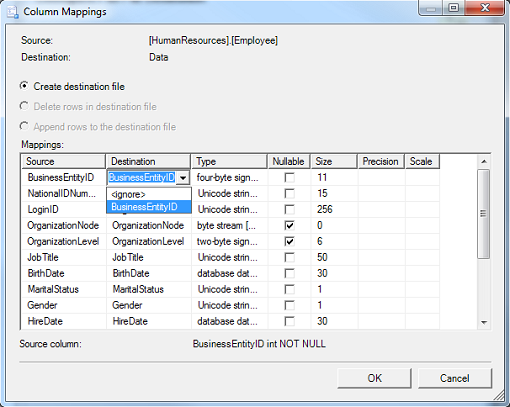
This tool is actually more powerful when you are exporting to an existing file that already has column names in place as you can map a column name from the Source file to a different column name in the Destination file.
For example, you have an Excel file with a column named BEID. You can map BusinessEntityID to BEID. The data will be populated in the BEID field in Excel. Click on Next to continue. This will bring up the Run Package page.
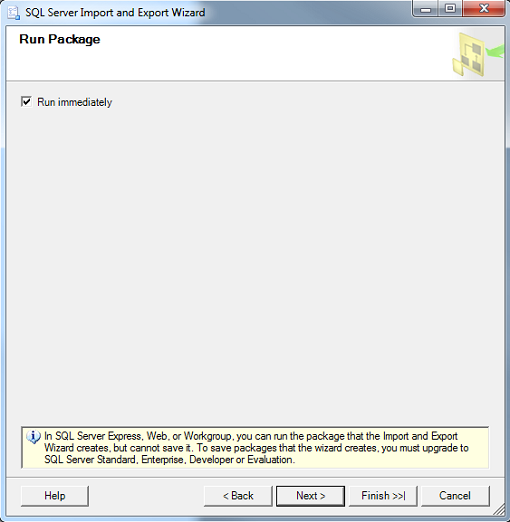
Click on Next to continue. The Wizard is complete and you can click on Finish.
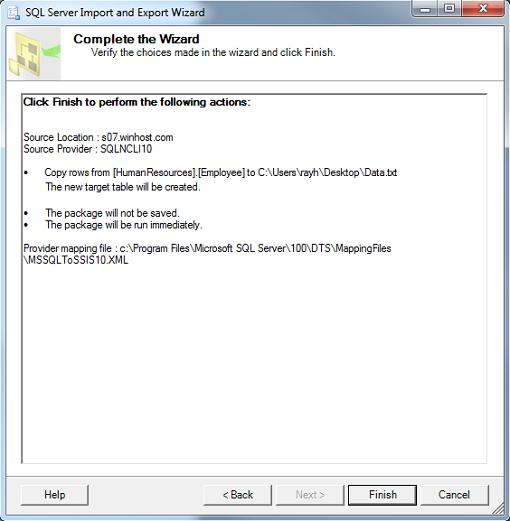
The Wizard will now run through a series of checks prior to exporting the data. If everything goes smoothly, you should get the screen below.
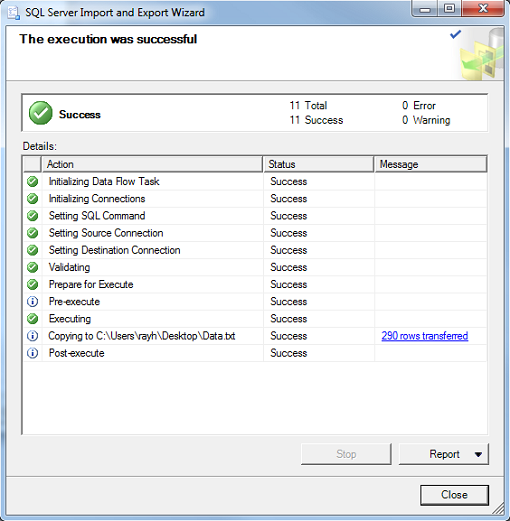
If you run into any errors, there will be a link in red which you can click and review the problem the wizard is having. You can use the Back button to correct the problem and go through the steps again until you are able to successfully export the data.