
Site hosting news, tutorials, tips, How Tos and more
![]()
You may have noticed that not all HTTP Verbs are enabled by default. This is a short tutorial on how to enable them if your application requires it or restrict them for security purposes.
First, you’ll want to connect to your site with IIS7 Manager.
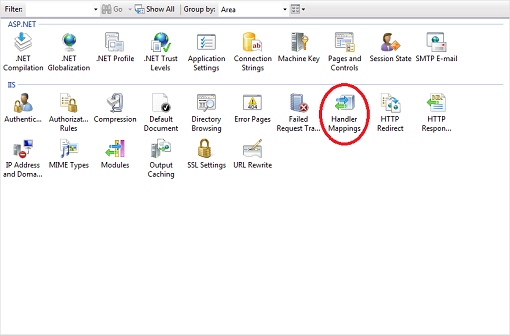
Double click the Handler Mappings module as shown above. This will bring up the Handler Mappings window.

Next, double click the ISAPI extension you want the verb enabled for. This will bring up the Edit Script Map window.
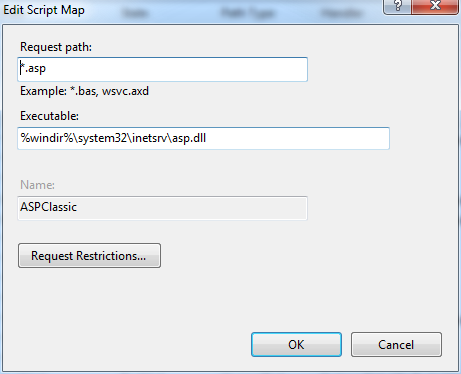
Click on the Request Restrictions… button to bring up the Request Restrictions window and select the Verbs tab.
In this window, you will be able to define which HTTP Verbs you want to allow or restrict. Click OK, and you’re finished!
![]()
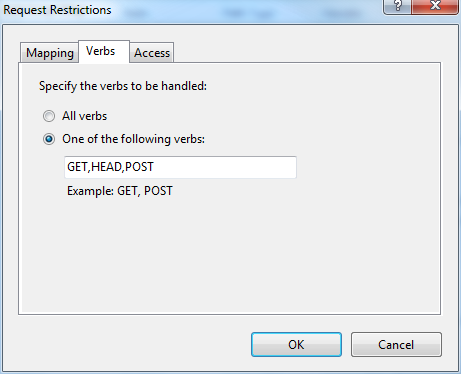
Have you been deploying (pun intended) your application unsuccessfully and running into an error regarding a missing assembly such as this one?
This is because we don’t include many of the assemblies in the Global Assembly Cache due to versioning conflicts. You can resolve the problem by making sure the missing assemblies are included in the /bin directory on your local machine prior to uploading your files to your site account. For MVC3 and Razor applications, you can follow these instructions to copy the missing .dll files to your local /bin folder.
For this tutorial, I created a sample MVC3 application in Visual Studio.
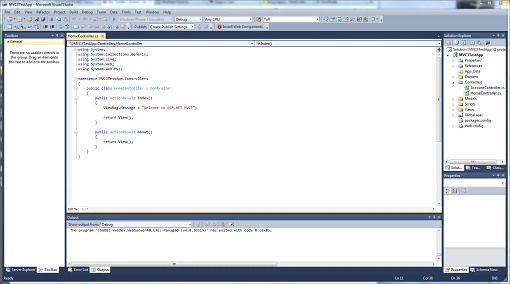
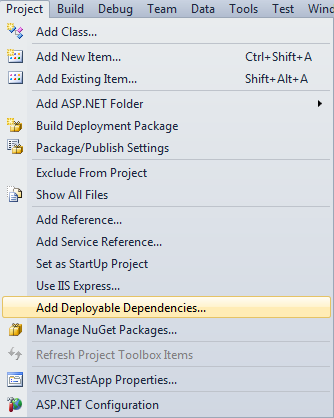
Next, you’ll want to expand the Project Menu and select Add Deployable Dependencies… as shown here.
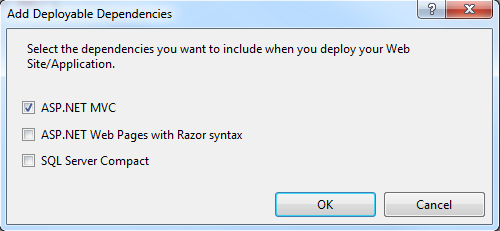
A pop-up window should appear with 3 check box options. Check the appropriate boxes and click on OK.
Then go to Build -> Build Solution (or hit Ctrl+Shift+B), and the missing assemblies will be added to the /bin folder.
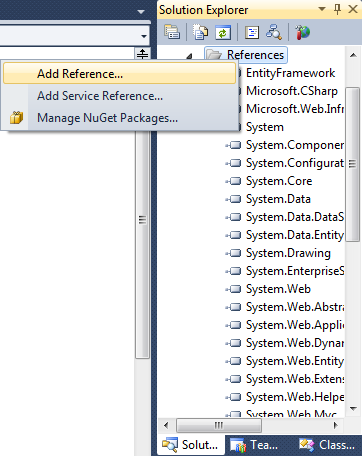
An alternative method of adding the missing .dll file(s) is to set the Copy Local Property value to True. In the Solution Explorer window, expand the References folder. If the assembly is missing from the list, right click on References and select Add Reference…
This will open the Add Reference window. Change the tab to .NET, find the missing assembly, and add it to the list by double-clicking on it.
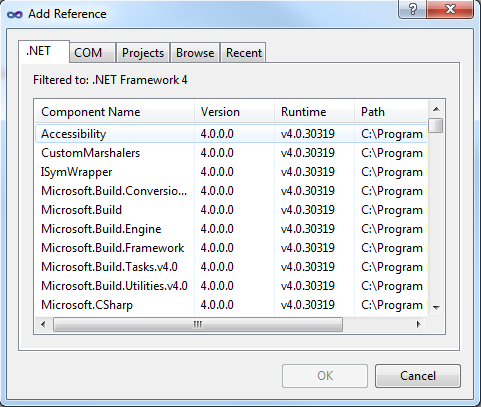
Now, select/highlight the missing assembly.
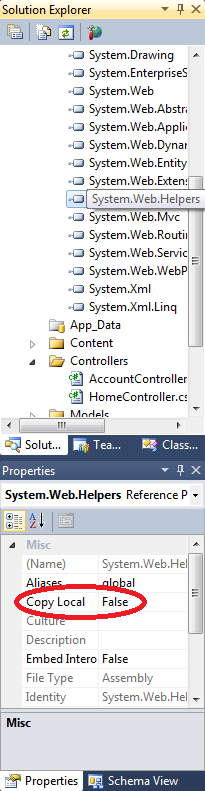
In the Properties window, change the Copy Local value from False to True. Note that you’ll have to set this for each missing assembly. Remember to go to Build -> Build Solution (or hit Ctrl+Shift+B) to recompile your application. The missing assemblies will then be added to the /bin folder on your local machine. You can use the Copy Local solution when deploying other types of applications and are missing assemblies.
![]()
Here’s another tip for those who are new to web hosting or Windows web hosting. Under Windows/IIS, you can specify the default web page that will load up when you enter your site’s domain name. We have preconfigured IIS to automatically load one of these files:
index.html, index.htm, index.asp, default.html, default.htm, default.asp, default.aspx, winhostdefault.htm
And here are the instructions to change these settings:
1. Download and install IIS7 Manager from Microsoft: http://www.iis.net/download/iismanager
2. Configure IIS7 Manager to access your site account. You can follow the instructions in this Knowledge Base article.
Or follow the steps below:
A. Select File -> Connect to a Site…
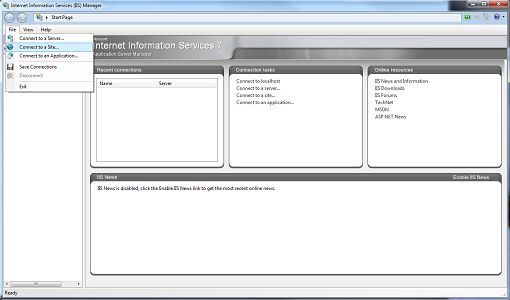
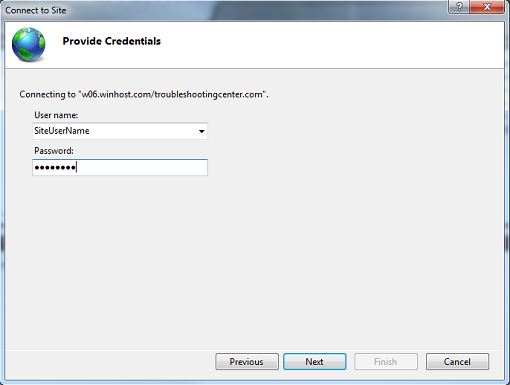
B. Enter the Server name and Site name. This information can be found in the Winhost Control Panel.
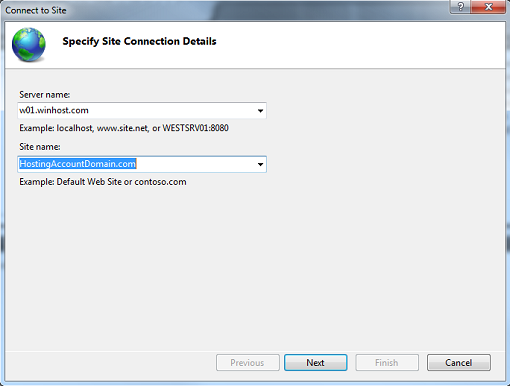 C. Enter the User name and Password for your site.
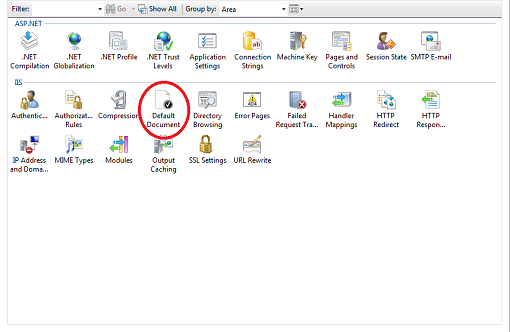
3. You will now see a number of delegated modules. Double click on the Default Document module.
4. To add a page to the Default Document list, click on the Add… link.
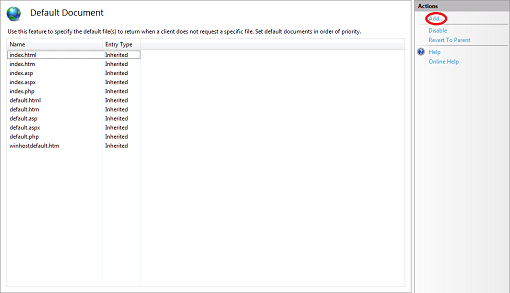
5. Here, I have added a page named homepage.html to the list.
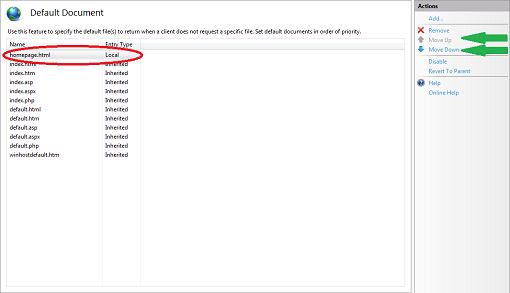
The page that automatically loads is determined by rank from top to bottom. This means if IIS cannot find a homepage.html, it will look for index.htm next and go down the list until the list is exhausted. You can use the Move Up and Move Down links (indicated by the green arrows) to change the rank order. Consequently, you can also Remove pages you do not wish to be on the list.
As a final note, I’ve shown you how to configure the Default Document for the root of your site. You can also configure the Default Document for any subdirectory by selecting it on your left, and then double clicking the Default Document module. Please note that all changes are written immediately to the web.config file in the appropriate directory on the server, and if you know the web.config file well enough, you can also manually add the XML entries using any text editor.
![]()
Many people may not realize this, but there are a few things you can do to help yourself receive a timely resolution when asking for support here at Winhost.
1. Open up a support ticket through the Winhost Support Portal at https://support.winhost.com.
Opening up a support ticket will authenticate your ticket and reduce the amount of time that it takes our support personnel to look up your information or verify that it is a legitimate support request. We cannot provide account-related information unless a ticket is authenticated. It also helps us keep a good ticket history and allows us to find more permanent solutions if there is a re-occurring problem.
 2. Be as specific as possible when you are trying to describe a problem.
If the issue you’re having is generating an error message, please provide it to us along with instructions on how to reproduce it, if possible. If you have screen shots or logs that you think might be helpful, include them as attachments.
Example of a support ticket that is too generic:
“I am having problems with my email.”
Example of a support ticket that is more specific:
“I am having problems with my email account [email protected]. I am unable to send or receive messages using Microsoft Outlook. I have also attached a screen shot of the error that Microsoft Outlook is generating.”
3. Open a different support ticket for separate issues.
For example, if you are having a problem with your database and email, open a support ticket for each issue as they are often unrelated. Please note that billing questions should be directed to our Billing Department and sales questions to our Sales Department.
By following these simple tips, your ticket will be routed correctly and resolved in a timely manner.
![]()
You may be wondering, “Why is this feature even in Control Panel?”
There are two reasons we offer the ability to disable email:
1) It’s for customers who want to host their site with us but want another provider to host their email. This is useful in situations where a customer opens multiple site accounts and wants one of the site’s email delivered to an outside entity. Email is routed locally before it gets forwarded, so if the email service is active on Winhost, it will not get delivered to the other provider. By disabling the service, you will ensure that the email gets delivered correctly.
2) It’s for customers who do not want to use email services.
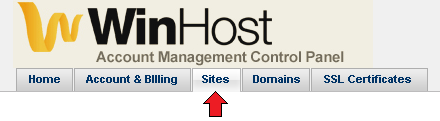
To disable the email service on Winhost, log into your Control Panel and click on the Sites tab.
 Click on the Manage link for the Site you want to update and then click on the Email button.
 Now select Disabled in the drop down list and click on the Update button.
 A pop up box will appear asking you to confirm. Please note that if you choose to disable your email, it will delete all existing accounts and messages on the servers at Winhost.
The process is irreversible, and we cannot retrieve your account or messages once it has been disabled. You will need to recreate all the accounts again if you choose to re-enable your email services at Winhost.
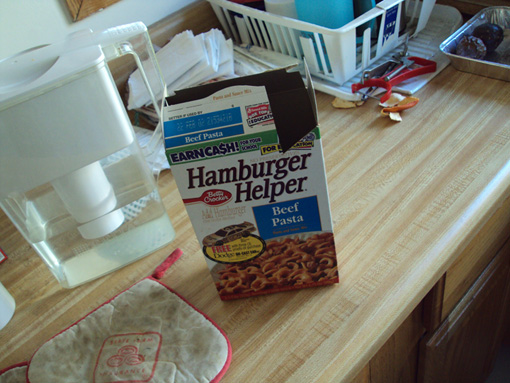
It’s still a tough economy, and in an effort to cut costs (and being the crazy person that I am), I bought some ground beef and wondered if my old box of Hamburger Helper was still good…
You’ll want to notice the date in the next picture: 22 FEB 02. That’s right, 2002. I bought it back when I started my first career job. Not wanting to harm any animals or humans in the process, I decided to become a human test subject.
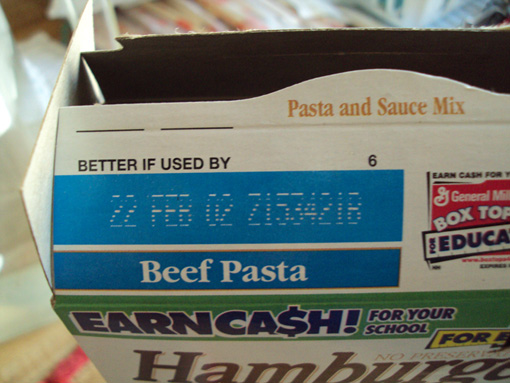
Suffice to say, I am still alive and have suffered no ill effects. I thought the pasta might go bad, but the seal was air tight, and the seasoning was still good as well. I was actually more worried about the beef which was set to expire January 31, 2012. It was still tasty (i.e. not stale). My hats off to Betty Crocker/General Mills for making food that stands the test of time.
![]()
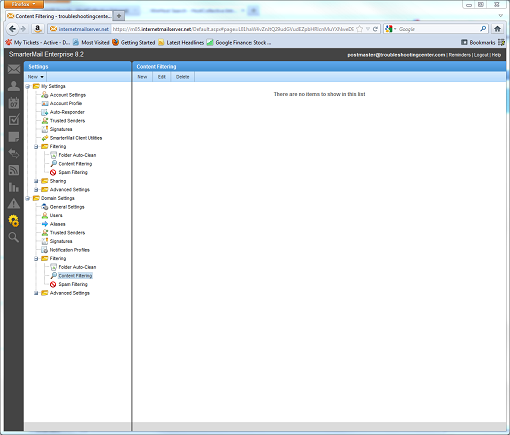
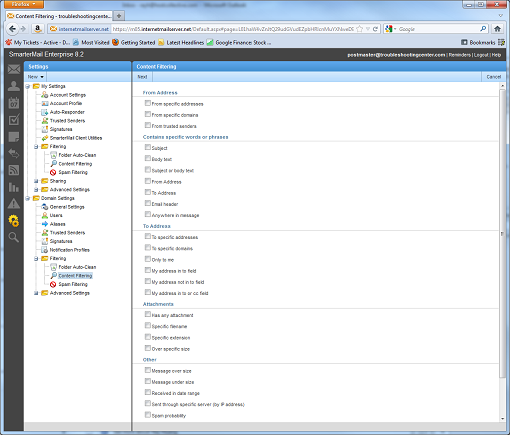
In addition to the Spam Filtering tool offered by SmarterMail, you can use Content Filtering to further reduce the amount of spam you receive. The difference between Spam Filtering and Content Filtering is that Spam Filtering filters a message on a more generic basis (think of a wide net) while Content Filtering filters a message specifically based on the rule you set up (think of plugging up a particular hole in the net).
Let’s see this in action. First, let’s access the feature by:
Now, click on the New button to create a new rule. This will start a wizard and bring up the next screen which provides a plethora of specific criteria you can filter messages by. For example, if you notice that a lot of the spam messages are coming from a particular email address, you can filter all messages from that address.
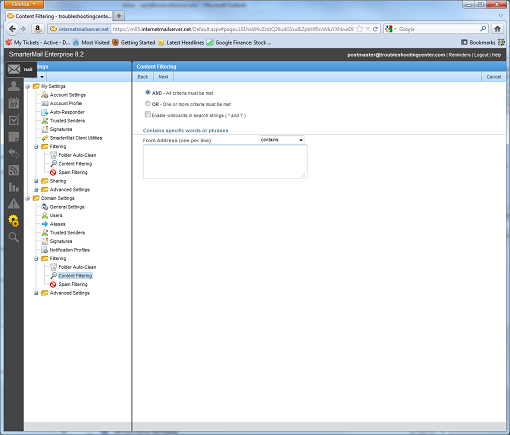
In this tutorial, I will do just that. I will go ahead and check the From Address box and click on Next. This brings up an AND/OR conditional screen which allows you to define more ‘complex’ rules. I will keep it simple by entering a single Gmail address I will be sending a test message from and click on Next to continue.
Now, I will name my rule and select one of 7 actions to take:
Mark as read
Do not deliver
Move message
Prefix subject
Add Header
Copy Message
Reroute message
I have checked the Move message box and in the field, I typed in “Deleted Items” for the name of the folder I want the message placed in. I click on Save to complete the rule. Now, I send a test message from my specific Gmail account, and voila, the message is automatically placed in the Deleted Items folder.

If you notice, there is another message waiting in my Inbox. I discovered on initial testing that the Spam Filtering rules take precedent over any Content Filtering rules. This means if the message was processed by Spam Filtering, it will not trigger any of the rules you’ve setup in Content Filtering. Please keep this in mind when you are setting up new rules. By using a proper combination of Spam Filtering and Content Filtering, you can greatly reduce the amount of spam you receive.
![]()
There may be some confusion regarding how to properly configure the spam settings in SmarterMail, so I decided to write this tutorial to give everyone a clearer understanding of how it actually works.
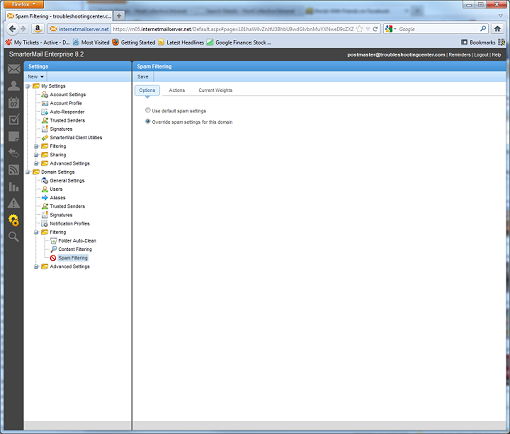
Spam is filtered based on the sum of the weights assigned to a number of predefined criteria. These settings can only be adjusted by the Primary Domain Administrator which is the postmaster account. To gain access to the settings page:
Now we can begin the process of adjusting the spam settings. Under the Options tab, check the Override spam settings for this domain radio button.
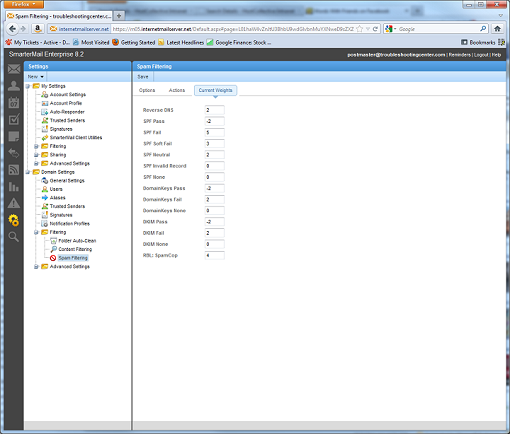
Next, click on the Current Weights tab. You’ll notice a list of criteria with text boxes which you can edit now. Here is where you can assign values to each criterion. Please note you can assign both negative and positive values which are important to understand because it affects the total weight of a message. I didn’t adjust the settings for now, but remember if you make any changes to the Spam Filtering window to click on Save so that the changes will be applied.
Now, we will take a look at the Actions tab. Here, there are two fields which you can edit. The Weight value here represents the total weight before the spam filter will take action. Any value over this total weight will trigger the action selected in the drop down box. There are only 3 actions you can apply:
Delete Message
Move to Junk E-mail Folder
Add Text to Subject
This will make more sense when we review an email header. Remember to click on Save to save your changes.

For testing purposes and this tutorial, I set the weight for the Low Probability of Being Spam to -5 and set the action to Add Text to Subject with the text “SPAM-LOW:” Then I sent myself a test message from Gmail and voila, the message was filtered.
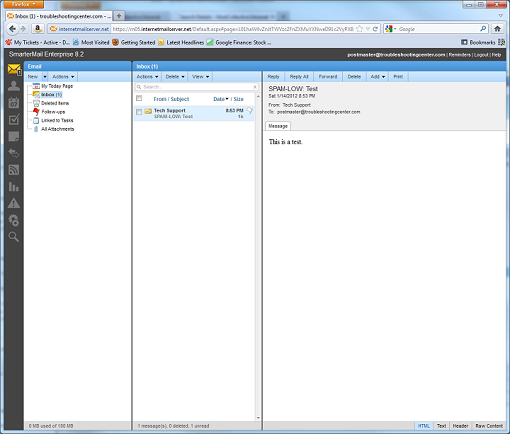
Now, to see which criteria were used to calculate the total weight, we’ll need to look at the header information. On the bottom right hand corner, click on Header. You’ll want to pay attention to these tags:
X-SmarterMail-Spam
X-SmarterMail-TotalSpamWeight
For the test message I sent, this is the complete header information:
X-SmarterMail-Spam: SPF_Pass, SpamAssassin 0 [raw: 0], DK_None, DKIM_Pass
X-SmarterMail-TotalSpamWeight: -4
If you notice, many of the tags correlate directly with the values assigned under Current Weights, so the total weight is the sum of the values you assigned to the criteria. In this case, it was (-2) + (0) + (0) + (-2) which equals -4. Since I set the weight in the Actions pane to be -5, this message was filtered properly because -4 is greater than -5. If you feel you’re receiving too much spam, you can review the spam message’s header information to determine which criteria were used and make adjustments accordingly.