
Site hosting news, tutorials, tips, How Tos and more
![]()
The SmarterMail system that is set up for your email by default has an array of spam fighting tools available, but admittedly, the settings can be a bit complicated to work with.
Many of you asked us to make a more user-friendly anti-spam option available, but to keep the cost low. So we partnered with SpamExperts to provide high level spam filtering services that are easy to manage and really affordable.
The SpamExperts service receives email addressed to your domain, filters it, then sends it along to the mail servers here at Winhost. The service is distributed across multiple servers all over the world, so it’s fast and reliable.
We’re going to cover the steps necessary to activate SpamExperts for your domain, which, for our purposes here, we’ll assume is hosted at Winhost (though you can set up SpamExperts service for domains hosted elsewhere too).
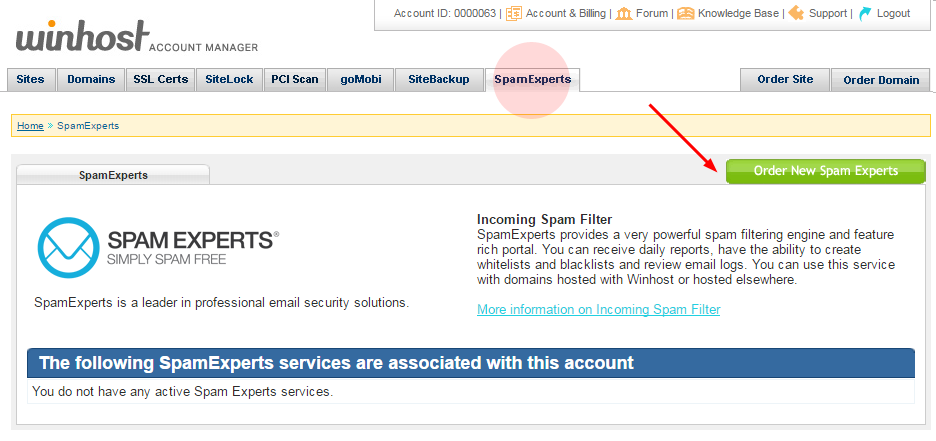
 The first thing we’re going to do is go to the SpamExperts section of Control Panel and click the “Order New Spam Experts” button.
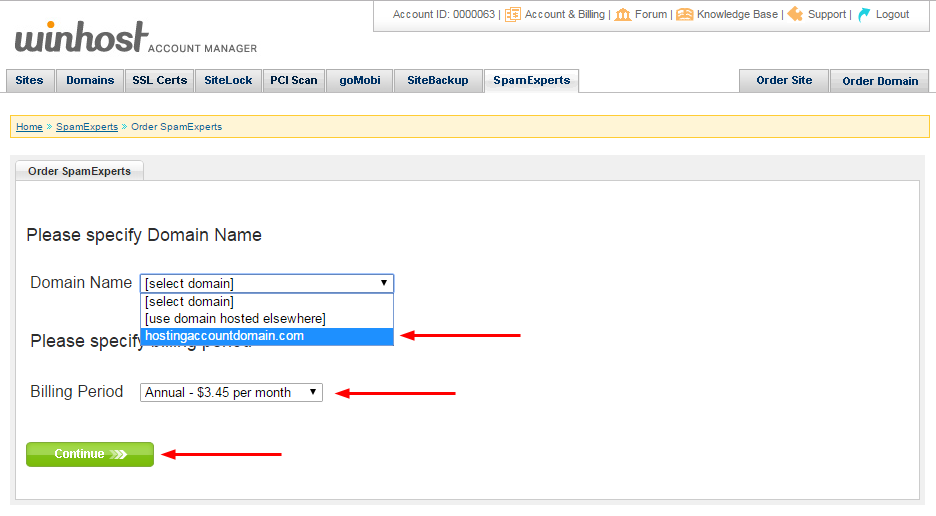
 Next choose a domain from the dropdown menu (you can also enter a domain hosted elsewhere), choose a billing period and hit the “Continue” button.
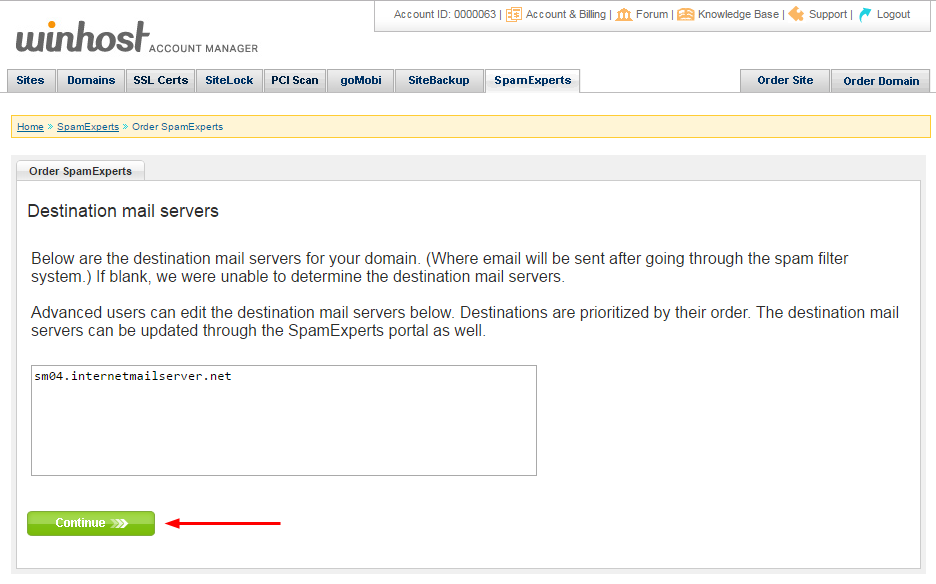
 The next page shows the current email server(s) for the domain you selected. Make note of any entries in the box. If you ever cancel the Spam Experts service in the future, you will have to update your DNS MX records to point back to these server(s).
Click the “continue” button.
 If everything looks good on the billing page, hit the “Submit My Order” button.

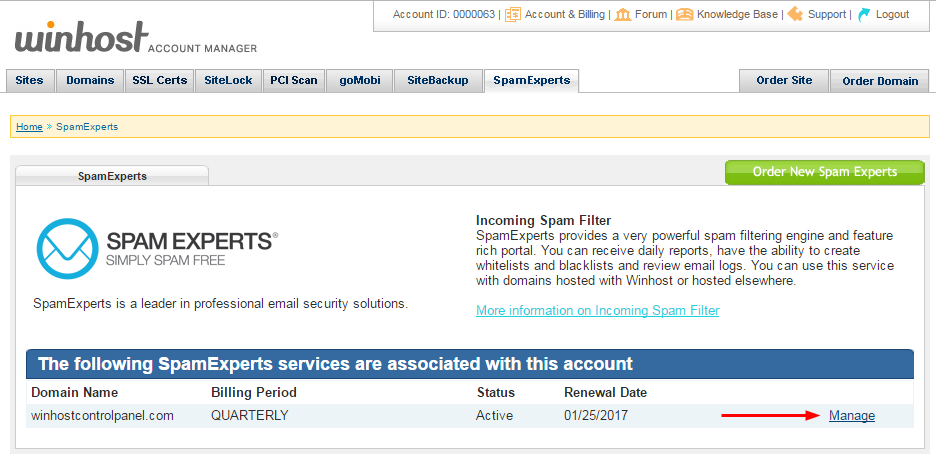
 Reload the SpamExperts page and click the “Manage” link.
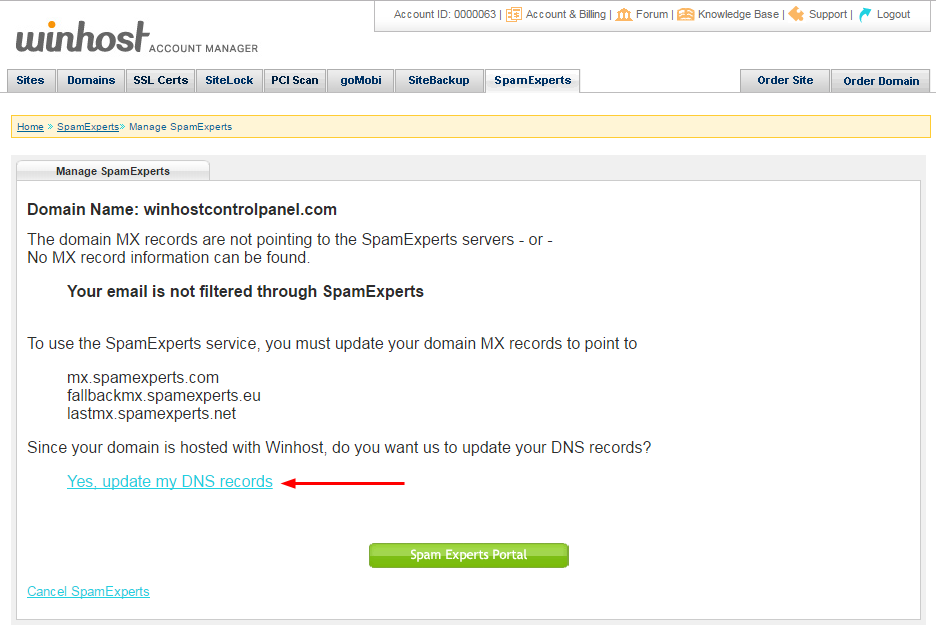
 In order for Spam Experts to begin filtering your email, the DNS MX records for your domain have to be updated. If your domain is hosted here, all you have to do to update your MX records is click the “Yes, update my DNS records” link.
If you are setting up SpamExperts for a domain that isn’t hosted at Winhost, this page gives you the MX settings for the domain. You’ll have to go to where the domain is managed to update the MX records.
That’s all there is to it. Your email is now set up to route through the SpamExperts system. Remember, the DNS change may take a few hours to propagate, so you may continue to see spam in your inbox until that happens.
We’ve found that the default SpamExperts settings will stop the vast majority of spam. But if you want to do further tweaking you can access the SpamExperts portal, which contains a number of very powerful tools. Use of the SpamExperts portal is beyond the scope of this article, but you can see the domain-level documentation here and the user-level documentation here.
![]()
Did you know you could order Payment Card Industry (PCI) scanning service from your Winhost Control Panel?
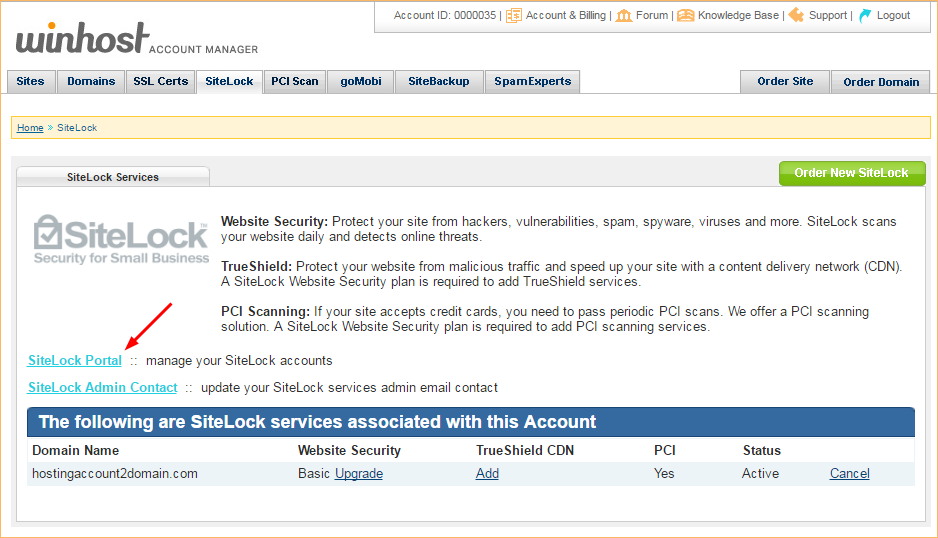
If you accept credit card payments – or plan to in the future – you will have to have regular PCI scans of your site and a review of your data handling procedures. The SiteLock PCI service can make that process much easier.
To use the SiteLock PCI scanning service, you have to first open a SiteLock Basic account. The PCI scanning will be a child service of the SiteLock Basic account. The SiteLock account comes with a bunch of great non-PCI features, so you can definitely benefit from both services.
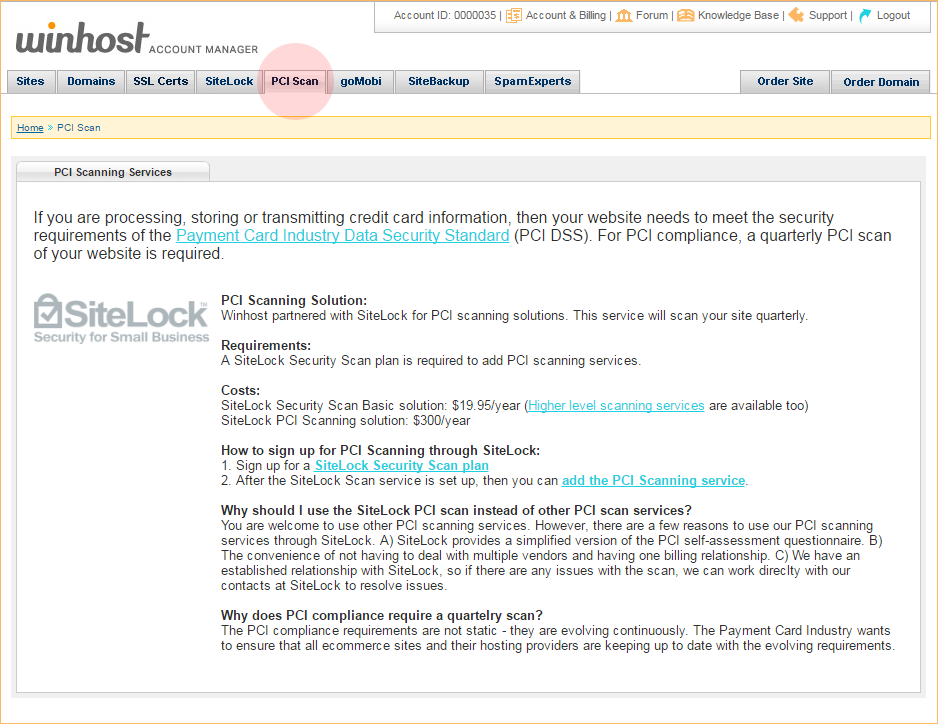
To get started you can click on the PCI Scan tab in Control Panel:
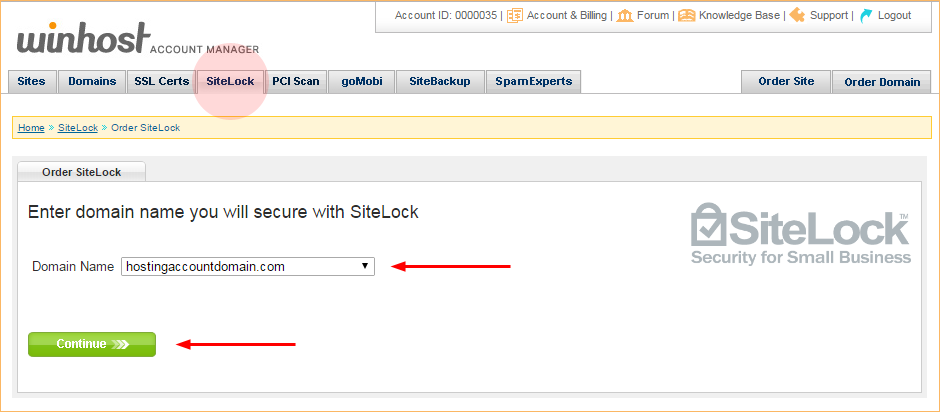
Or go straight to the SiteLock page. Select the domain you wish to apply SiteLock to, then hit the “Continue” button:
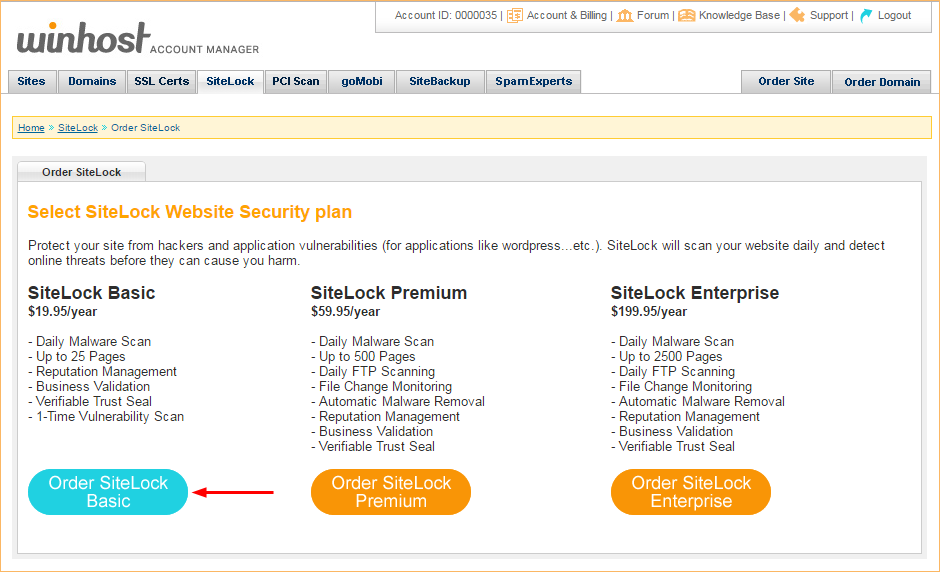
Choose which SiteLock plan you want to use. Basic is the minimum that’s needed for the PCI service, but the other SiteLock plans have benefits you may want to take advantage of:
After selecting your plan, click the “Skip Adding TrueShield Plan” link on the next page:
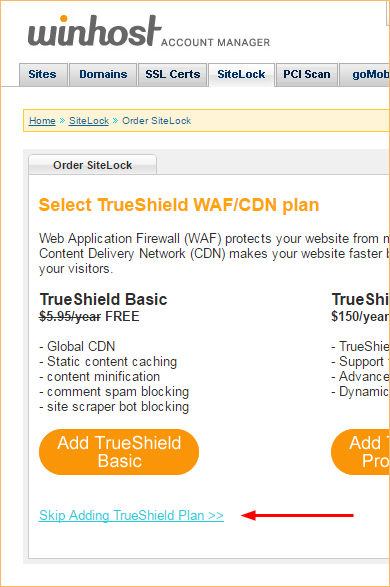
(We’re skipping TrueShield in the interest of keeping this focused on the PCI scanning service, but TrueShield is also a very useful service, and you can read more about it here.)
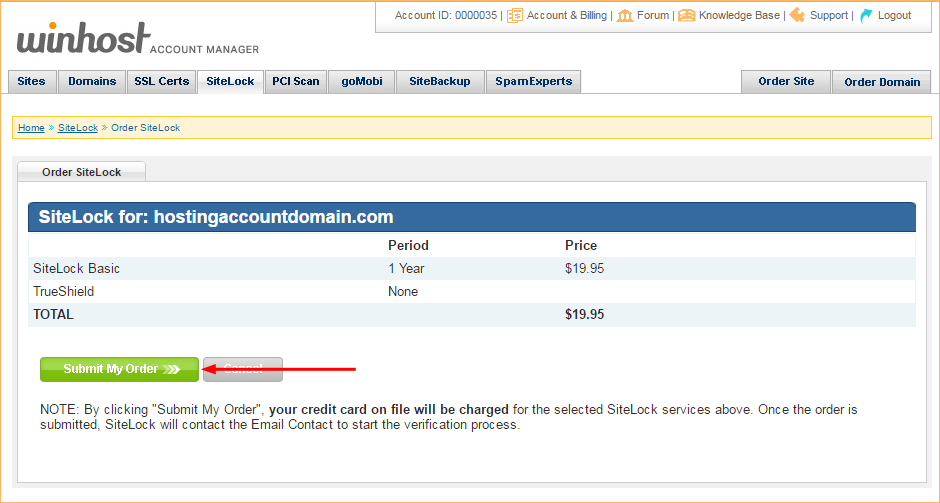
The next page will display a summary of your SiteLock order. Click the “Submit My Order” button:
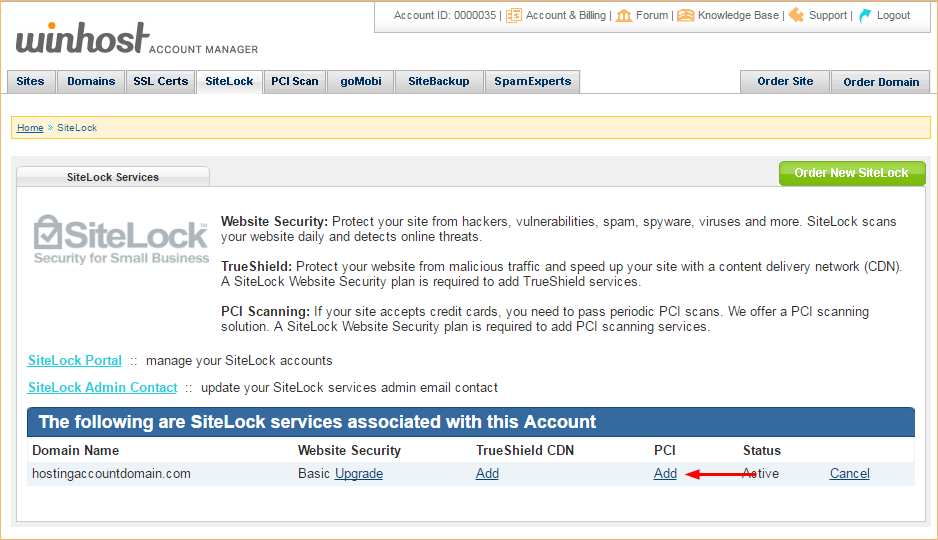
The next step is adding the PCI scanning service to your SiteLock account. Go back to the SiteLock tab and click the “Add” link in the PCI column:
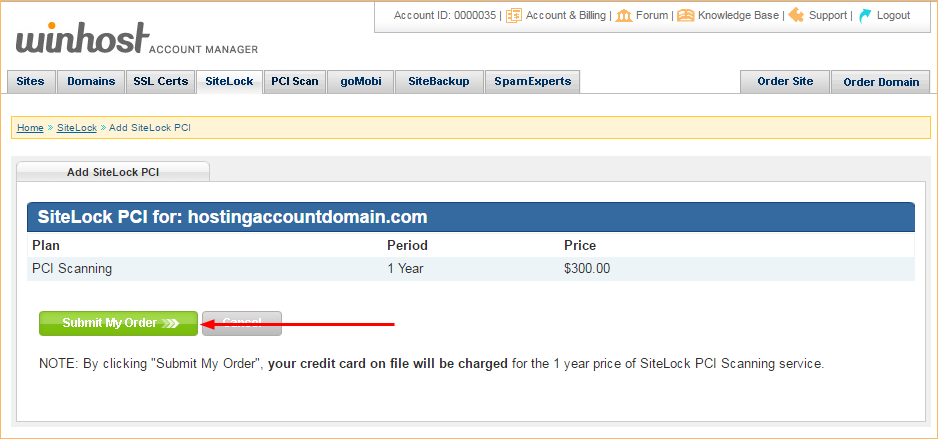
The next page will display a summary of your PCI scanning service order. Click the “Submit My Order” button:
When PCI service is activated, you can access the SiteLock dashboard from the SiteLock tab in Control Panel:
SiteLock will also send you an email that includes their phone number, if you should need to call them during any part of the PCI verification/scanning process. This article covers the account set up only, the actual PCI scanning and verification process is a bit more complicated than we can get in to here. But you’ll find plenty of information on how to proceed in the SiteLock portal.
If you don’t accept credit card payments, the SiteLock service can still protect your site from hackers, vulnerabilities, spam, spyware and viruses. It can scan your site daily to detect threats, and also offers TrueShield service that can protect your website from malicious traffic while speeding it up with a Content Delivery Network (CDN)
![]()
A domain pointer is an additional domain name that points to the root of your site.
So, for example, if you own domain.net and want it to point to your domain.com site, you can add domain.net as a domain pointer and anyone entering domain.net in a browser will see the domain.com website.
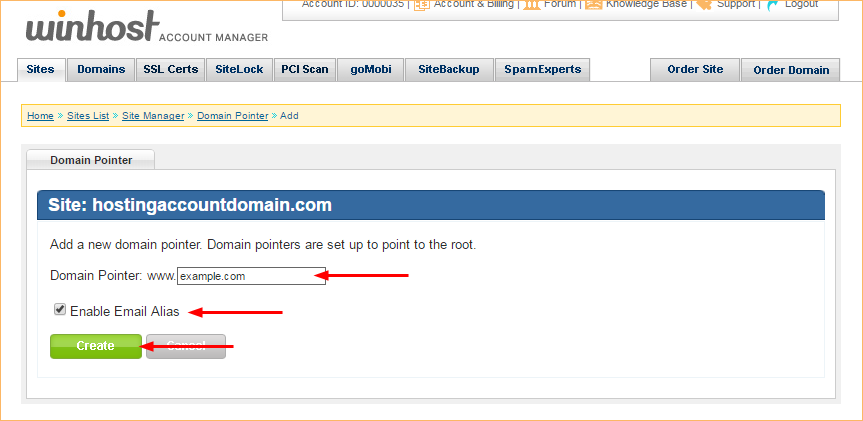
It’s easy to set up a domain pointer, just go to the Site Tools section of Control Panel and click on the “Domain Pointer” icon or link:
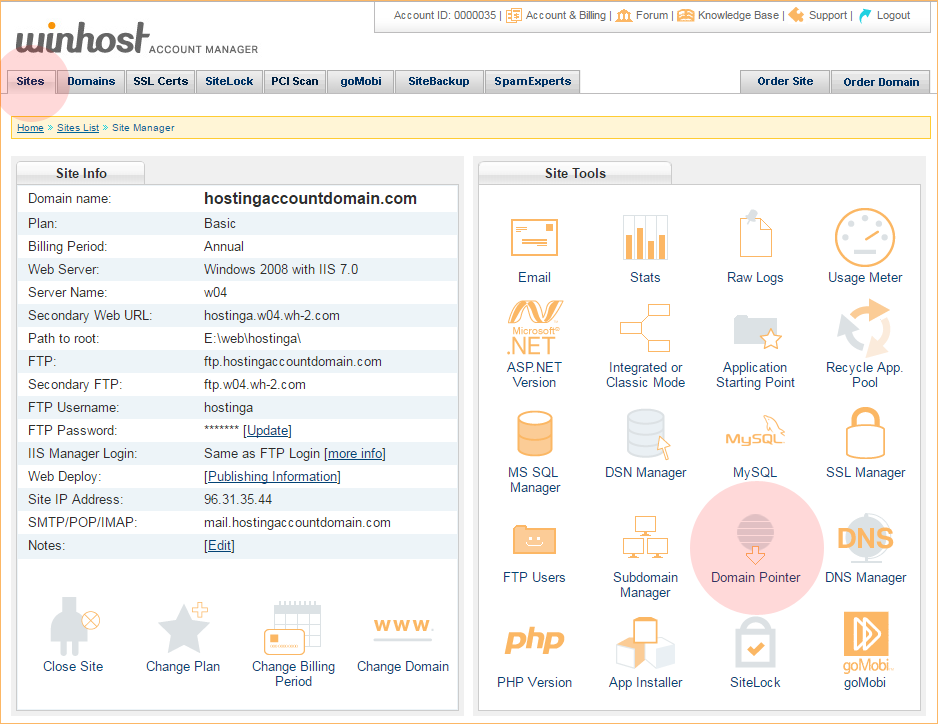
On the Domain Pointer page, click the “Add” button:
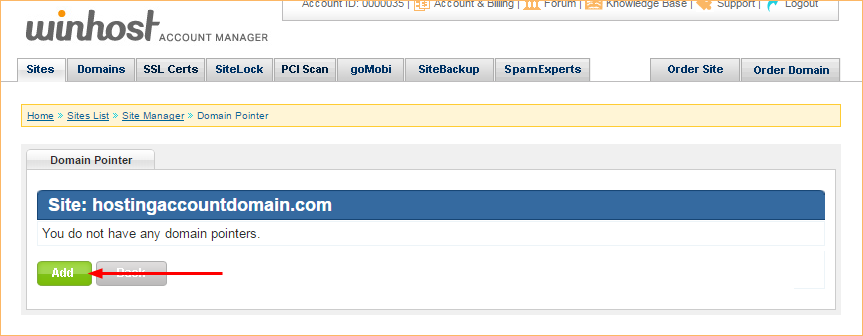
Enter the domain you want to add as a pointer in the “Domain Pointer” field.
Domain pointers do not get full email service, but you can set up aliases (forwarding addresses) for the domain pointer. To set up forwarding addresses, just check the “Enable Email Alias” box.
Click the “Create” button:
That’s all there is to it, the domain pointer is now set up.
About domain pointer name server records: The name servers for the new domain pointer have to be set to use the Winhost name servers:
ns1.winhost.com
ns2.winhost.com
ns3.winhost.com
How you make that change varies depending on where your domain is registered, so check with your domain registrar for details.
If your domain was registered through Winhost, your name servers should already be set and the domain pointer should start to work in a few minutes. If you have to change the name servers for the domain pointer, DNS propagation may take several hours.
About domain pointer email aliases: When domain pointer Email Alias service is activated, an MX (mail) record is added to the pointer domain’s DNS record. If the domain has a preexisting MX record, it will not be removed when you activate Domain Pointer Email Aliases.
So you must ensure that you remove any preexisting MX records through the Control Panel DNS Manager (or wherever you manage the DNS for the domain) to avoid possible conflicts with the Domain Pointer Email Alias service.
How domain pointer email aliases work: Domain pointer email aliases are forwarded to the corresponding email address of your primary email account. So if you set up the email address [email protected], that mailbox will also accept mail for [email protected].
If the same message is sent to [email protected] and [email protected] you will receive two copies of the message in the [email protected] mailbox.
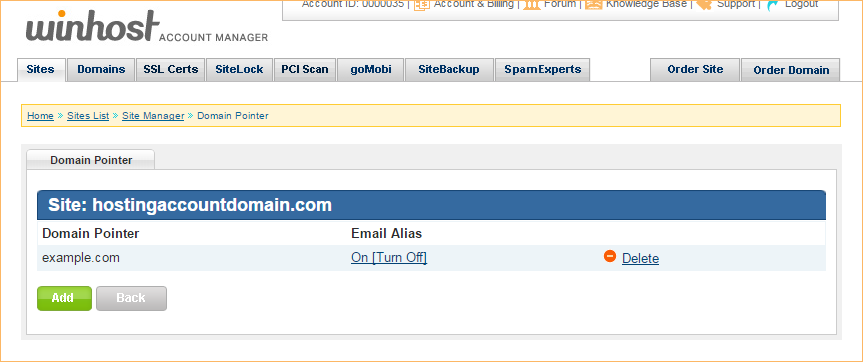
You can disable domain pointer email aliasing in Control Panel. Go to Site Manager > Domain Pointer and click the “On [Turn Off]” link. You can activate domain pointer email aliasing the same way when it is disabled. On this page you can also delete the domain pointer completely:
![]()
There may come a time when you want to change the domain name for your Winhost site. If you ever find yourself in that position, you’re in luck, because we made sure that change is easy, quick and painless.
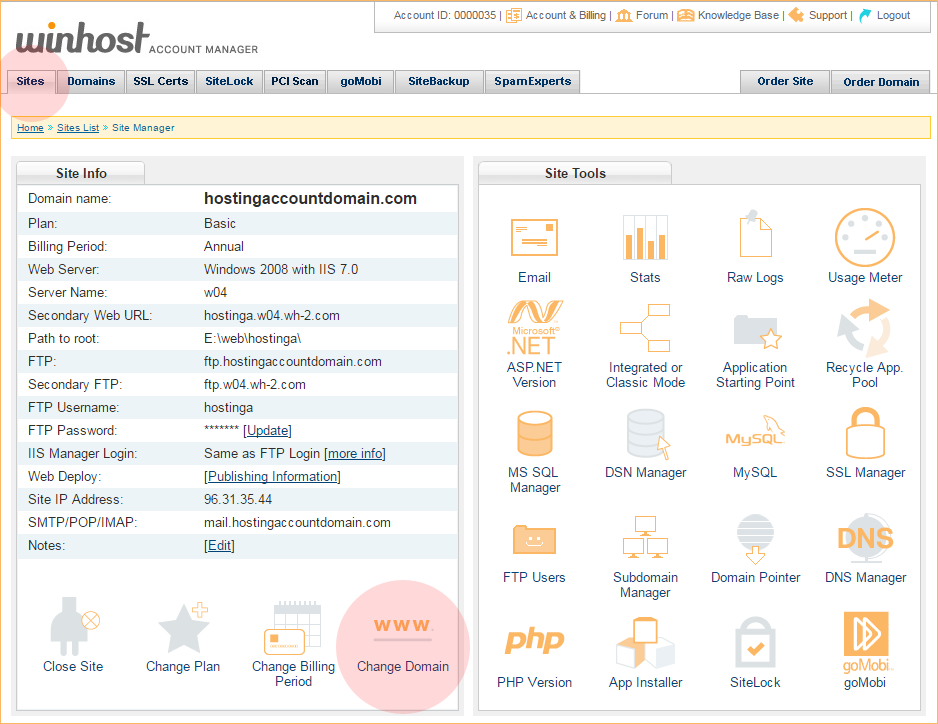
In the Site Tools section of Control Panel, click on the “Change Domain” icon or link.
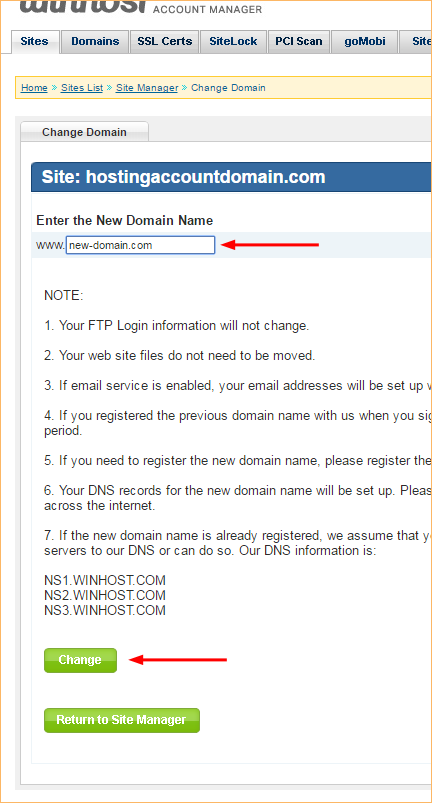
Enter the domain into the “New Domain Name” field on the next page. Do not enter “www” into that field! If you do, your DNS will be set up incorrectly and the new domain won’t work.
Hit the green “Change” button to finish.
That was easy, right?
But as all the text on that page suggests, there are some things to watch out for when you change the domain.
The number one thing to be aware of is if you are switching the primary domain to a domain that is currently being used as a domain pointer, you have to delete the domain pointer before making the domain name change. If you don’t delete the pointer, the name change will fail.
Also something that’s essential but easy to forget – the name servers for the new domain have to be set to use the Winhost name servers:
ns1.winhost.com
ns2.winhost.com
ns3.winhost.com
How you make that change varies depending on where your domain is registered, so check with your domain registrar for details (if your new primary domain was previously a domain pointer, or was registered through Winhost, your name servers should already point to Winhost).
![]()
Every Winhost account includes traditional website statistics, but there are occasions where you may need to see the raw server logs for your site. Luckily it’s easy to get your logs, here’s how to do it.
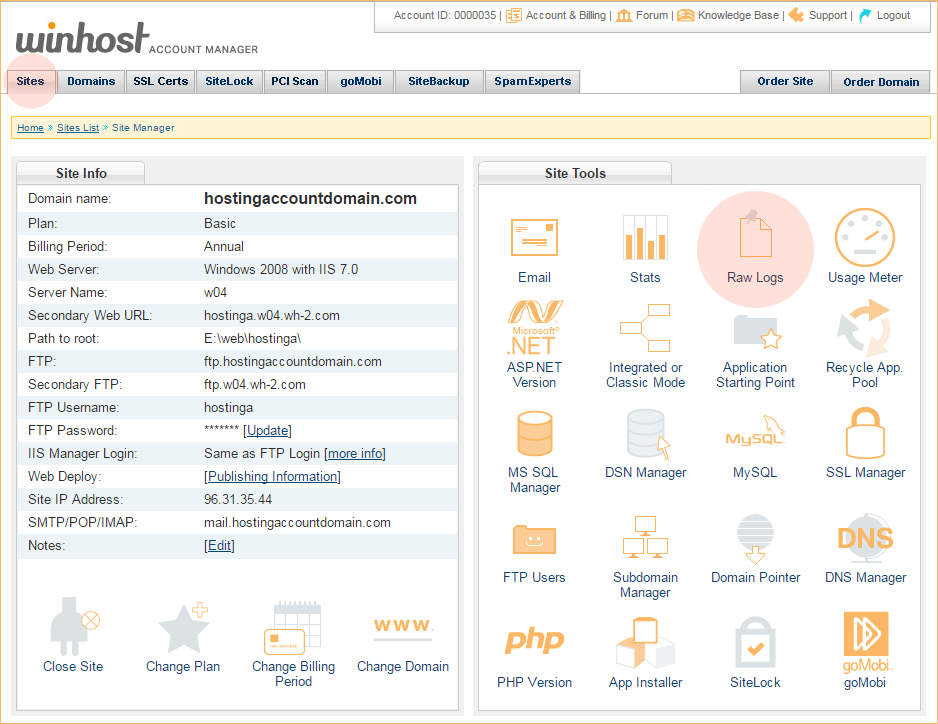
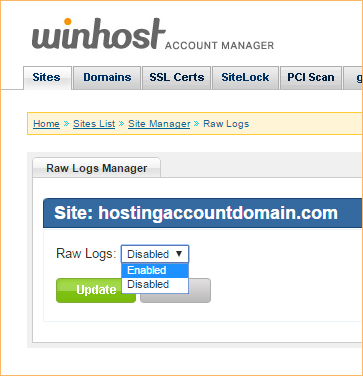
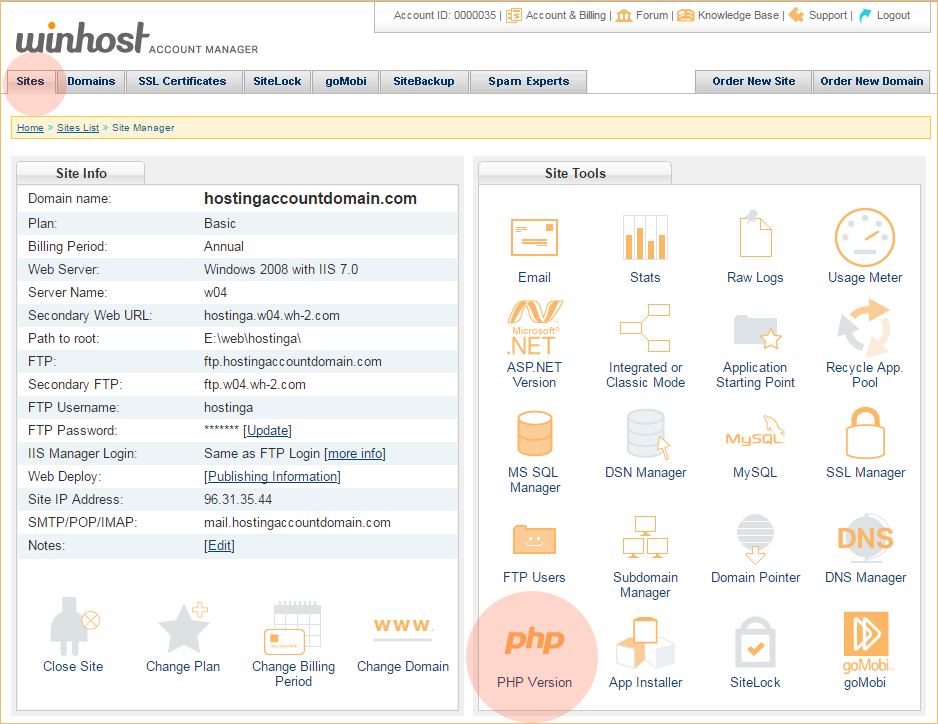
In the Site Tools section of Control Panel, click on the Raw Logs icon.
In the dropdown, select “Enabled,” and click the “Update” button.
Your raw log files won’t appear immediately, but they will be available within 24 hours and updated nightly thereafter. The log files are compressed into a .zip archive. To download the logs, log in via FTP and go to the /httplog directory.
Note that the log file directory is a hidden directory so it will not be visible when you log in via FTP. After logging into your root directory you have to use the change directory function in your FTP client to change to the log file directory. You have to use your default FTP username to access the /httplog folder. You will not be able to access the hidden /httplog directory using an additional FTP user that you’ve created.
Log files more than 30 days old will be automatically deleted.
![]()
php is such a popular and widely used scripting language that sometimes it seems as if it’s always been part of website development. It hasn’t, of course, but it’s wide use in many popular third party “canned apps,” and the fact that a lot of people continue to use very old versions, makes it a prime target for hackers.
So if you don’t use php in your site, or an application that is php based, you may want to disable php as a preventative security measure. The bad guys can’t exploit something that’s not there, right?
The good news is disabling php is easy and you can do it in about 30 seconds. Here’s how:
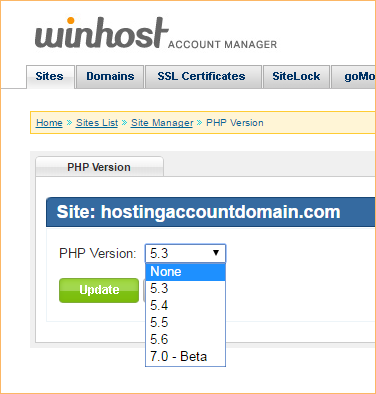
In the Site Tools section of Control Panel, click on PHP Version.
In the dropdown, select “None,” and click the “Update” button.
And that’s all there is to it.
See, maybe even less than 30 seconds. 😉
For what it’s worth, php isn’t inherently less secure than any other web technology. It’s popularity is what makes it a frequent target. But it’s certainly possible to safely run any php application, even those third part applications that are the favorite targets of hackers. We’ll be posting more security-related articles in the future.
If you want to take a look at other security measures that are available right now, check the website.
Finally, if you run a WordPress blog – one of the hackers favorite targets – and are concerned about security but don’t necessarily have the time or inclination to tackle all the details, we offer a WordPress Hardening Service that buttons up your WP installation and lets you carry on with your life worry-free. Well, at least you won’t have to worry about WordPress. Log in to the Support Portal and open up a tech support ticket, they can give you all the details.
If you’ve never heard of a CDN or you’re not sure exactly what it is, CDN is an acronym for Content Delivery Network. What a Content Delivery Network does, in very basic terms, is serve your site files from multiple data centers all over the world so that your visitors download files from a server near them and experience faster page loads. As a bonus, you get to experience reduced bandwidth use due to your content being cached at the various locations on the network.
How does it work? You change your domain’s name servers to point to the CDN, which then handles the requests for your site. When a request comes in to the CDN, here’s what it does:
That makes for a better visitor experience, since visitors are getting files from a local server. And it saves bandwidth on your Winhost account, since the files don’t have to come from the Winhost servers every time they are requested.
There are a lot of CDNs these days, and their setups vary in levels of difficulty. We’re offering a CDN that’s really easy to set up, and if you already have a SiteLock security plan for your site (and you really should, but that’s a separate article), you can add the basic CDN for free.
If you’re thinking that sounds great, but your site doesn’t contain much static content, SiteLock TrueShield CDN can also serve dynamic content from more than 25 data centers around the world via its Dynamic Content Caching system. It’s all completely automatic, but you have control over the cache and can purge files any time you need to, for instance when you update or change content on your site.
On average, sites using the SiteLock TrueShield CDN load 50% faster and use 40-70% less bandwidth.
The TrueShield CDN can also handle end to end encypted SSL (https) requests, and perfoms advanced CDN optimizing techniques, including content minification, image compression, session reuse optimization, “on the fly” file compression, TCP optimization & connection pre-pooling and progressive image rendering.
The TrueShield CDN isn’t only about speed, it also offers a layer of protection for your web applications. Does your site use WordPress? If so, you probably know that WordPress is a common target for exploits, and if someone gets into your WordPress installation, the cleanup can be a nightmare, not to mention the probable damage to your site and your reputation.
The SiteLock TrueShield CDN protects you against many web-based exploits with a Web Application Firewall, which blocks malicious bots from accessing your site, and depending on the plan you use, can protect your site against many SQL injections and cross site scripting. Whether your site uses a third party application that runs on a database or works with a database you designed and built, the Web Application Firewall can help keep you safe.
I know this sounds like a commercial for SiteLock, but we’re big fans of their service, and we’re able to offer you some really cool and useful tools through them. We see the damaging effects of website exploits every day, and as I mentioned, cleaning up after them is no fun. It’s either going to cost you time or money – sometimes both. So prevention, as they say, is the best medicine.
![]()
In this tutorial I’m going to show you how to migrate your email messages to Winhost using the SmarterMail’s Mailbox Migration tool.
Prerequisites
Let’s Start
Log in to your SmarterMail interface via Control Panel.
You will need to use our mail server’s URL to access the email system since your domain name isn’t pointing to us yet.
First log in to the Control Panel on Winhost.
Next you will see a link on the Email Manager page called SmarterMail Manager. Click on it and it will automatically log you into the SmarterMail interface. This step helps you complete two things:
After you’re done creating the email users using the postmaster email account, log out at the upper right hand corner and log back in with one of the email users you just created, one of the addresses whose mail you want to migrate.
Once logged in on SmarterMail with the new email user
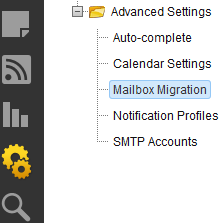
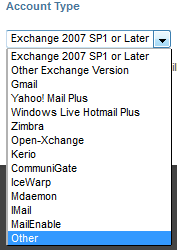
This will pop up a new window for the Mailbox Migration.
As you can see you have different options to choose from but in this tutorial we’re going to use the option Other.
Remember that you will need to log out of SmarterMail and log back in with each user you wish to migrate. It would be very unfortunate to migrate all the email messages from all the email users on a single email account on SmarterMail. So please be careful when migrating and make sure you migrate the correct email messages to the correct user.